Friday, 29 July 2016
Why Is Pinewood Better Than Sheet?
Pinewood vs. Sheet
The Merits Of Pinewood
from Home My Heaven: Home Improvement Blog UK http://www.homemyheaven.co.uk/2016/07/why-is-pinewood-better-than-sheet.html
Thursday, 28 July 2016
4 Easy Ways to Spruce up your Interior this Spring
-
Out with the Clutter
-
Get The Paintbrush Out
-
Get Creative with your Living Room Décor
-
Bring the Outdoors Inside
from Home My Heaven: Home Improvement Blog UK http://www.homemyheaven.co.uk/2016/07/4-easy-ways-to-spruce-up-your-interior.html
Thursday, 21 July 2016
Charlie’s First Vacation
It’s been a while since we had a Charlie update, so I thought it might be fun just to look at how my sweet, wild pup handled her first (and only, to date) vacation since she became a part of the Fogle family.
During my recent road trip up to the Richmond & DC area, Charlie came along for the ride. I have to say, it was quite a treat to take her traveling with me for the first time (normally when I travel, she has a dog sitter or goes to a day camp). She didn’t stay still much, (there were just too many fun things going on), but I did manage to snap a few photos of her throughout the trip. She isn’t the kind of dog who can run around in a new place without a leash, so I bought a tie-out and thought we’d be good to go. Those ears still kill me!

For the record, she did not behave herself very well for the first few days. The first part of the trip started in a place called Deltaville, Virginia, which had a beautiful view (I love those cotton-candy sunsets!) and a convenient dock to enjoy the river. The fireworks spooked her though, and she escaped not one, but three times during the first 48 hours of the trip (I was very embarrassed for inconveniencing people because of it, but everyone was extremely understanding and helped track her down… phew). As a result, she’s now got a brand new harness that seems to really keep my strong but skittish gal in check.

She also really liked barking at the fireflies whenever the sun went down.

But unlike how I struggled at first, Charlie definitely figured out the whole relaxation thing pretty fast. This was, like, Day One.

The guest house pictured in these photos was dog-friendly, so I (thankfully) didn’t have to feel self-conscious when she made herself at home on the furniture (the owner had another dog who was also lounging around, so I guess Charlie just decided to go along with local customs to fit in, ha).

Later on in the trip, Charlie also came along for a quick two-day stay in Virginia Beach. The guy I went with and I thought we were pretty well-covered by finding a dog-friendly hotel, but for whatever reason, the hotel turned out to be several miles away the area of the beach that would actually allow dogs. No matter — we just drove over and walked her down to the water’s edge. Which turned out to be… well… interesting.

Before this, Charlie had never seen sand, the ocean, or understood any part of how that environment worked. For a dog who gets nervous just trying to go from rug to hardwood floors, it’s putting it mildly that Charlie was kind of uncomfortable with the whole concept (except watching all of the other dogs happily running around, digging, and running into the ocean, that is). Sadly, she lasted all of five whole minutes.

The second that evil, cold ocean water hit her front paw (about 30 seconds after I snapped the photo above), she did her best impersonation of a dog in real, mortal danger and promptly flipped out. We took her back to the hotel and continued the trip, but with a few more funny memories for me to share. :)

Charlie may have handled the whole trip pretty much exactly the opposite way I did (relaxation = instantaneous, enjoyable activities for humans = made of NOPE), but I’m thrilled I got to have my crazy pup along for the ride. She is suck a kook, and every new experience is a guaranteed riot!
Have you ever taken your dog on vacation? How do they handle it?

The post Charlie’s First Vacation appeared first on The Ugly Duckling House.
Website // Subscribe // Advertise // Twitter // Facebook // Google+
from The Ugly Duckling House http://www.uglyducklinghouse.com/charlies-first-vacation/
Tuesday, 19 July 2016
DIY Disasters - What To Do When It All Goes Wrong


from Home My Heaven: Home Improvement Blog UK http://www.homemyheaven.co.uk/2016/07/more-and-more-homeowners-are-keen-to.html
Monday, 18 July 2016
One Project In, One Project Out
Hey, friends! I was going to share a vacation recap today, but I decided to toss that aside in consideration of some recent events that I’m still trying to process (the only details I’m going to share about it right now are here, but thanks to those of you who have already left comments). Charlie’s recap will still be on its way because her experience was just too damn funny not to share, but for today, I think it’s better to focus on what it is that I do best: start projects (finishing them is a whole other story, though).
One of these is happening in the interior of the house, while the other is a huge project I’m super excited about, and both are hopefully going to make my home a lot more guest friendly.
Organizing the Entryway
It’s been a long while since I did anything to the entryway area, and I realized when I got home from my road trip that this…

… is just ridiculous. This little nook has been really tough for me to figure out how to organize, but the main issue is that because it’s not pretty or helpful in any way, I use it as a dumping ground. I hardly ever use the closet, and I brought the coat rack down from the guest bedroom because I kept tossing coats on the bench instead of hanging them up (I’m not proud of the sheer laziness of that, but we all fall into really annoying habits sometimes).
Almost everything above that you see in that picture needs to be installed somewhere else in the house (mostly upstairs), but when I lug things in from the car, this is where it goes first. I’ve been working with a hardware company this summer, so they have sent me a package full of goodies to help turn this into something that doesn’t make me audibly groan anymore. I have some fun ideas, and I’m looking forward to seeing it come together.
Leveling Out the Back Yard
Ok, so I’ve taken out trees, moved plants over, built some garden beds, and done some makeover stuff back here before, but I’m excited to finally announce that I’m going to begin one of my biggest projects ever. There will be video. There will be lots and lots of labor and sweat. And pretty soon, a spiffy new place to entertain. And, it’s all going to be thanks to one amazing brand partnership that I’ll be sharing with you guys soon. But first, let’s just just take a quick glimpse at what we’re now going to call the “before” photo:

And just for shits and giggles, some really lazy Photoshopping to demonstrate my excitement about what’s going to be happening. Boom!

I’m going to be renting a giant toy* (eep!) and using it to move the large dirt mound on the left side of the yard into the depressed area along the back (you guys might recall me talking about this sink hole problem before). Then, I’m going to probably have to grab some extra fill dirt to level things out even more. And once that’s done, I’m going to add a shed back here (remember, the garage isn’t very large, and having extra storage space for the garden supplies will be so helpful) and build a large area that will be my new spot for entertaining (the tiny cement patio that I’ve worked on before will get some updates as well, but it will be used as a separate space… hopefully for a grill).
Will all of that happen this summer? Ha! Shit no. I have other projects already going on that need to be addressed as well, so I’ll be happy if just the ground gets leveled out and I don’t do anything stupid. But since even that is a giant first step, I’m going to recap the whole thing in a few posts and show you how it’s done. Can you tell how excited I am?!?! My personal life is kind of a shit sundae right now, but this? THIS. My friends have offered to take me to a gun range to do some target practice as a form of catharsis, but I chuckled and thought to myself, “actually… I think I have a better idea!”
*For the record, I know this is a serious piece of machinery, so I’m going to be safe about it and will be encouraging you guys to do the same in the upcoming tutorials. But I’m just also already giddy at thinking of how badass I’m going to feel sitting in this thing, which is kind of funny when you consider how much I loath mowing my grass.
Alrighty, enough for now. I need to go hit something with a hammer.
The post One Project In, One Project Out appeared first on The Ugly Duckling House.
Website // Subscribe // Advertise // Twitter // Facebook // Google+
from The Ugly Duckling House http://www.uglyducklinghouse.com/one-project-one-project/
Thursday, 14 July 2016
Kitchen Details: The Sink
I’ve been asked a number of times recently what my favorite project is to date, and hands down, it’s still the kitchen (so far). I especially love the area around the kitchen window: the striped window treatment, the sill for my succulents (one of the few spots in the house that gets a good amount of morning sun), the new faucet, and my ultra-deep undermount stainless sink.

I already covered all the details about the faucet in a previous post here, but I also promised at the time to eventually share the details about the sink and answer some FAQs that come my way. So, I’m back today to give you a little bit more detail about it and how I maintain the surrounding countertops. Now that I’ve been using this sink for a few years, I’ve gone through a little trial and error and found what works (and even though this post is not sponsored, there are a few referral links in here that help support this site if you were to buy products off of my recommendations, magic-internet style… for more info, you can grab details on my disclosure page).

The sink: it’s awesome. But in the below picture, it’s also dirty (I did that on purpose, just hold on a sec).

I had a beat up old double sink before, but one of the things I loved about this one was that it was a single basin and deep. It was provided to me several years ago by a local company called National Builders Supply, now more simply known as Supply.com (they are based in Austell, GA, which is where I grew up).
This exact model is made by Houzer (similar smaller version here), and my favorite part has to be the drain grooves at the bottom (for whatever reason, they just look more upscale me). I also like the curved corners, though I’ll admit that I was in quite a panic when cutting the hole into the countertop didn’t work out quite as perfectly as I expected.:
The sink undermounts to the butcher block counters, which can pose two main issues: water splashing up and leaving spots on the surrounding lip of the counters, and rust stains in the sink (you can see one in the basin below on the right side). But hey, since this blog is all about lessons learned in DIY, I wanted to share all about how I’ve gotten around these two problems and keep the sink area looking pristine.

As you can see from the close-up photo below, these are those water spots I was talking about. Usually, I’m pretty good about wiping the sink down if anything splashes out, but I’m also not the most diligent about oiling down the counter on a regular basis (I do it only every few months, tbh). As a result, stray water spots form on the counter around the lip of the sink pretty easily. From day to day, this isn’t really all that bothersome, because you can’t really see it unless you get closer.

And whenever I have wet hands or water the plants along the window sill, sometimes a water drop or two will cause the wood to show a few spots along the back of the sink area. It’s normal for butcher block to show some “character” over a few years of use, but this isn’t exactly what I had in mind! Luckily, there are two products that solve these issues for me every time.

How I clean my stainless steel sink
It probably goes without saying that when it comes to cleaning, I would rather literally haul rocks first. So I make every effort to find a product that does as much as it can for as little effort as possible.
The solution that eventually worked for me is Bar Keepers Friend, which now comes in a convenient spray bottle.

I just spray the foam on and let it sit for a few minutes, then use a little elbow grease to remove rust marks, residues, water marks, old veggie grime, and anything else that falls into the sink (like stray leaves that fell off one of the plants, for example). It quickly polishes to a nice shine, and then I can move on doing things… like not cleaning the sink. End of story.

How I remove water spots on butcher block
For water spots, I use the same exact oil and wax treatment that I’ve been using since I first installed the counters: Howard Butcher Block Conditioner.

I’ll usually throw it in the microwave to nuke it for a few seconds to get the wax to flow out of the tube easier, but I apply it with either a little paper toweling or old t-shirt fabric (since it’s well-washed, it doesn’t produce lint).
I slather the mixture on and let it soak into the wood, usually overnight. Anything else that doesn’t soak in gets wiped back off (to keep the surface from feeling gummy). Sometimes, it takes a couple of applications for spots to totally disappear, but the almost always do.

For anything stubborn, I run a little bit of sandpaper over it, clean off debris, and then oil. Works like a charm.

Thanks to the deeper sink, I’m a lot better about keeping the kitchen looking more cleaned up — I know that there are plenty of folks who are Team “Beside The Sink”, but the deeper basin is great for folks like me on Team “In The Sink”! For you Team “Immediately In The Dishwasher” people, well… being perfect must be nice. ;)

As I mentioned, there was a mistake made when the hole for the sink was cut during its install; the blade bent out around the curve, cutting the underside of the corners closest to the edge a little too much. My uncle and I did our best to help hide it as much as possible (once I stopped freaking out, that is) by cutting a small sliver by hand, re-attaching with wood glue, and filling with a little walnut putty.

The color of the putty doesn’t take the oil as richly as the rest of the wood, so I might someday go back in and darken those spots a little, but I really don’t notice it anymore. It’s on the inside right corner of the sink, so when you’re looking around the room, it’s pretty much invisible because it faces away and your eyes are drawn elsewhere (plus, imperfections in butcher block that are filled with small bits of putty isn’t totally unheard of).

But anyway, one small piece of the puzzle has been figured out, and I love the view!
What’s your favorite feature in your kitchen?
For more info on the kitchen makeover and progress to where we are now, check out the House Tour pages.
The post Kitchen Details: The Sink appeared first on The Ugly Duckling House.
Website // Subscribe // Advertise // Twitter // Facebook // Google+
from The Ugly Duckling House http://www.uglyducklinghouse.com/kitchen-details-sink/
Monday, 11 July 2016
DIY Courage Tonight & Speaking at the Haven Conference!
If you’re one of my friends or one of the people I’ve met IRL from this blog, you probably wouldn’t be the least bit surprised if I’d told you that I came out of the womb an extrovert. My mom has often reminded me that even as a preschooler, I couldn’t leave the house without running into someone I knew — a teacher, someone from church, the parent of a classmate, etc. — and I’d stop what I was doing to have a quick chat. At times, that would go to extremes, like disappearing from my mom to wind up in the next aisle over, conversing with (to her) an adult stranger. But, child safety issues aside, I had very little fear of speaking to people I barely knew. It also explains why I rarely left the house as a teen without insisting on makeup (hmm, or maybe that’s maybe just being your average teenage girl).
Anyway, the thing is this: I enjoy meeting new people, being in new situations, and often feel zero fear when it comes to combining those two things… as long as its only a few people at a time. Once you throw in a sizable amount of eyes and ears paying attention, all of my confidence dissolves like a raccoon eating cotton candy. There’s just something about standing alone in front of a crowd — mouth open, my usual lack of filter ready to let the first thing tumble out — that utterly terrifies me. So naturally, for most of my life, I avoided it as much as possible.

Fast forward to getting my MBA, and I was forced to work on this crippling fear and make an effort to turn it into a legitimate skill. After all, businesses need people to do things like present and persuade and such, so I found the communications class (where we literally had to record and watch ourselves awkwardly honing our skills) extremely helpful (awkward and scary, but helpful). Face your fears and jump in head first, right?

The blog was also growing a sizable amount during that time, and I realized that eventually — whether I was ever going to be comfortable or not — I’d have to put myself in front of an audience. Over the years, I’ve pushed myself to test the waters every now and then — with an online TV series, with Youtube, and lately, with live streaming (you guys were AWESOME to speak with on Facebook Live, so I’m definitely doing that again!). But I guess I just wanted to give you some background so that you understand how big of a deal these next few things are going to be for me… because they are probably going to be the biggest ones yet!
Tonight: #DIYCourage
It’s a little late to have all of you know about this live (I signed up for it kind of last minute, so that’s on me), but regardless, I’ll have the link up and you can tune in tonight or you can check it out after the discussion. My friend Brittany (Pretty Handy Girl) asked me to hop on her DIY Courage chat this evening at 8:30 EST to discuss my ongoing projects and share a few stories (some of which you guys might not have heard before!). Sara Bendrick, host of DIY Network’s I Hate My Yard, will also be hosting, and Lee Dahlberg, a model/actor/comedian/artist will also be joining. If you want to know more about it, you can check out Brittany’s post and click here to join us at 8:30 EST. There will also be a $100 gift card giveaway during the talk!
Again, here’s the link! DIY Courage

Next Month: Haven Conference!
Many of you who regularly read DIY blogs probably know about the Haven Conference already; it’s DIY & decorating professional blogging conference that always happens in Atlanta, GA every summer, and one I’ve attended several times before (recap 1 / recap 2 / recap 3). I’m not kidding when I say that without this conference, I might not have some of my best and closest blog friendships (which grew to becoming lots of IRL friends).

So if you’ve never gone, now’s the time to reconsider. This time, it’ll be August 5-7, and if you’ve visited their website recently, you’ll see a new picture on the Speakers page this year: mine!

If you’re wondering what we’re going to be talking about, here’s the summary we wrote for the conference schedule:
What in the heck makes a “good pin” these days? How do I find viral Facebook content? What Instagram strategies still work? In this course, Sarah, Jenna, and Amy will walk you step by step (and spill their secrets) of utilizing their favorite social media to power your blog’s growth. You’ll learn about various social media strategies including how to master both Google and Pinterest analytics to maximize your Pinterest potential, how to best network with peers and influencers, and increase your total reach with a multi-pronged approach. Come prepared for a no-frills, no-BS talk on actual strategies (when, what, how many, etc.) and maybe a few laughs.
Luckily, I have two spectacular bloggers on the panel with me. We’ve already been making lots of jokes about having a swear jar up at the front to keep us in check.

Amy (Mod Podge Rocks, Washi Tape Crafts, DIY Candy) and I have been friends for a number of years now. She is incredibly savvy and basically the entrepreneur I wish I could be — books, product lines, several successful blogs, etc. I pretty much want to be her when I grow up. But perhaps the most amazing thing about Amazing Amy (in my opinion) is that she’s a true cheerleader and supports other bloggers. In fact, she was my very first design client before I’d even thought about forming a business for doing web design services (no joke, I offered to help her on something simple and she immediately asked if I wanted to design her soon-to-launch site, DIY Candy… and my business was born). I’m sure that our discussion will be enlightening with just her on the panel by itself! Maybe I can be comic relief.

Other than her questionable preference for cheap beer (ha — sorry, I’m a local craft gal), Jenna (Rain on a Tin Roof) is awesome. Her style is incredible and unique, but I think what I like most is that she’s fearlessly real. She’s also obsessed with Pinterest analytics, which is why she joined our speaker panel for Haven.
——-
That’s it for now, but with a slew of outdoor projects coming up later this summer, I’m planning on doing several more Facebook Live and YouTube videos to show you guys some more hands-on stuff. You can go ahead and subscribe to those now so you’ll get the notifications as soon as they begin, but until then, I hope I see a couple of you join for the DIY Courage chat tonight!

The post DIY Courage Tonight & Speaking at the Haven Conference! appeared first on The Ugly Duckling House.
Website // Subscribe // Advertise // Twitter // Facebook // Google+
from The Ugly Duckling House http://www.uglyducklinghouse.com/speaking-at-the-haven-conference/
Sunday, 10 July 2016
How To Make Your Home More Energy Effiecient With These Helpful Tips
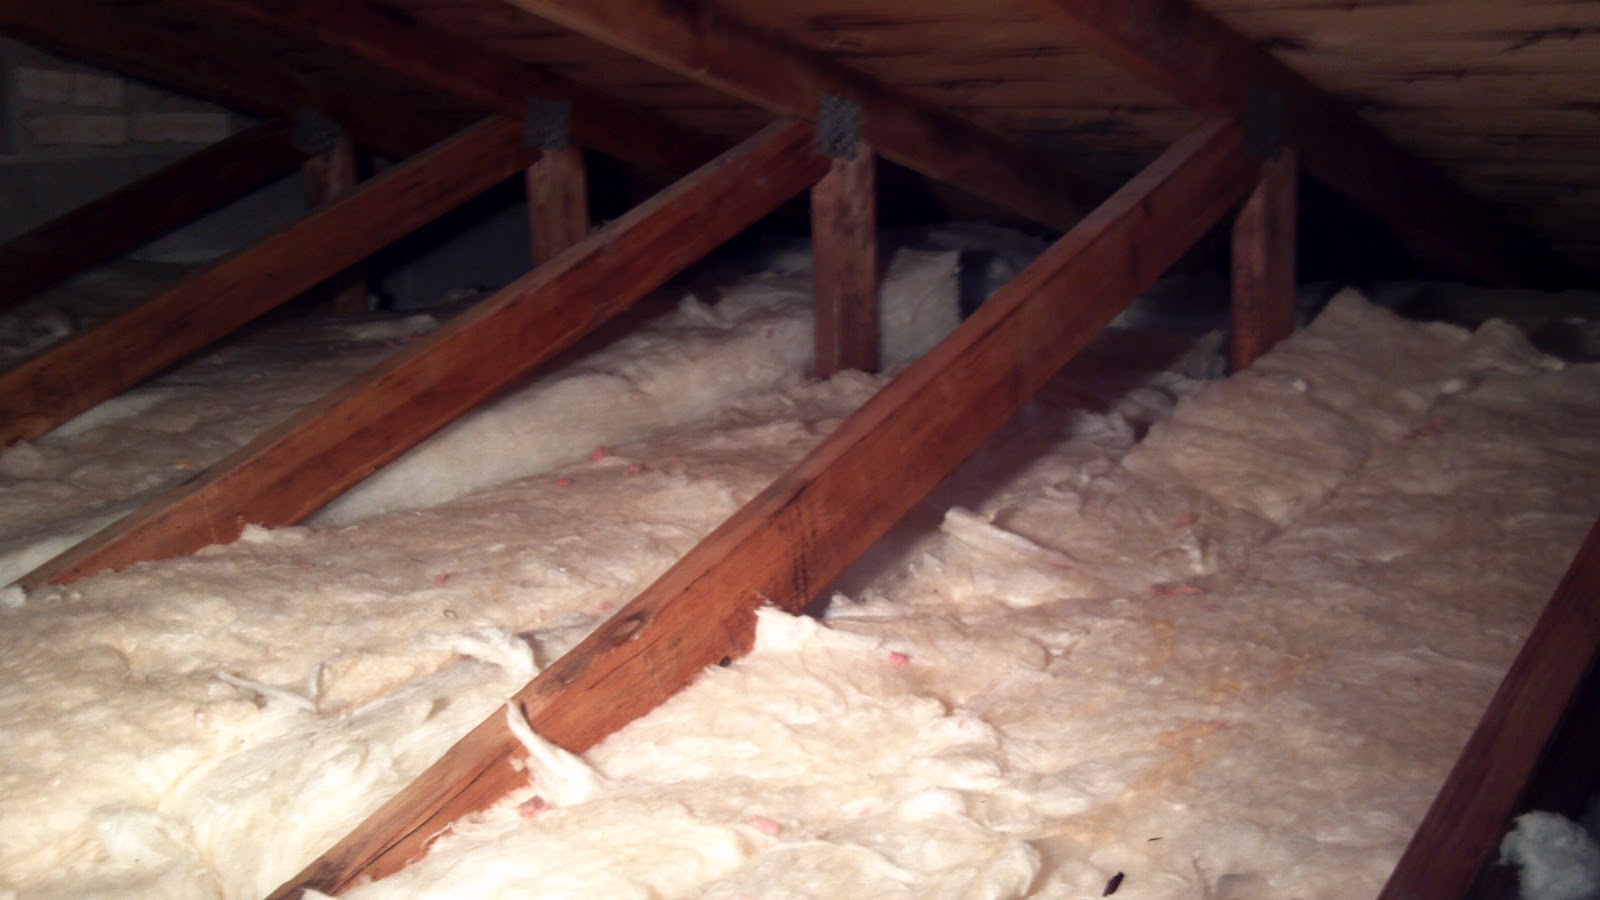

from Home My Heaven: Home Improvement Blog UK http://www.homemyheaven.co.uk/2016/07/how-to-make-your-home-more-energy.html