Friday, 14 April 2017

Lessons in Fence Fixing, Part 1: How NOT to Anchor a Fence Post

When I first moved into the UDH, one of the very first projects my dad and I ever tackled was adding a small fence and gate to close off the back yard. In fact, it was the second blog post that I ever wrote — it was that early!

Since then, quite a lot of things have changed, including other improvements to the fence: replacing part of the chain link on the other side of the house, adding better gate hardware, planting garden beds next to it for added foliage (and to hide my neighbor’s fence that’s falling apart, which you can see more of in the pics below), and more. I’d like to think I’ve actually learned quite a bit about fences during that time. But last fall, there was a bit of an accident to this little section:

old and bent fence post

It happened during that awesome, sweaty week last summer when I rented a backhoe, ordered truckloads of dirt, and filled in the sink hole in a brutally humid August. My friends stopped by one night to help (truthfully, they really just wanted to play with the backhoe for a bit)…

…but as usual, it was my dad who helped out the most. Look at him go!

Please note: Some of the links in this post are affiliate links, which allows me to make a small commission from your purchase (but your purchase price stays the same). Thank you for helping support the blog! I appreciate it! 

Even though we got a huge amount done in that week, there’s was just one little step in the wrong direction: during one of the return passes through the gate to get more dirt…

…Dad turned the wheel and crashed directly into my fence. It wasn’t enough of a collision to take out the fence as a whole or for him to be injured in any way (and it was kind of funny since all bets would have been on me to be the one with a runaway backhoe), but it did just enough damage to loosen the concrete and make the whole thing unstable. The post had been bent to an angle that could not be repaired, so I would have to replace it in order for the gate hardware (actually, the newly-installed gate hardware) to close properly.

damaged fence post

I took the fence panel off and came up with a game plan to fix it, but I wasn’t in a huge hurry since I was busy working on lots of other projects all winter. Typically, you just buy a new pre-treated 4×4 and a bag of quick-dry concrete, reattach the hardware, and done (you actually don’t even need to separately mix the concrete… you literally pour the bag into the hole and water it down, poke it a few times to make sure the water mixes well enough, and stabilize the post so that it’s level — not a difficult DIY at all, just heavy). But as I made one of my usual supply runs to my local Orange, I spotted this little display:

sika post fix foam filler

According to the product’s advertising:

  • This new product could fix my fence without the inconvenience of carrying around 50 pound bags of concrete through the store — “effectively replaces two 50 lb. bags of concrete mix.” Since I don’t like carrying heavy stuff unless it’s part of an obstacle course race, this was a selling point for me.
  • The two components that are separated in the bag, once popped and mixed for about 20 seconds, form an expanding polyurethane resin that you pour it into the hole; in just 3 minutes, the product expands around the post and stabilizes it.

Basically, magic.

Given that I also love trying out new DIY products and being the guinea pig to see if something *really* works or not, I figured it would make for a really cool experiment. For around 3x the price (online it says it’s now cheaper, but I remember spending more), it was more expensive than the bag of concrete I’d initially planned to use, but I liked the idea of trying it out and picked it up anyway. Could it really work?

The short answer: no. Nope, nope, nope. But hey, I have cool pictures!

With the weather warming back up (and dry), the temperature was right to finally give it a try. I started by cleaning out the existing hole that contained the original post (any softer dirt, debris and such — Georgia’s red clay is pretty hard to begin with, but spring rain had caused some mud at the bottom of the hole). It may not look it from this photo, but the hole I started with was deep enough for the usual concrete that I would have poured otherwise (probably two-ish bags). It doesn’t really say it on the bag, but an online video that I found for this product says the hole should be 8 inches in diameter and one third of the length of the post should be in the ground.

digging out the fence post hole

I popped the bag and did a quick shimmy to get the two components to mix (note: there’s a very short window of time for this, about 20-30 seconds), then snipped a corner with some scissors and started pouring it into the post hole. The goop almost instantly started foaming up before I could snap a few pictures with my phone, which was pretty cool to watch. Over the next few minutes, I monitored the expansion and made sure the post stayed level (a post level would have been even better to use, but since I didn’t feel like making another trip to the store, two levels measuring both directions worked in a pinch).

Sika Fence Post Mix review

I stood around for another ten minutes, watching the foam expand even further and even above ground (according to package directions, you can just trim off excess after it’s hardened). You’re supposed to let things cure additionally for another two hours before attaching anything to the post, but I had other things to tackle the rest of the afternoon, so I let it be for the rest of the day.

I gave it a few test wiggles that evening (well after the 2-hour “fully hardened” window on the packaging), which proved disappointing. The product wasn’t super stable around the post, and as you can see in the photo above, had even pulled away from the post while it expanded. I was still outside working on a few other things, and I could clearly see the post swaying slightly in the wind. I chose to leave it overnight and decide whether or not to re-attach the fence panel the next day.

The next afternoon, I pushed on the post. While it didn’t fall over, it still wiggled at the slightest nudge — nothing like the secure stability of setting the post in concrete. I guess one could argue not to expect they’d be exactly similar, except that the video I watched about the product literally had a guy climbing onto and hanging off the post as a demonstration of its strength. In my case, it took just a few more strong nudges, and the whole thing came right up out of the ground. Womp, womp.

Perhaps the hole I dug was still not deep enough (the foam only came up out of the ground a little, similar to what I’d seen in the video, so it looked plenty deep enough for the equivalent in concrete that it’s supposed to replace). Perhaps the ground around the hole wasn’t dry enough (the product didn’t really say much about water except to remove any standing water in the hole, and any loose soil had already been cleared out). So, while I’m sure that a lengthy investigation with the manufacturer would point out what step I must have not done perfectly in perfect conditions (because that hardly ever exists in real life, duh), I’d had enough of my experiment. I certainly think it’s cool when new products come out, and I’m willing to try them, but if the original way is both pretty much fool-proof and cheaper, I consider this a product flop.

The foam is easy to remove — I just hacked at it with a reciprocating saw and dumped the pieces. I noticed while removing it that the lack of expanding around the post was actually worse than I thought; somehow, air pockets had gotten into the resin, which probably contributed to its lack of stability.

Sika fence post mix shows air pockets, leading to a less stable fence

With the junky foam shorn off, I grabbed an ol’ reliable bag of concrete and reset the post. Even though it took about fifteen minutes longer (well, a day of the other product and then fifteen minutes) to set enough to feel comfortable walking away, for me, this is the way to go from now on.

This post has gone on long enough, but there’s more that needed to still be done to get my fence and gate fixed up, so I’ll save that for part 2. And if you saw on Instagram, even more was accomplished elsewhere over the same weekend (remember this project?). More of that is coming as quickly as I can edit the photos!

pouring small concrete slab

P.S. In case you’re wondering, this wasn’t a sponsored post or anything, merely something I saw in store and wanted to try out. I know how it is when you see a new product and wonder if it’s worth the extra cost compared to the alternative — which is often cheaper, but more labor intensive — so from time to time, I let my house test things out. In years past, manufacturers have even reached out later to let me know these posts have helped them improve products that don’t work out, so I hope you found this helpful too!

The post Lessons in Fence Fixing, Part 1: How NOT to Anchor a Fence Post appeared first on The Ugly Duckling House.

Website // Subscribe // Advertise // Twitter // Facebook // Google+


from The Ugly Duckling House http://www.uglyducklinghouse.com/fixing-fence-post-mix-review-part-1/

Wednesday, 12 April 2017

Advantages Of Using Engineered Oak Flooring


There are many advantages to using engineered oak flooring. For example, a walnut finish floor can be quite beautiful. A high gloss engineered oak floor can change the interior of the entire home. You are sure to receive many compliments on a high gloss engineered oak floor. 

Oak Flooring


Engineered wood flooring has a unique and feel. Anyone looking at your floor for the first time will certainly notice the beauty and elegance. An engineered wood floor looks absolutely authentic and it certainly will add great beauty to just about any home. If, in fact, you are seriously considering engineered oak wood flooring, it would be best to find one of the trusted suppliers of oak flooring in Melbourne like Market Timbers.

Another huge advantage of having an engineered wood floor is that the floor will never expand or contract. Hard wood floors will easily expand and contract depending upon the temperature within the home. For example, the cold winter months can cause real wood to actually expand. In addition, the warm summer temperatures can cause a wood floor to contact. Hard wood flooring actually can shift a bit due to changes in temperature and overall weather conditions. You should not run into any of these problems with an engineered oak wood floor.

Flooring made from different types of treated plywood offer much more durability than traditional wood flooring. Traditional wood is not very durable and it tends to become more of a problem if you spill something directly on the floor itself. Therefore, clean-up is so much easier with an engineered oak floor.

Another great advantage to having engineered oak flooring is that you can easily sand the floor and refinish quite easily. Wood floors can be sanded and re finished however, it may be more of a chore to refinish as opposed to an engineered wood floor.

If you plan to install the new floor yourself, you can count on the fact that an engineered floor is a great deal easier to install than a traditional wood floor. In addition, the fact that this type of floor is easier to install it will certainly be less time consuming to complete the job.

Cost Effective & Stylish


Possibly the most attractive feature of an engineered oak floor is that it is far less costly than wood. For anyone on a budget, an engineered wood floor is far less expensive and it will not drain your bank account.

If you plan on selling your home, a new engineered wood floor will certainly add value to your existing home. Therefore, you may find that replacing an existing floor with an engineered oak floor will increase the overall re sale value of your existing home.

Having engineered oak flooring installed within a home offers a number of advantages to the homeowner. There are so many styles of engineered wood flooring in which to choose from. Always remember, any improvements you make within the interior of the home will certainly be beneficial for a variety of reasons in the long run.


from Home My Heaven: Home Improvement Blog http://www.homemyheaven.co.uk/2017/04/oak-flooring.html

Interior design tips for first-time homeowners in London


Choosing your first home is one of the biggest decisions you can make, and it can be even tougher to decide how to decorate it because it is this process that will make it go from a house to a home. Decorating and furnishing a whole house from top to bottom is a tough task but these tips and some careful planning should make it easier.

Stick to a budget
The first thing you need to do when it comes to decorating is to know how much you intend to spend. As it’s your first home, it can be easy to get carried away with new furniture and decorations that you think will look good in your home but this can often mean you’ll end up spending more than you have. Always shop around for deals and discounts before you commit and if you have some spending money left over once you’ve got the essentials, you can always treat yourself with something on your wish list. 


Start with neutral tones
Sticking with neutral colours can be a good starting point for any first home design. Colours such as white, cream, black and grey are easily dressed up with splashes of colour here and there in things such as rugs, cushions, and throws. If you’re struggling for inspiration when it comes to neutral colours, asking help from a professional service such as Kia Designs, interior designers based in London, could help you create a starting point for each room.

Be frugal at first
This tip ties with the idea of sticking to a budget and can be another difficulty for first-time home buyers. You’ll probably have the overwhelming desire to buy everything all at once, but more often than not it’s better to start with very little and before you expand. If you know, you can do without a sofa for a while, wait until you’ve shopped around a little more to get the best deal. Sometimes it’s better to live in your house for a while to figure out exactly what you’re going to need.


One room at a time
By treating your home as a large project and working on the design of one room at a time, you’ll be able to have a clearer idea of exactly what you want to achieve without the stress of thinking about other rooms. Break tasks down into smaller, more manageable parts and this way you’ll be a lot less overwhelmed with the amount of work you have to do.

Stay focused on your ideas
Creating mood boards can have advantages and disadvantages. One disadvantage is something that we’ve already covered, the fact that you’ll probably want to buy everything all at once, but an advantage is that it will keep you focused on what you have in mind for each room in your new home. Compile photos, paint colours and fabric samples that you can take with you when you’re finally buying your furniture.


from Home My Heaven: Home Improvement Blog http://www.homemyheaven.co.uk/2017/04/interior-design-tips-london.html

8 Top Tips to creating a luxurious living room

Want to know how to create a luxurious living room? Then read on to discover our top tips for creating a sumptuous haven for your family. Whether you want to revamp the whole room or simply add a few luxurious accents, there are lots of options available to you.     
  1. A touch of velvet
Create luxury in your living room by introducing a range of textures and fabrics. Velvet strikes a particularly luxurious note, and velvet sofas in jewel-like colours have been cited as a top style trend for 2017. If you don’t want to replace your sofa, then think about adding a plush throw, or a few scatter cushions to your interior design scheme.      

  1. A chandelier
For an opulent feel add a chandelier to your decorating scheme. You’ll find examples aplenty from affordable versions on your local high street to vintage examples in antique shops and at your local auction house. Lighting fixtures are often the element of a decorating scheme that gets forgotten, but with a chic chandelier, you’ll achieve an opulent look in your living room.     
  1. Art deco
Art deco style abounds in interior design at the moment, and it lends itself well to creating a luxurious feel, from angular mirrors to occasional tables with marble tops. Strong colour contrasts are evident too, as in the dining room of the Courtauld House at Eltham Palace, where black and gold reign supreme. Add key design motifs of the Deco style from the stepped profile to the Egyptian-inspired key design, sunrises, zig zags and stylised flowers. Here too shiny decadent fabrics are evident, just right for the luxurious feel you’re trying to create.  
  1. Fireplace
Fireplaces create a striking focal point in a living and can add a luxurious note depending on the material and style employed. Look to Victorian or Georgian styles in carrara marble, limestone or granite to help create your luxurious living room. If you don’t have an open fireplace, there are plenty of gas or electric alternatives which echo vintage styles.     
  1. Furniture that’s a cut above
Quality tells, and it’s worth splashing out on well-crafted furniture for your living room to help create that luxurious look. Oak has long been associated with quality when it comes to furniture and French oak strikes just the right note for a luxury feel, so seek out some stylish examples for your home. Whether you want a cabinet to hold your TV, to create a dining area or to add some valuable storage to your home, there are a plethora of pieces from which to choose.     


  1. A rug
Nothing speaks of luxury like a rug, whether you choose a jewel-like colour to complement your sofa or a striking geometric pattern to echo the Art deco influence we’ve mentioned. There’s sure to be an example to suit every style and budget, with a plethora of options available online, on the high street or in your local antique shop. The texture, style, size and colour of a rug can transform a room, and there are some things you should consider before buying one. Firstly, consider what you want the rug to do; draw attention to the main focal point of your living room or become the focal point of a room. Size is also an important consideration; go for a small size to highlight a bijou but exquisite piece of furniture or larger size to pull together your whole interior design scheme. A rich colour, deep texture or ornate pattern is most likely to create a luxurious feel. If your living room is currently, plain, pale and smooth, it will break up the monotony and add some warmth to your interior.            
  1. Crystal
Though the cut glass vase and punch bowl might not have the best reputation and have been out of favour for some time, an element of crystal in your living room can help create the luxurious feel you’re seeking. Look a little deeper, and you’ll see that the designs can be  much more cutting edge than you might at first anticipate. From the wow factor of a chandelier to a pair of candlesticks to top your fireplace or a mere door knob to put the finishing touch to your interior design scheme – there is bound to be something to suit you. From a piece of vintage Lalique to a contemporary design by the likes of John Rocha or Jasper Conran, the options available are many and varied.       
  1. Window dressing
A crucial factor to consider when creating a luxurious interior design scheme is the treatment of the windows in your living room. Choose a heavy fabric such as a damask or velvet to add to that opulent feel and consider the added extras such as coordinating pelmets and tie backs.
So there you have our eight top tips for creating a luxurious living room, from quality keynote furniture to opulent fabrics, vintage elements and crystal accents. We hope you’ve found it helpful and that you’re well on the way to creating the opulent living room you desire.      


from Home My Heaven: Home Improvement Blog http://www.homemyheaven.co.uk/2017/04/creating-luxurious-living-room.html

6 key resources to have before investing in a property

6 key resources to have before investing in a property

Property investment can be fun and financially rewarding, but also – especially if you are just starting out – daunting. Buying a property for the first time will require the outlay of a significant amount of money that you could find hard to come by. Furthermore, naivety on your part leaves you risking shooting yourself in the shoot. Here are 6 vital resources for helping to prevent major issues arising.


A well-regarded online repository of advice

If you lack knowhow about the property market, then you can take heart that the Internet includes a treasure trove of detailed advice from property investment gurus. However, certain online sites will inevitably be more reliable than others; therefore, we would advise you to stick with a popular and respected property investment blog like Property Investments UK.

Your own knowledge of the market

Whatever trustworthy advice you learn online, you can augment with whatever you know about the particular property market that you are eyeing. The Property Speculator observes: “Many property investors specialise in a particular market because they know it well.” You could benefit from following this route if, for instance, you know the ins and outs of a nearby city with a buoyant population of students. You could then have their needs in mind as you choose property.

Money to spend investing in your chosen property

If you will be a first-time investor, you might need to first have a large pool of monetary savings at hand – even if you will be seeking a mortgage. Many lenders expect investors in your situation to use a lot of their own cash to fund their first buy. Furthermore, once you do have enough cash saved up, you should still meticulously compare different mortgage deals as you seek the best one for you.

Construction materials for use in developing the property

Chances are that, over time and as you see fit, you will progress beyond mere property investment and become a property developer, too. In other words, you could utilise some DIY skills as you add more physical features to an acquired property or give it a thorough refurbishment. For all of this, you will need suitable build materials; thus, remember to factor in the costs of these.


Further advice from a mentor

Even well-known entrepreneurs such as Richard Branson and Karren Brady have recommended mentoring for use in reaching better fulfilment and success. Your own mentors could come in the form of property investment consultants at Flambard Williams. These people can assist you in identifying fresh and promising opportunities for extending your success in investment.

Later, returns from a large portfolio of properties

Once you are amassing a steady income from one property, you could use some of the returns to help fund another property purchase and so grow your revenue and profits even more. However, The Property Speculator warns: “It takes a portfolio of quite a few properties to produce a regular income of sufficient size to live on.” Your savings from just one property could, thus, be meagre.


from Home My Heaven: Home Improvement Blog http://www.homemyheaven.co.uk/2017/04/resources-investing-property.html

Monday, 10 April 2017

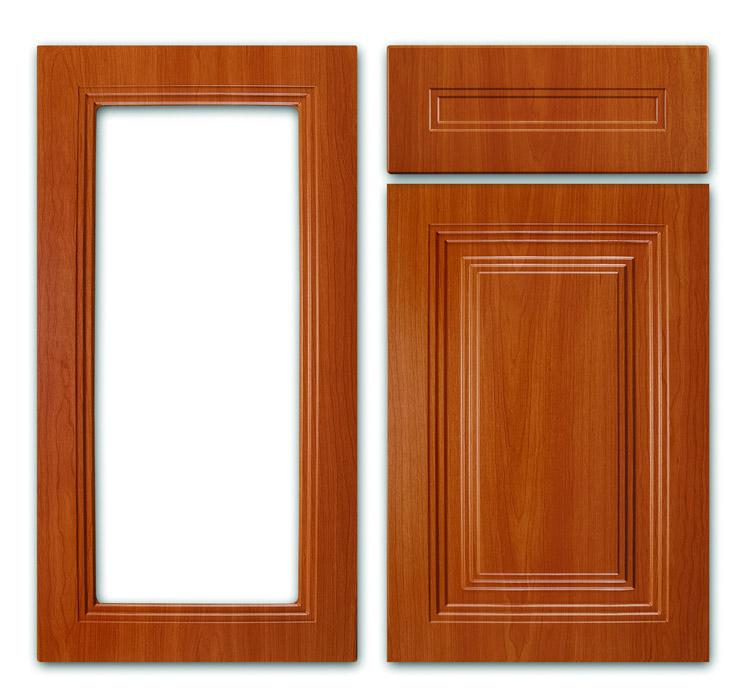
How to make cabinet doors using matched rail and stile router bits


It is not uncommon for doors made from glued or entirely wood to expand, contract and warp at different climatic conditions. Such changes are problematic and can deny homeowners the comfort of having doors that can fully function regardless of the prevailing climatic setting.
Rail and stile doors are considered an ideal solution to the problem of wood movements (warping, expansion, contraction) since they can firmly hold wooden door panel and prevent unnecessary movements that are caused by seasonal weather changes. Rail and stile doors are also incredibly good-looking, and the strength they add to doors make their installation a huge bonus for homes.
Making rail and stile doors is simple as long as you have all the necessary working tools and some “know how” on how to engage in tasks such as fitting the components to have a working door as the outcome. 

Picking the right working tools


The first thing that will be required of you in this woodworking process is to pick the best router bit and stile collection. 2-piece set is highly recommended since it delivers flexibility regardless of the cabinet door you may wish to work on. They also come in different profiles, and you can pick a piece that can perfectly blend with your cabinet door. The fact is that you would also wish for your cabinet door to have durability and that is an aspect that can be determined by the features of the rail and stile router bits you pick. 
Thick micro-grain carbide based cutters are ideal since they enhance longevity while CNC-machined router bits can create anti-kickback geometry that adds a lot to their safety whenever they are used. Router bits with the non-sticking coat are also incredibly simple to clean, and the non-sticking coat also enables the routers to operate without excessive friction. Many rail and stile router bits have a 1/4" shank that improves their cut quality and durability. The bigger shanks prevent the bits from unreasonable vibrations or flexing and also helps in creating tight joints. 
The shanks also have a laser-etched mark that clearly identifies the part to be used for stile and rail cut profiles. You must get such specifications right since any wrong pick can lead to unintended product outcomes. For convenience, you will need a good router table that can make any woodwork process to be managed. That is because some tasks involved may be so uncomfortable to be handled on hand-held routers. Assuming that you have got all the tools and specifications right, your next step will be how to make cabinet doors using matched rail and stile router bits, and the following steps can be of great help.

Procedure 


• Determine the dimensions of your cabinet door and decide on the width of the stiles and rails. Most kitchen doors have 18”x24” and this dimension typically requires 2-1/14” rails and stiles. 
• Plane your door frame to have uniform thickness - Rails and stiles on cabinet door frames always have the same thickness. Any deviation in thickness produces mismatched joints, and that would not be a good thing if you favor “cope and stick” joinery. Be sure that you plane your door parts to a uniform thickness. You can have some stocks as test pieces just to ensure that you get to have stiles that have matching dimensions. 
• Measure your cabinet door with accuracy - Always remember to verify any dimension you get after measuring the width and length sections of your cabinet. The approach will ensure that you avoid errors which can otherwise prevent you from having the much-needed convenience and precision in your work. Here is how you can determine the length of the rail you intend to use: Subtract the width of 2 styles from the door opening width and add the outcome to the length of a rail joinery. 
• You can adjust slot-cutting width if working on doors with plywood or glass panels - some cope-stick bits models are adjustable so that the slot width can vary as the door opens. That feature is helpful when using plywood or glass cabinet doors that have not more than ¼” thickness. Insist on checking the instructions on the router you are using to see if they provide for slot width adjustment. Sometimes, it may be necessary to remove or add washers between slot cutters or consider replacing slot cutters with undersized cutter sets. Insist on having these adjustments before applying routing to any rail and stile joinery. Again, sticking the cutters and coping needs some modification since the required profiles must match. 
• Insist on coping the rails first since this procedure can offer you unimagined convenience. You can use a board to prevent any possible tear after you are done coping the rails, and any splintering can be well taken care of by making cuts in the subsequent tasks. Remember not to create any situation that causes the rails to flip or cause a mismatch in the cope orientations.
• Make a matching joint cutter using a routed workpiece – “cope and stick” joints ever needs to have an exact fit. If you are done with coping the ends of the rails, and your attention is now focused on the sticking cutter, you don’t have to measure to get the right cutter height. Instead, rely on the coped profile to make some judgment on the right height to use. Once you are done with lining up the necessary profiles, be certain to have some tests before resolving to mill the door’s frame parts. 
• If you are raising the door panels, first start by cutting across the grains, then cut along the grains – this procedure is necessary so that you can avoid unnecessary splinter which can induce some minor damages to the beautiful work you may have done. 
• Raise the panels in a progressive manner – panel raising often comes out as a challenging milling operation. To get clean results and also work safely, it is advisable to mill the panels in series, preferably not removing more than 1/16” for every milling series. 
Author Bio:
My name's Danny L. Montgomery. I'm the founder and owner of the blog zukzik.com. I love all things DIY & Home Decor. I hope I will be able to share my experiences with the interested readers


from Home My Heaven: Home Improvement Blog http://www.homemyheaven.co.uk/2017/04/how-to-cabinet-doors.html

Friday, 7 April 2017

My New Favorite Weekend Travel Bag

I’ve finally found it: the weekender bag that fits all of my crap for an entire trip.

Recently, and for no other reason than I’d never been before and the rates were cheap, I took a trip to Asheville, NC. While I don’t get many opportunities to take whole weeks off as a rule — working for myself over these last couple of years has taught me that too long of a break means too many fires to put out when I get back. So, I still try to break things up by visiting cities that are a few short hours away from Atlanta. Over the course of a year, these small trips amount to quantity rather than the quality of a long break, but I make it work. It gets me out of the house for a few days to experience new things, and it keeps me happy!

I’ll have that post recap of the Asheville trip to you within the next week or two, but first: this bag. I have been on a long search to find the right one, and I’m glad I can check this off my list!

weekend travel bag for overnight trips

Originally, I’d bought it for two reasons:

  • Sponsors and PR companies I work with sometimes ask me to make short promotional trips for the blog. I did so here when I went to New York and here when I went to San Francisco (and a couple more times to New York). Hey, anytime someone asks me to go, I’m absolutely going to take that opportunity, right? The next one is probably going to be Chicago, but more on that later! They are always a lot of fun, but they are often in and out, limiting the amount of plane time. So, I needed a carry on that could fill work-related duties, enough space for several outfits (nice stuff and then “down time” attire) and a laptop. I don’t always have a clear picture of the types of activities I’ll be doing on these trips (the itinerary sometimes includes surprises to increase their chances of live promotional shares), so a little extra room was important.
  • I wanted a bag that simultaneously worked for leisure trips, but it was hard to justify the expense of the weekender bag I originally wanted, which is a pricier pick at $295. Emily Henderson raved about it and loving its features, so I really wanted to get a good quality bag that fit the bill but would also be stylish (a place for shoes, a place for my laptop, etc.). It’s harder to find than you think! So when I found this one with good reviews, I snapped it up thinking that if it doesn’t work, it’ll at least be good enough until I can save up for the pricier one. But now, I might not have to!

weekender bag for overnight travel

The bag is made of camel-colored fabric that feels like leather, but it’s vegan (I didn’t specifically look for that as a feature, but it feels soft). It has side and interior pockets, a comfortable strap, and a zippered bottom that I can stuff about 3 pairs of shoes in. I’ve already packed this thing to the brim repeatedly, and it’s showing no signs of wear yet. I am pretty confident I’ll be able to get my money’s worth over the next few years of travel. Buh-bye, old beat up roller bag!

weekender bag for overnight travel

I intended on taking a photo of me holding  the bag so that you could use it for scale (I’m 5’2″, so this looks more like luggage than a purse on my frame), but my camera malfunctioned right as I prepared the photos for this post. So, I’ll update it when I get the chance with a new pic. I will be taking a new trip next month, so it won’t be long before I have another opportunity. :)

Hope you have a great weekend! Do you have any travel essentials you’re obsessed with? I’d love to hear about them!

The post My New Favorite Weekend Travel Bag appeared first on The Ugly Duckling House.

Website // Subscribe // Advertise // Twitter // Facebook // Google+


from The Ugly Duckling House http://www.uglyducklinghouse.com/my-new-favorite-weekender-travel-bag/