Monday, 10 April 2017

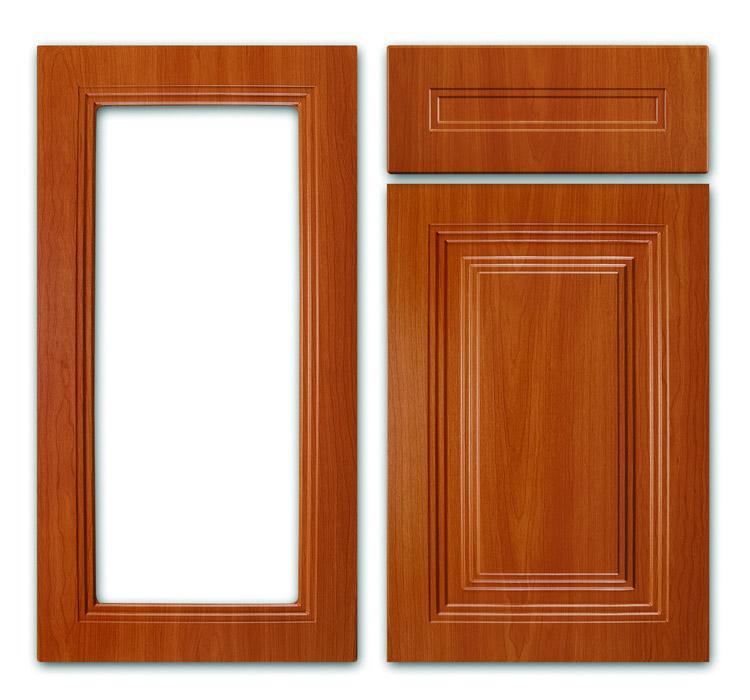
How to make cabinet doors using matched rail and stile router bits


It is not uncommon for doors made from glued or entirely wood to expand, contract and warp at different climatic conditions. Such changes are problematic and can deny homeowners the comfort of having doors that can fully function regardless of the prevailing climatic setting.
Rail and stile doors are considered an ideal solution to the problem of wood movements (warping, expansion, contraction) since they can firmly hold wooden door panel and prevent unnecessary movements that are caused by seasonal weather changes. Rail and stile doors are also incredibly good-looking, and the strength they add to doors make their installation a huge bonus for homes.
Making rail and stile doors is simple as long as you have all the necessary working tools and some “know how” on how to engage in tasks such as fitting the components to have a working door as the outcome. 

Picking the right working tools


The first thing that will be required of you in this woodworking process is to pick the best router bit and stile collection. 2-piece set is highly recommended since it delivers flexibility regardless of the cabinet door you may wish to work on. They also come in different profiles, and you can pick a piece that can perfectly blend with your cabinet door. The fact is that you would also wish for your cabinet door to have durability and that is an aspect that can be determined by the features of the rail and stile router bits you pick. 
Thick micro-grain carbide based cutters are ideal since they enhance longevity while CNC-machined router bits can create anti-kickback geometry that adds a lot to their safety whenever they are used. Router bits with the non-sticking coat are also incredibly simple to clean, and the non-sticking coat also enables the routers to operate without excessive friction. Many rail and stile router bits have a 1/4" shank that improves their cut quality and durability. The bigger shanks prevent the bits from unreasonable vibrations or flexing and also helps in creating tight joints. 
The shanks also have a laser-etched mark that clearly identifies the part to be used for stile and rail cut profiles. You must get such specifications right since any wrong pick can lead to unintended product outcomes. For convenience, you will need a good router table that can make any woodwork process to be managed. That is because some tasks involved may be so uncomfortable to be handled on hand-held routers. Assuming that you have got all the tools and specifications right, your next step will be how to make cabinet doors using matched rail and stile router bits, and the following steps can be of great help.

Procedure 
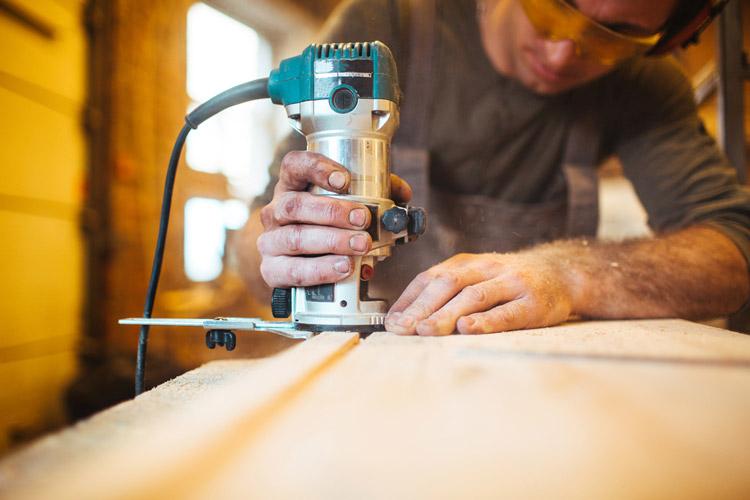

• Determine the dimensions of your cabinet door and decide on the width of the stiles and rails. Most kitchen doors have 18”x24” and this dimension typically requires 2-1/14” rails and stiles. 
• Plane your door frame to have uniform thickness - Rails and stiles on cabinet door frames always have the same thickness. Any deviation in thickness produces mismatched joints, and that would not be a good thing if you favor “cope and stick” joinery. Be sure that you plane your door parts to a uniform thickness. You can have some stocks as test pieces just to ensure that you get to have stiles that have matching dimensions. 
• Measure your cabinet door with accuracy - Always remember to verify any dimension you get after measuring the width and length sections of your cabinet. The approach will ensure that you avoid errors which can otherwise prevent you from having the much-needed convenience and precision in your work. Here is how you can determine the length of the rail you intend to use: Subtract the width of 2 styles from the door opening width and add the outcome to the length of a rail joinery. 
• You can adjust slot-cutting width if working on doors with plywood or glass panels - some cope-stick bits models are adjustable so that the slot width can vary as the door opens. That feature is helpful when using plywood or glass cabinet doors that have not more than ¼” thickness. Insist on checking the instructions on the router you are using to see if they provide for slot width adjustment. Sometimes, it may be necessary to remove or add washers between slot cutters or consider replacing slot cutters with undersized cutter sets. Insist on having these adjustments before applying routing to any rail and stile joinery. Again, sticking the cutters and coping needs some modification since the required profiles must match. 
• Insist on coping the rails first since this procedure can offer you unimagined convenience. You can use a board to prevent any possible tear after you are done coping the rails, and any splintering can be well taken care of by making cuts in the subsequent tasks. Remember not to create any situation that causes the rails to flip or cause a mismatch in the cope orientations.
• Make a matching joint cutter using a routed workpiece – “cope and stick” joints ever needs to have an exact fit. If you are done with coping the ends of the rails, and your attention is now focused on the sticking cutter, you don’t have to measure to get the right cutter height. Instead, rely on the coped profile to make some judgment on the right height to use. Once you are done with lining up the necessary profiles, be certain to have some tests before resolving to mill the door’s frame parts. 
• If you are raising the door panels, first start by cutting across the grains, then cut along the grains – this procedure is necessary so that you can avoid unnecessary splinter which can induce some minor damages to the beautiful work you may have done. 
• Raise the panels in a progressive manner – panel raising often comes out as a challenging milling operation. To get clean results and also work safely, it is advisable to mill the panels in series, preferably not removing more than 1/16” for every milling series. 
Author Bio:
My name's Danny L. Montgomery. I'm the founder and owner of the blog zukzik.com. I love all things DIY & Home Decor. I hope I will be able to share my experiences with the interested readers


from Home My Heaven: Home Improvement Blog http://www.homemyheaven.co.uk/2017/04/how-to-cabinet-doors.html

Friday, 7 April 2017

My New Favorite Weekend Travel Bag

I’ve finally found it: the weekender bag that fits all of my crap for an entire trip.

Recently, and for no other reason than I’d never been before and the rates were cheap, I took a trip to Asheville, NC. While I don’t get many opportunities to take whole weeks off as a rule — working for myself over these last couple of years has taught me that too long of a break means too many fires to put out when I get back. So, I still try to break things up by visiting cities that are a few short hours away from Atlanta. Over the course of a year, these small trips amount to quantity rather than the quality of a long break, but I make it work. It gets me out of the house for a few days to experience new things, and it keeps me happy!

I’ll have that post recap of the Asheville trip to you within the next week or two, but first: this bag. I have been on a long search to find the right one, and I’m glad I can check this off my list!

weekend travel bag for overnight trips

Originally, I’d bought it for two reasons:

  • Sponsors and PR companies I work with sometimes ask me to make short promotional trips for the blog. I did so here when I went to New York and here when I went to San Francisco (and a couple more times to New York). Hey, anytime someone asks me to go, I’m absolutely going to take that opportunity, right? The next one is probably going to be Chicago, but more on that later! They are always a lot of fun, but they are often in and out, limiting the amount of plane time. So, I needed a carry on that could fill work-related duties, enough space for several outfits (nice stuff and then “down time” attire) and a laptop. I don’t always have a clear picture of the types of activities I’ll be doing on these trips (the itinerary sometimes includes surprises to increase their chances of live promotional shares), so a little extra room was important.
  • I wanted a bag that simultaneously worked for leisure trips, but it was hard to justify the expense of the weekender bag I originally wanted, which is a pricier pick at $295. Emily Henderson raved about it and loving its features, so I really wanted to get a good quality bag that fit the bill but would also be stylish (a place for shoes, a place for my laptop, etc.). It’s harder to find than you think! So when I found this one with good reviews, I snapped it up thinking that if it doesn’t work, it’ll at least be good enough until I can save up for the pricier one. But now, I might not have to!

weekender bag for overnight travel

The bag is made of camel-colored fabric that feels like leather, but it’s vegan (I didn’t specifically look for that as a feature, but it feels soft). It has side and interior pockets, a comfortable strap, and a zippered bottom that I can stuff about 3 pairs of shoes in. I’ve already packed this thing to the brim repeatedly, and it’s showing no signs of wear yet. I am pretty confident I’ll be able to get my money’s worth over the next few years of travel. Buh-bye, old beat up roller bag!

weekender bag for overnight travel

I intended on taking a photo of me holding  the bag so that you could use it for scale (I’m 5’2″, so this looks more like luggage than a purse on my frame), but my camera malfunctioned right as I prepared the photos for this post. So, I’ll update it when I get the chance with a new pic. I will be taking a new trip next month, so it won’t be long before I have another opportunity. :)

Hope you have a great weekend! Do you have any travel essentials you’re obsessed with? I’d love to hear about them!

The post My New Favorite Weekend Travel Bag appeared first on The Ugly Duckling House.

Website // Subscribe // Advertise // Twitter // Facebook // Google+


from The Ugly Duckling House http://www.uglyducklinghouse.com/my-new-favorite-weekender-travel-bag/

Wednesday, 29 March 2017

Easy Ways to Reduce your Home Heating Oil Bill


For many homeowners, the winter months bring concerns about how they are going to stay warm. For those of you who use heating oil, I have put together this article. In it, I quickly explain how you can keep your heating oil bills under control.
Get your order in before everyone else does
Unfortunately, my first tip is not one that you can use this year. However, it is certainly something that you can put into action for next winter. Whenever you can, buy your heating oil before the winter rush. Most home heating oil firms get very busy in the winter months, so offer good deals to those customers who order at other times of the year.
Look after your boiler
You need to get your boiler serviced on a regular basis to keep it working efficiently. An un-serviced oil boiler will always burn more fuel than one that has been properly maintained. It will also generate fewer harmful fumes, so having your boiler serviced on a regular basis is also important for your family’s health.
Insulate your home
Without good insulation, there is no way you can keep your heating oil bill in check. This is because most of the heat you generate will just leak away through the roof, windows, doors and walls.
It is important to realise that some parts of the home are leakier than others are. Understanding this will help you to target your efforts and prioritise insulating those areas where most of the heat is lost. Because around 25% of the heat that leaves a home does so through the roof, you need to insulate your loft space as a matter of urgency.
Stop the draughts
Filling in gaps around your doors and windows will also help to stop heat from leaking from your rooms. It is not difficult to do this using insulation tape and draught excluders. This video shows you an easy way to do this.
Turn down your thermostat
Ensuring that your thermostat is not set too high will also help you to keep your fuel bills under control. It is also important to check that it is still functioning properly. Turning your thermostat down by just one degree can make a huge difference to your overall fuel bill.
Sometimes the boiler also has a thermostat. Letting your service engineer check and adjust this thermostat can also help you to reduce your heating oil bill.
Shut the doors
Keeping the heat that you generate in the room that you want to heat is important. You need to get everyone into the habit of shutting the door behind him or her. There really is no point in heating the hallway or corridor.
None of the above tips is expensive or hard to implement. Yet, they will all save you money. That is cash you could potentially invest in buying energy saving devices like smart meters or thermostats. Technology that will help you to reduce your heating bills even more.


from Home My Heaven: Home Improvement Blog http://www.homemyheaven.co.uk/2017/03/reduce-home-heating-oil-bill.html

Friday, 17 March 2017

Top 3 Home Improvements That Can Increase Your Property Valuation


As we start to approach Spring I thought I would write about the top 3 ways to increase your homes value with DIY updates. 

Spring time is a great time of year to dust off those tools and start making some alterations after the terrible winter we went through this year.

I recently interviewed several property buying company’s to see what home additions add the most value when they consider buying or selling a property. 

I then used online property valuation tools such as ones from https://www.propertycashbuyers.com/online-property-valuation/ to see the values before and after improvements.

Here are the top 3 home improvements, based on return on investment, they suggested homeowners make if they wanted to make the property more valuable.

#5 Changing your kitchen door fronts to revamp a tired kitchen.

If your kitchen is looking tired than spending a small amount on replacing kitchen doors can transform a room. Most kitchens have standard units so buying new door fronts and handles can make the kitchen look brand new. 

Changing 12 doors will normally cost around £360 and several companies told me it could add between £3,000-£6,000 to your property value.

#4 Paint the walls in neutral colors to help sell a property quicker.

The next most popular response from our panel was to repaint all the home in neutral colours. This is especially true in living rooms, kitchens and dining areas. The overall feedback was that loud colours often make a property less appealing and could affect the property value due to some vibrant colours not being to everyone’s taste.

Consider toning down colours but retaining a personal feel with colourfull paintings or furniture as these can be easily changed and still make the room intone with your personal taste.

#3 Increasing a home’s valuation by clearning the garden

Now that we are entering Spring it is a perfect time to action this tip. Often the garden is overlooked during the winter months and we are all sometimes guilty of getting used to things. The cheapest improvement suggested was to just ensure the grass and hedges are trimmed as it makes the garden look larger more inviting. A slightly more expensive suggestion was to layer the garden which gives a greater sense of depth. The obvious logic behind this is larger gardens are more appealing to families which are normally the biggest market in your quest to sell a property.

#2 Replacing the bathroom in your property

Whilst this improvement is a little costlier it pays for itself several times over. The professional property buyers told me that if they buy an old property the first thing they do is replace the bathroom. 

Because the bathroom is often heavily used it get start to look tired very quickly. Bathrooms are also the most common room in a property to suffer from mold and damp which can be very off-putting for potential buyers. After researching a little online I found the average cost to replace a bathroom was around £2,000 including labour.

The companies I spoke with told me they would normally offer around £3,000-£4,000 more for a property which had a brand new bathroom fitted so this tip not only pays for itself but gives you a room you can enjoy.

#1 The best home improvement you can make to increase a properties valueis splitting one bedroom into two.

Out of all the feedback gathered from industry professionals they all said adding another bedroom increased a properties value by up to £10,000-£15,000.

This is especially true in 2 bedroom properties where most families want 3 bedrooms for a growing family or the flexibility to have a home office or guest room.

The easiest way to create an additional bedroom without the huge cost of building an extension was to split the often large front bedroom into two with a petition wall. It can be surprisingly easy to achieve by constructing a wall down the center of the room and a small hallway connecting each room.

You can find low cost builders from websites such as www.mybuilder.com and initial research estimates the cost to be between £1000-£5000 including all labour and materials.
I hope you enjoyed this article and please post any questions of comments below along with sharing on social media.

Writer – Amanda is a property and home improvement blogger who has been buying and refurbishing properties along with documenting her journey to help other homeowners.
You can read more of her articles on decordecoratinganddesign.com.


from Home My Heaven: Home Improvement Blog http://www.homemyheaven.co.uk/2017/03/top-home-improvements.html