Man oh man… I am tired. I have spent the better part of this past week installing the new shower tile, grouting, replacing the shower head, and more in the master bath. Given that it was also Independence Day in the U.S. and most of my family and friends were out celebrating the holiday, being stuck in a small bathroom with bits of water from the wet saw in my hair (a missing splash guard will provide the ultimate hair texturizing spray) and thinset under my fingernails (the ultimate nail whitener?) was not exactly how I pictured a “vacation.”

Those posts — including how I wound up waterproofing the shower, installing the new tile (and some nifty new gadgets that helped), and all of that is coming soon. But first: let’s go back to the floor tile and fix a problem that’s long past due, shall we?
If you read the post about the master bathroom tile floor install, you probably already knew that this post would be coming eventually. If you missed it (it’s right here!), then let me summarize as follows:
If you’re an accomplishment-seeking, DIYing perfectionist like me, never hire someone to do a job you know you’ll be more satisfied doing yourself… even if that takes longer on your timeline. No one else will pay obsessive attention to detail like a homeowner working on their own home.
I wound up almost instantly regretting my decision to hire out the job. I came home to find tiles that weren’t level with each other, uneven grout lines, and messy tile adhesive everywhere. Since my instincts are almost always “wait until I have the time to do it MYSELF,” I was really kicking myself over this error. Most of my anger wasn’t even on the guy who did the installation (as it was a family friend and not a pro/stranger I’d hired, and it was more or less just someone trying to help me out and get at least one thing off my very long to-do list). My main point of frustration was with myself for not realizing that I just needed to have put the project on hold until I was ready to do it.

To be clear, I don’t claim to have more know-how; I just know that I’m going to eyeball every single little imperfection and would always wonder if it could look better if I’d done it instead. That what-if haunts me whenever I see something go wrong (if you’ve ever looked over someone else’s work in your home, you know what I’m talking about).
In some ways, I got lucky: when I arrived home after the tile was in, the adhesive hadn’t get cured enough in some of the worst areas, and I was able to pry up a few and fix them in time (I was admittedly frustrated and almost in tears, but it was not as bad as it could have been if I’d arrived just an hour or two later).

But some, unfortunately, had already dried enough that prying them back up might cause damage to surrounding tiles that were ok enough to leave alone. I hadn’t purchased enough of the tile for me to install the whole floor twice, so I decided to let things finish drying and then fully inspect things once I had enough time to walk away from the project and regroup (for me, a big hiccup in a DIY project can lead to thrown objects, temper tantrums, and a host of other behaviors usually reserved for toddlers and drunk party guests… so, best to just walk away).

That “break” that I needed wound up being weeks… and then months… up to now. I was so bitter and frustrated with my “bad luck bathroom” and all of the weird setbacks it’s had since I first took it apart that it was easier to ignore the problem and use the guest bath (footpath-wise, it’s actually closer to my bed in the master bedroom because of the long hallway that leads to the closet and then the bath).
The thing that finally narrowed my focus again?
- One: I got other rooms in the house like the laundry room back to working order and saw how much nicer things are when things are in proper working order (less chaos? what??); and
- Two: A few sponsors came along recently who are very good at providing deadlines (I know that sponsored posts are easy to hate — and when they’re a bad match, they’re noticeably bad — but it’s also sometimes very hard to beat a combo of a supplied budget and a deadline when you’re way too good at procrastinating! Those sponsors will be revealed with their coordinating blog posts/projects, but the point is, they got me back in the bathroom and working on things enough to make this fix something I was constantly being reminded of by proximity.
So, that’s how I wound up finally sitting down one evening as I finished the shower tile, hammer in hand, and began to take care of the last remaining tile on the floor that needed to be replaced. It had been cut in such a way that one edge was resting on the toilet flange rather than fitting around it, leading to the entire tile lifting too far up on one side. And, it cured that way — meaning that once the toilet was installed, the toilet would likely rock on top of this uneven tile joint.

Lots of things that rock are kind of awesome — horses, chairs, concerts — but not a toilet. I’ve sat on one before… in my sister’s house. I forget every time I use that bathroom and it has surprised the crap out of me (accidental pun!) every time. And I really don’t want that in my master bath.
*this post contains affiliate links*
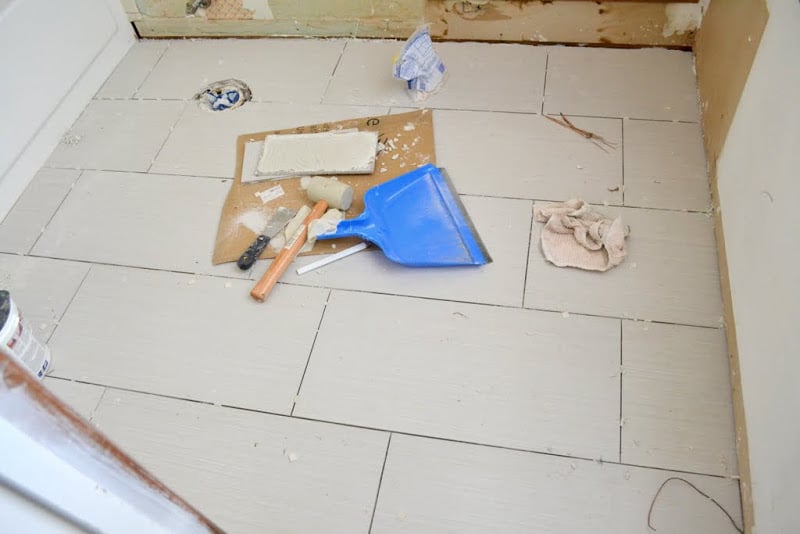
How to Replace a Porcelain Floor Tile
Since these were rectified porcelain tiles, they were a little different than your average ceramic tile (at least, from my experience). I’ve drilled holes in normal ceramic tile in the laundry room, but my existing arsenal failed when it came to these porcelain ones (I actually picked them out because they’re known to be solid and durable!), so the next best option was to just hammer and chip away at it until it was out. I worried that trying to pry at anything might damage the edges of the surrounding tiles, and any contact they’d had with a power tool also failed (grinding at the tile was louder and more shrill-sounding than I could stand, even with ear protection).
Remove grout (if needed) and grab a hammer.
The grout hadn’t yet been finished, so I didn’t need to first remove anything (if you are trying to replace a broken tile in an existing floor, you’ll need to remove the grout first). So, I just started hitting the tile in a single spot with the face of my claw hammer.
By concentrating on one spot with multiple hammer blows, the first piece cracked. I then moved the hammer a few inches away and hammered again. Once one spot broke, I moved a few inches over again. The trick was to concentrate the hammer in a single spot before moving onto the next section — jumping from one spot to another didn’t do anything except impress me as far as the bathroom floor’s future potential for not showing wear and tear.

Wear proper ear and eye protection.
It wasn’t quick, but it also wasn’t tough to do. Be sure to wear earplugs and eye protection though — little bits will come flying. After I got enough of the tile broken apart, I scooped it into the trash with a dust pan and worked on the next section until the entire tile was removed.

Remove cured tile adhesive.
Believe me, I was hoping I’d get to skip this part. I cut a new tile to account for the toilet flange (remember: around, not on top — not even a little!) and did a dry fit to see if I needed to remove the old adhesive underneath, too. But I could already tell that the added height from the dried adhesive plus the putting down new adhesive plus the new tile was definitely going to cause the new tile to not sit level with the others, which would be a real pain when it came time to grout (and doesn’t really solve the non-rocking toilet thing I was trying to avoid by removing it). So, removing the extra layer of dried adhesive was best.

At first, I tried scraping it with the small pry bar set I had and one of my putty knives. It got a decent amount, but I still needed to remove more.

For once, though, I had luck on my side. Instead of using thin-set like you would in a wet area, the adhesive I’d used for the porcelain floor is vulnerable to water exposure (this is totally fine as long as it’s not a shower floor or a steam room). So, all I had to do is pour some water onto the adhesive, let it sit for a bit (it will bead up at first and then eventually absorb into the adhesive), and then start scraping.
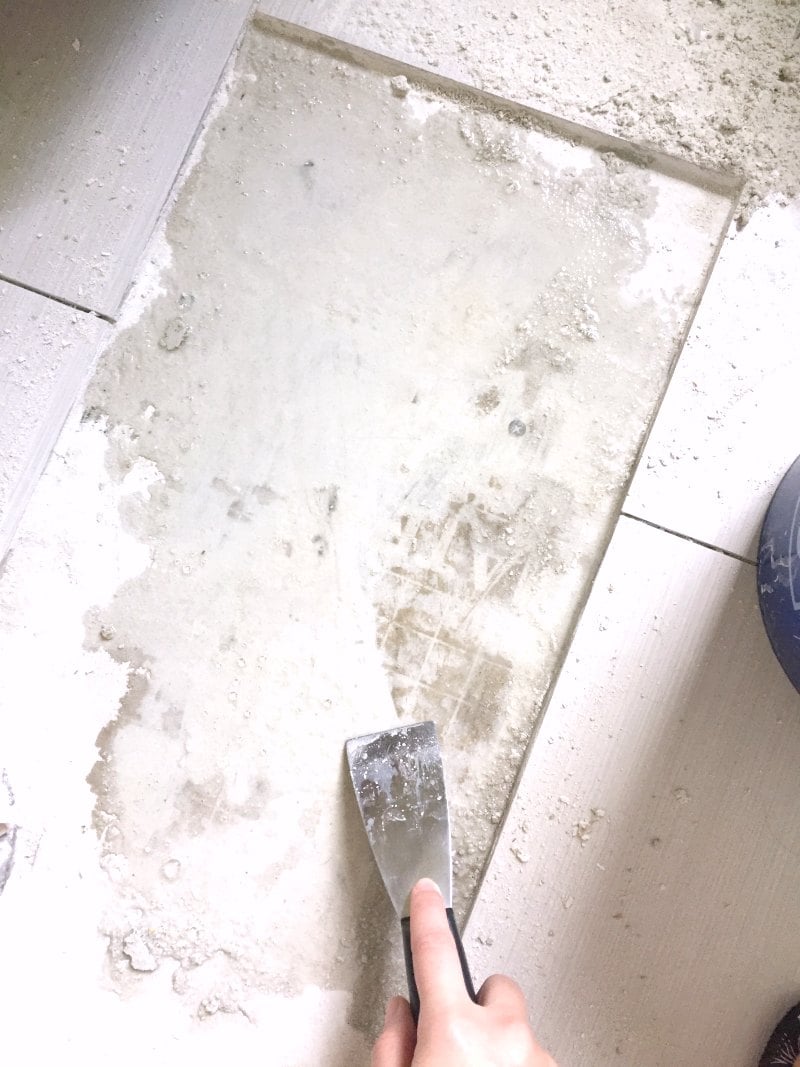
I have a heavy duty 6-in-1 tool I use for painting, but since it’s got a nice tapered edge, it came in handy (nothing against a decent putty knife, but it really didn’t get the job done). A little elbow grease, and most of the bumps and ridges from the dried adhesive were either completely removed or smoothed out enough to allow space for the new tile.

Cut and install the new tile.
If the tile is near an area that needs to be cut, mark and cut your tile on a wet tile saw per usual. Since I was also installing the new shower tile and grouting it this past week, it was easy just to include this tile in with the rest of the items I was working on. Back butter the tile and use spacers that match the existing width of the other grout lines in the tile (I prefer these).

Grout
That’s on the to-do list next, but there you have it — all in all, pretty simple.
The updates on the shower are next, but that will include several parts because I nearly screwed everything up right from the start! I’m serious when I say that it’s like this room has really fought against me…
The post How to Replace A Porcelain Floor Tile appeared first on The Ugly Duckling House.
Website // Subscribe // Advertise // Twitter // Facebook // Google+
from The Ugly Duckling House https://www.uglyducklinghouse.com/remove-replace-porcelain-floor-tile/
No comments:
Post a Comment