Monday 30 October 2017

DIY Disgust Costume – Inside Out

Catch the full details on this no-sew DIY Disgust costume inspired by Disney-Pixar’s Inside Out. Perfect for cosplay or Halloween!

I’ve been meaning to share this DIY costume with you guys since last year!

DIY Disgust Costume Inside Out Cosplay Halloween

For those of you who remember me going all out in 2015 on my Katy Perry costume, you already know that I freaking LOVE Halloween. And perhaps more than the holiday itself really, I freaking LOVE the challenge of making my own costumes and have often come up with them last-minute. So when my friends asked me in 2016 to do a group costume inspired by Disney-Pixar’s Inside Out where each of us would dress up as one of the emotions (Joy, Anger, Disgust, Fear, and Sadness), we had tons of fun bringing them all to life!

Inside Out cosplay - Fear Disgust Sadness

As you can see, we really got into taking our own spins on each one, but I tried to be as true to the original character as possible. It was just as much fun to act in character all night… with finding all the drinks, food, and other people’s costumes totally subpar to my expectations (it was all in good fun though, of course).

I mean, ew… you dressed like that??? How gross.

disgust inside out - cosplay halloween costume

Putting it together really wasn’t that difficult at all. I found most of my supplies and makeup in inexpensive places and, thanks to my Prime membership, was able to get everything shipped to me just a few days before my friend’s Halloween party. I’ve listed out the individual details of each component of my costume below, but I also have affiliate links for you to track similar items online if you wish to bookmark this post (since I basically sourced most of it in person with a limited timeline, and that kind of limits your options — so if you plan to do this costume in the future you’ll have ample opportunity to order these things).

My DIY Disgust Costume from Top to Bottom:


Dress:

  • green sleeveless dress from Target / similar
  • for the fabric design of the lime green and dark teal splat-like shapes, I used similarly colored puffy paints and just let them dry; all of it was hand-drawn and free-form, which let me put lots of extra sparkle into the dress
  • Notes: finding a dress like this during fall is especially tough (and can be pricey if you have to rush shipping), so your best bet is to just keep your eyes peeled during the summer!

Hair:

Scarf:

  • just a simple fuschia glittery tulle ribbon, tied into a knot and the ends trimmed so they came to a point
  • Notes: it’s a bit scratchy, but it was exactly the color I was looking for

Belt:

  • I made the belt myself with some extra-wide lime green grosgrain ribbon and a “D” chipboard letter readily available at any craft store (it was actually covered in burlap, but I painted it green and then covered it in glitter).

Tights:

  • dark green leggings, cut/hiked up to capri length / similar
  • Notes: I could only find a lighter green that nearly matched my dress, and the color in the character’s tights looks a good bit darker, so I actually sprayed the leggings in my garage with a dark green spray paint I already had (spray paint surprisingly performs decently on fabric when you don’t expect it to be perfect, and if it’s one-time use no one’s really looking all that hard… I’ve used it a number of times for costumes in a pinch!)

Shoes:

  • purpley-pink ballet flats / similar
  • Notes: I bought a really cheap red pair from Walmart and used a VERY light spray of white spray paint to make it look more pinkish (since it’s notoriously hard to cover over red anything, I expected the white would not do full coverage and I was right)… to make it more purpley, I used a spray pink dye I found at the craft store

Makeup:

  • purpley-pink lipstick stain, blush, and eyeshadow / similar
  • kelly green eyeshadow for my eyebrows and other shading accents / similar
  • Notes: When it comes to getting makeup to be really matchy-matchy for a costume, my usual trick is to look for a lipstick or lipstick stain that I then use for my eyes and blush; as long as you use a good primer and set with a crapload of translucent powder or fixing spray, it stays put long enough for your evening plans… and the better part is that you don’t spend a lot of money on buying separate lipstick, eyeshadow, and blush that you’ll use only once

Eyelashes:

The majority of questions I get on this costume is how I made the very dramatic green eyelash extensions. And this is where I get all proud like I solved a Rubik’s cube (even though this was significantly less frustrating).

  • You’ll need green card stock, Mod Podge, extra fine green glitter, eyelash glue, and false eyelashes
  • Notes: Honestly, I hate falsies and hate the feeling of something on my eye, so I set a goal to make this as least-irritating as possible, especially since putting anything with traditional glitter near your eye can be irritating and scratchy (so use extra caution when putting this together). First, I cut out an extra-long teardrop shape for each individual lash, then glued them together in clumps of three for each side. The benefit of card stock is that it can hold its shape a little better than normal paper, so I added a little glitter on both sides of the paper with Mod Podge — leaving the end that would go on my skin glitter-free — and then shaped them into a sort of curved shape so that they would  bow outward from my face (which ultimately led to less annoyed picking at them later from them getting tangled with my real lashes). I put on falsies with thick black eyeliner with eyelash glue, but I used the same glue to then paste the cardstock near the corners of my eye. This proved far easier and less heavy for my eyelids than trying to glue them to the falsies (which was my original plan until I realized this would work better).

And there ya have it!

DIY Inside Out costumes Fear and Disgust

As I mentioned, I kind of meant to share this DIY with you guys a long time ago… as it happened all the way back in 2016. I also did a second costume last year when I dressed up as Sia for my run club’s Halloween run, but that was just plain funny since I really only needed the wig and some red lipstick, and the rest was my normal black running attire. I had to run without the wig because it was impossible to see wearing it!

Sia running costume

Next up: I want to share this year’s DIY costume with you too, but that’s long enough for one post and I’ll have that tutorial for you I hope tomorrow… just under the wire. ;)

Happy Halloween, and happy DIYing!

Grab Your Supplies for This Costume:


You'll Also Love

Great Last-Minute Homemade Costumes
Clever Homemade Halloween Costumes
Halloween Prep
Trick-or-Treating at the UDH

The post DIY Disgust Costume – Inside Out appeared first on The Ugly Duckling House.

Website // Subscribe // Advertise // Twitter // Facebook // Google+


from The Ugly Duckling House https://www.uglyducklinghouse.com/diy-disgust-costume-inside/

5 signs you should think about installing a new roof


A home that is warm and comfortable can be too easy to take for granted... until you suddenly hear a dripping sound and fear what it could be. Yes, it could be a roof leak - and this is only one of many reliable signs that you should seriously consider having your roof replaced.
However, it's also one of the more obvious signs. Some indicators might not come to your attention unless you thoroughly look for them, as this guide will make clear. 

Your roof is between 20 and 30 years old
You should expect an asphalt shingle roof to stay intact for 20 to 30 years, as indicated by Good Housekeeping. Therefore, if your roof of this type has reached this age, now would be a good time to get it replaced before it ruptures - even if, right now, it still looks fine from the ground.
Another sign that the time is right is if neighbours on the same development have recently been arranging for replacements of their roofs, which were likely built around the same time as yours.
Complete shingles are lost
While there is nothing functionally wrong with replacing the occasional missing shingle, getting a replacement that is identical in colour to an old shingle is nearly impossible. This is largely attributable to the major change, over time, in commercially available granule colours - though weathering-induced change can also be to blame. Hence, fully replacing the roof may be wiser.
Cracks have randomly formed around the roof
Usually, wind is the culprit for cracked shingles. However, if the cracking is not isolated to a specific area but instead present - albeit randomly - throughout that roof, then a roof replacement may be in order. In fact, that replacement could become necessary within just three to five years; therefore, it could pay for you to plan ahead to prevent the roof's existing damage seriously worsening. 

Sunlight is visible from the attic
Of course, if your attic lets in light, then rain, snow, and cold air could enter through the same gap. Should you notice light leaking in, see if you can find water stains as well. Then, monitor those stains to discern whether, as rainfalls come and go, the stains change in size or shape.
If they do, the roof is actively leaking. Furthermore, simply patching the leak might not suffice; if it is particularly large or the roof is old, this can warrant a new roof installation instead.
Your greenhouse roof is glass rather than polycarbonate
If you have long remained with glass as your choice of material for a greenhouse roof, consider that polycarbonate is stronger than glass, as attested in The Telegraph. In addition to this, it can be easier to support than glass and prevent sunburn by filtering out plenty of UV rays.
It's possible to purchase big packs of polycarbonate sheets from Varico. In fact, such sheets could help you to put together an entirely polycarbonate greenhouse, allowing you to maximise benefits of the material.


from Home My Heaven: Home Improvement Blog http://www.homemyheaven.co.uk/2017/10/5-signs-you-should-think-about.html

Friday 27 October 2017

Anatomical Brain Cross Stitch Pattern

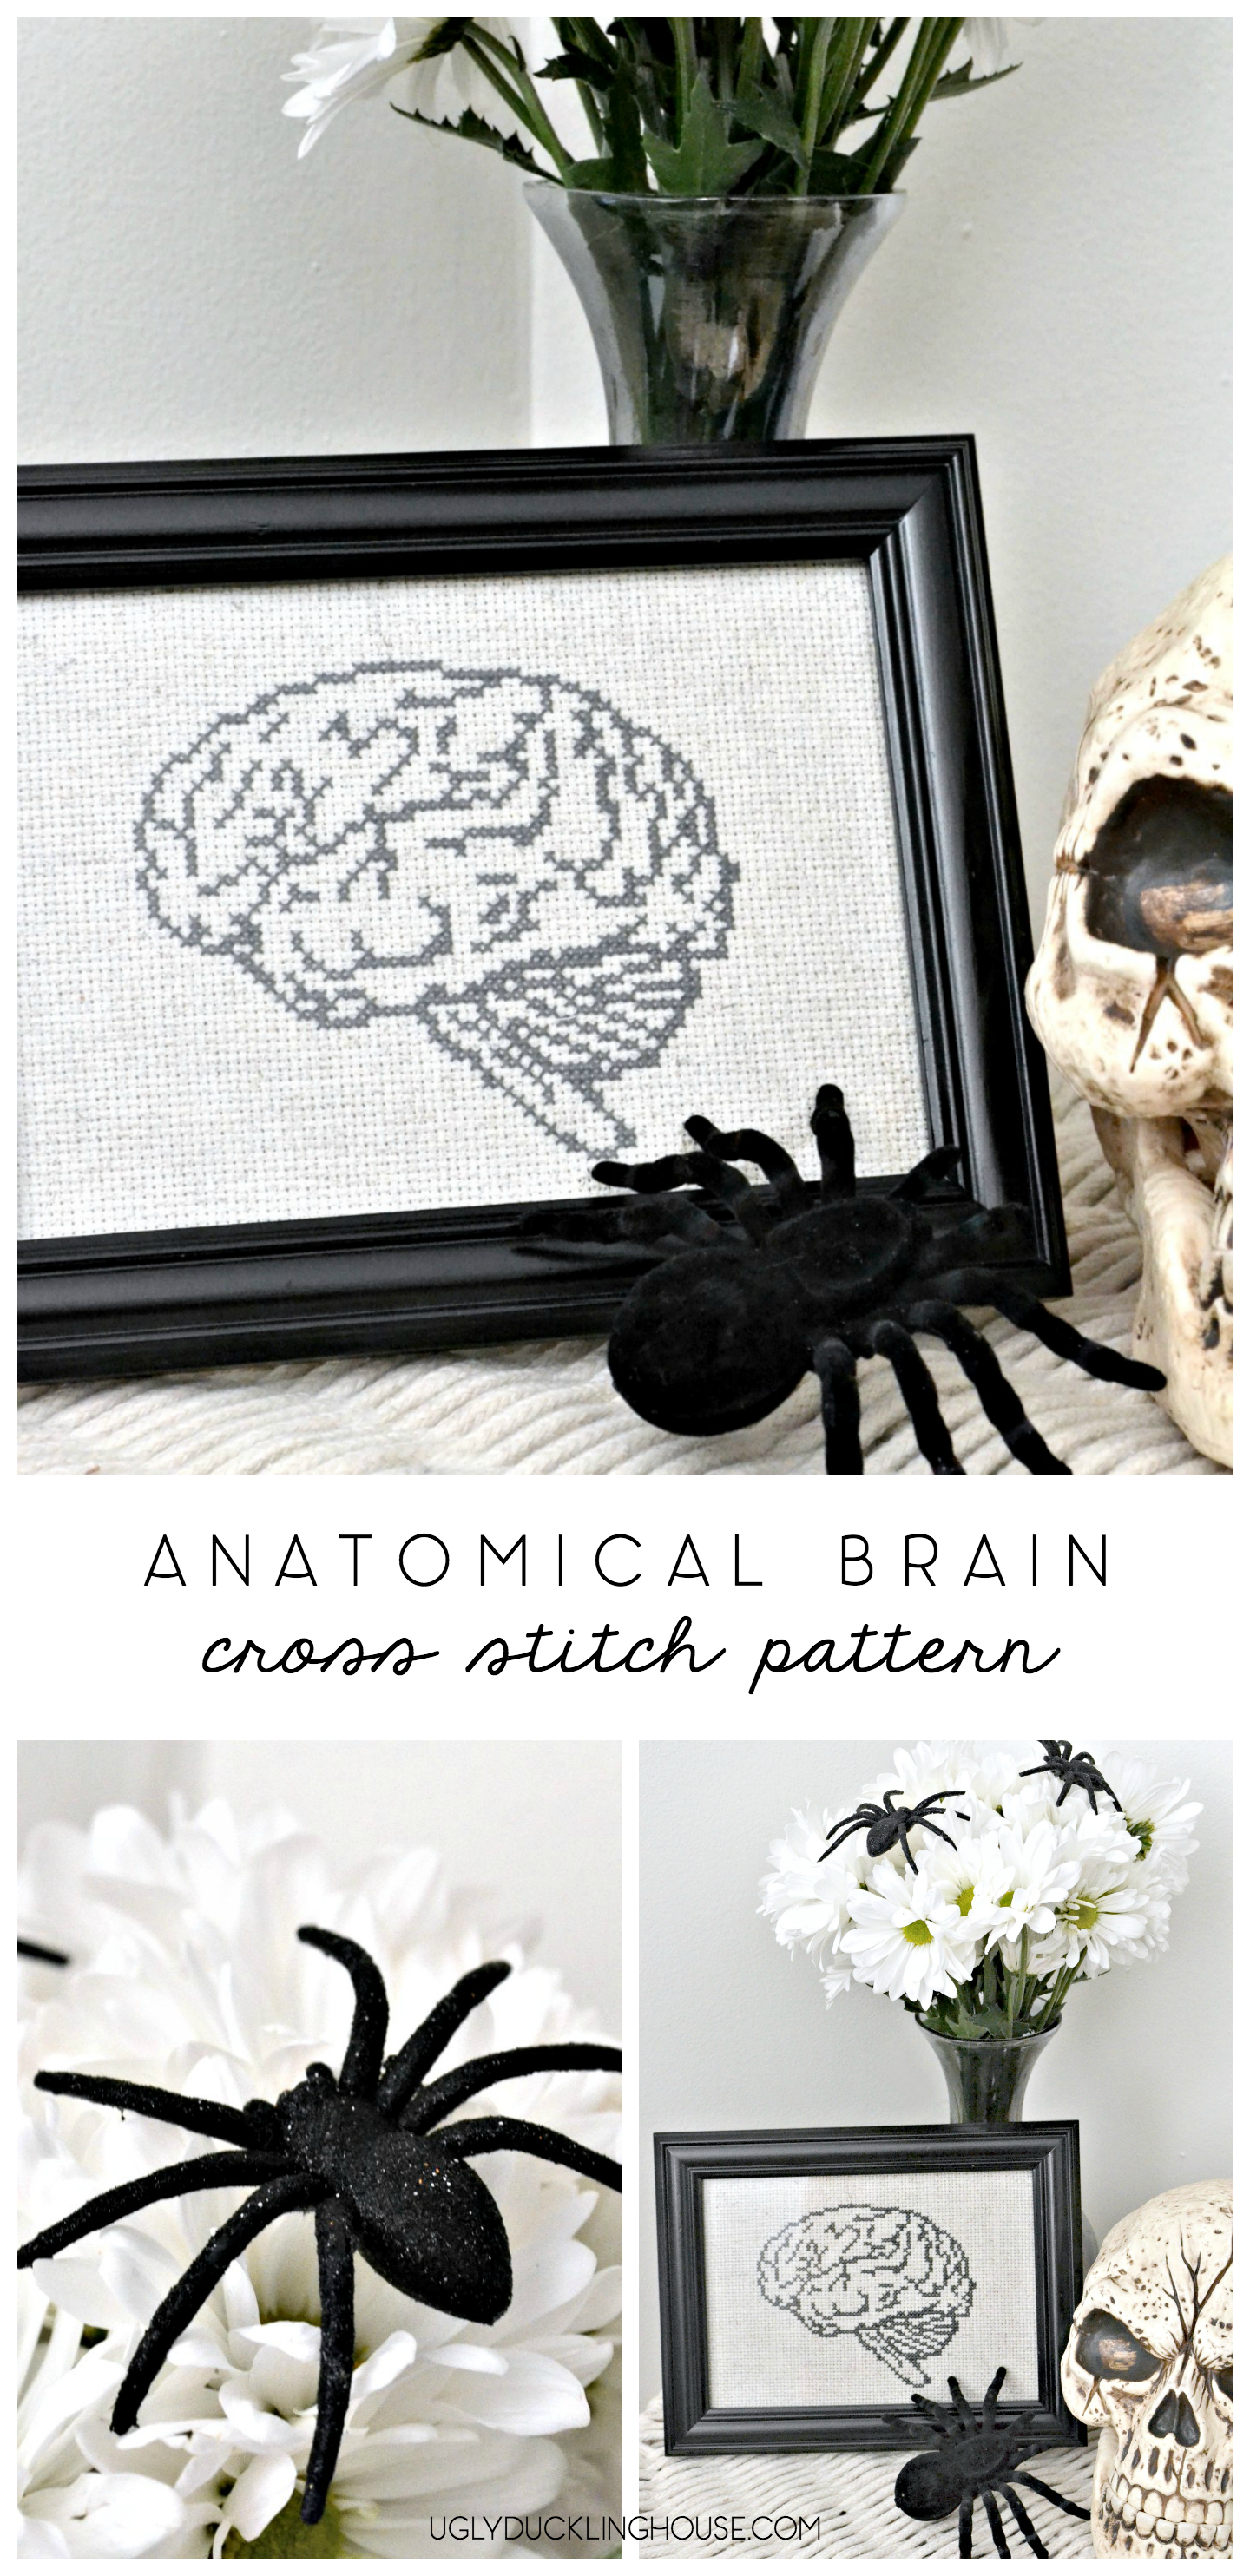
Tips on how I quickly frame cross stitch into a traditional picture frame, plus my anatomical brain cross stitch pattern, perfect for spooky Halloween decor.

As promised! It may have taken me ALL week to finally get the time to put this up for ya (my post about my costumes from last year is also forthcoming), but since it’s almost Halloween and the last cross stitch post was such a hit with some of you guys, I thought I’d give out a spooky-themed one, too:

brain cross stitch

In truth: I completed the pattern ages ago (just because I thought an anatomical ANYthing cross stitch would be cool to add to a gallery wall… whenever I put that up) and just kind of forgot about it. After rummaging through my cross stitch supplies though, I found it again and realized that if you use your imagination a little (say, for a spooky apothecary or mad scientist theme), it would feel right at home in your Halloween decor.

anatomical brain cross stitch pattern - halloween decor

It also wasn’t until I realized I wanted to share it here that I finally put it into a frame too, so I have instructions for you on that:

How I (Quickly and Lazily) Frame Cross Stitch Patterns

Another confession: I did this entire framing job (hehe, that makes me think of a heist) while sitting around someone else’s house last weekend (aka, while Charlie was watching cows and K was convincing me to take on his camper renovation project). It’s that easy!

First, I did a quick ironing on the back to help flatten out any of the areas that showed a “bump” from the cross stitch hoop.

flip cross stitch onto the back

Then, I did a loose measurement around the cardboard I was going to use for the backing (note: it’s best to do this with the acid-free stuff that comes with better quality photo frames — that leads to less fading and exposure over time).

cardboard and cross stitch fabric

Next, I clipped off the corners (in hindsight though, it would be better to cut it along the dotted lines as more of a triangular cut instead of the square I did… I later wound up clipping off more, as you’ll see in the next photos).

cut lines along fabric

Then, I grabbed some spare cross stitch thread and just started stitching along the back to connect the extra fabric around the back of the cardboard. This helps to pull the fabric taught and fits it snugly inside the frame.

wrap fabric around back of cardboard

finish stitching the back

Pop it in the frame, and done!

anatomical brain - cross stitch pattern

spiders on flower bouquet

Anatomical Brain Cross Stitch Pattern Download

And of course, the pattern! Last time, I assumed I might only share a cross stitch pattern once, but given that so many of you liked the last one, I’ve decided to add a new page to the blog: the Cross Stitch Patterns Library.

cross stitch library click here

I’ve been meaning to do something like this for the woodworking projects I’ve done, and this served as a great way to figure out how to create a library right from the start. This means that those of you who have already subscribed don’t have to go through a multi-step confirmation again; just add your email address as your access (last time I wasn’t sure how to best combine that with existing subscribers, so I hope this works much better). This will also give you access to download the existing fall tree cross stitch pattern if you didn’t do that last time, and any future patterns I post about will be there too (once they go live).

anatomical brain cross stitch

That’s it for now: I’ve gotta run and find a few accessories for this year’s Halloween costume for a party tomorrow night (if all goes well with my makeup, it will be an AWESOME costume to share, especially since it’s so last-minute!). Happy stitching!

anatomical brain cross stitch pattern - halloween decor

The post Anatomical Brain Cross Stitch Pattern appeared first on The Ugly Duckling House.

Website // Subscribe // Advertise // Twitter // Facebook // Google+


from The Ugly Duckling House https://www.uglyducklinghouse.com/anatomical-brain-cross-stitch-pattern/

Wednesday 25 October 2017

Spiked Hot Chocolate with Bourbon and Grand Marnier

It’s cooling off out there and this spiked hot chocolate with bourbon and Grand Marnier is just what you need for your holiday get-togethers.

Hey there, UDH readers! We’re Pam and Sara from Biscuits & Burlap, popping in to give you a little food inspiration to go with your DIY projects. This is our third time contributing to the Ugly Duckling House and want to thank y’all for welcoming us with open arms. Sarah introduced us a couple months ago with a round up of our readers’ favorite recipes and we followed it up with a couple recipes just for y’all including a Limoncello Cucumber Cocktail and an Herbed Goat Cheese Crostini with Roasted Cherry Tomatoes.

With the cold months quickly closing in on us, what you need is a spiked hot chocolate to warm you up after trick-or-treating, during chilly tailgate parties, and at holiday gatherings.

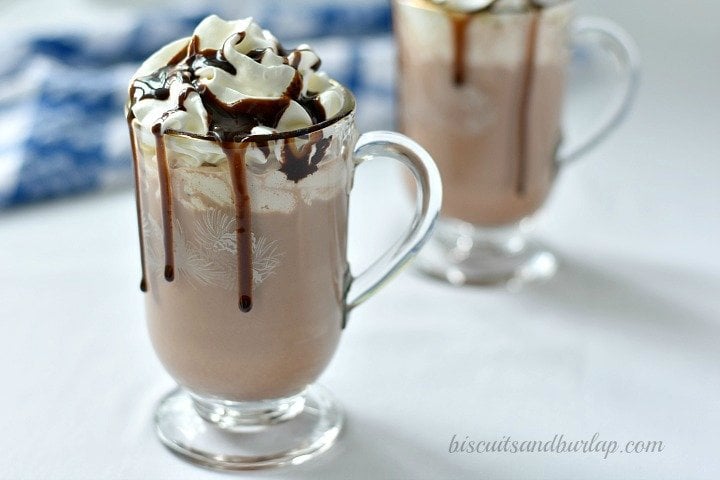
spiked hot chocolate with bourbon and grand marnier

The key to a great hot chocolate is starting with whole milk. If you must lighten it up, you could substitute 2% but don’t go any lighter than that and please don’t use water. This is your chance to indulge!

Using brown sugar adds to the richness of this recipe and the booze? Well, booze just makes everything better.

spiked hot chocolate with bourbon and grand marnier

Start off with your milk in a saucepan and bring it to a boil. Remove it from the heat and stir in the cocoa, brown sugar and salt until dissolved. Last, stir in the bourbon and Grand Marnier and ladle into mugs. Top with whipped cream and garnish with mini chocolate chips, chocolate syrup, or a sprinkle of cocoa and orange zest and you have a yummy spiked hot chocolate!

Print

Spiked Hot Chocolate with Bourbon and Grand Marnier

This spiked hot chocolate with bourbon and Grand Marnier is just what you need for your fall and winter holiday get-togethers

  • Author:
  • Yield: 1 serving

Ingredients

  • 1 cup whole milk
  • 1 T cocoa powder
  • 1 T brown sugar
  • 1 dash salt
  • 1 oz bourbon
  • 1/2 oz Grand Marnier
  • whipped cream
  • mini chocolate chips, chocolate syrup or orange zest, for garnish (optional)

Instructions

  1. Bring milk to a boil in a medium saucepan.
  2. Remove from heat and stir in cocoa, brown sugar, and salt. Stir until dissolved.
  3. Add bourbon and Grand Marnier.
  4. Pour into mug and top with whipped cream and desired garnish.

The post Spiked Hot Chocolate with Bourbon and Grand Marnier appeared first on The Ugly Duckling House.

Website // Subscribe // Advertise // Twitter // Facebook // Google+


from The Ugly Duckling House https://www.uglyducklinghouse.com/spiked-hot-chocolate-bourbon-grand-marnier/

Types of Scandinavian Sofa Beds


Sofa Beds are absolutely one of the greatest inventions when it comes to furniture. A perfectly blended mixture of sofa and bed, the Sofa Beds are intelligent space savers and a stylish piece of furniture to add to your space. Scandinavian Sofa Beds are just the better versions of your regular sofa beds. They have the elegance, the class, and the durability that most of us look for in any kinds of furniture. Although it is highly recommended that you buy a Scandinavian Sofa Bed, it is definitely not recommended for you to buy the first sofa bed you come across. Every person has different needs and that is why you should first have a look at the following types of Sofa Beds to decide which one best suits you before actually buying a Scandinavian Sofa Bed.

Below is the list of 5 different types of Scandinavian Sofa Beds you might want to know before hitting the ‘Add to the Cart’ button.
1.   Scandinavian Single Sofa Bed
If you have less space but don’t want to compromise with your sitting or sleeping experience, then the Scandinavian Single Sofa Bed is the ideal choice that you would want to make. With this sofa bed, you won’t have to spare a lot space but be assured to get a good night sleep for yourself and for your guests too. In addition to being of great comfort and use, this sofa bed also comes designed in an elegant manner. These sofa beds are made to add nothing but class and sophistication to your space. Their design is also intricately made which gives detailed styled appeal to every part of the sofa bed including the fabric to the leg of the sofa bed.

2.   Scandinavian 3 Seater Sofa Bed
Unlike most sofa beds, the Scandinavian 3 Seater Sofa Beds provide a lot of surface area to sleep as much as a King Size Bed can. Gone are the days when you had to worry about two guests arriving at your place at the same time. The huge sleep of the 3 Seater Sofa Beds has large area that can support more than one people easily. One of the best bargains that this sofa bed has to offer is that even though it covers a large surface area when it is used for bedding, while it’s used as a sofa, the sofa isn’t that much of bulky furniture. The Scandinavian 3 Seater Sofa Bed fits just about perfectly into your living room and can embellish your room’s décor with its sophisticated appeal. The other appealing thing about this furniture is that it is very easy to set up. Just pull out the mattress under the seat and you are ready to go.

3.  Scandinavian Sofa Bed with Storage
Scandinavian Sofa Bed with Storage is very true to its name: it indeed does provide enough storage area to satisfy most of the people. This sofa bed can be your alternative to your bed sheet section of your wardrobe. This sofa bed has a clever storage area just below its seats. All you need to do is lift the seats up and you can get a large area to store your pillows and bed sheets, and sometimes even the clutters in your living room, may be. These sofa beds also have easily removable arms that ensure that even the tallest of the tallest people get a sound sleep in this sofa bed.
4.    Scandinavian Corner Storage Sofa Bed
Scandinavian Corner Storage Sofa Bed is the kind of sofa bed that has either a left facing or a right facing corner sofa extended chaise. It is totally up to you to choose which sided sofa bed would suit you the best, one of the aspects to consider while deciding on the type being your room’s style. This Scandinavian Corner Storage Sofa Bed is also quite an investment for people who want to save space but are in dire need of a bed for two. This bed allows you to easily pull out the bed giving your partner, or your friends at a sleepover, or, perhaps, your unexpected guest ample space to sleep. These sofa beds also have extra storage area hidden under the chaise. You can, this way, have enough space to store anything from guest bedding to any other thing you’d rather keep hidden.
5.   Scandinavian Snuggler Sofa Bed
The Scandinavian Snuggler Sofa Bed is for anyone who wants the best of both worlds – space-saver and comfortable sleep. Don’t let the small cozy look of the bed fool you. This sofa bed makes one of most comfortable pullout bed that there is available in the market. As a sofa, this furniture keeps its bedding identity a secret. The thick mattress and scatter cushion give you a perfect bedding area ensuring nothing but a peaceful sleep for you. However, one downside of the Scandinavian Snuggler Sofa Bed is that like the Scandinavian Single Sofa Bed, the Snuggler Sofa Bed can have a sleeping area for only a single person.


from Home My Heaven: Home Improvement Blog http://www.homemyheaven.co.uk/2017/10/types-of-scandinavian-sofa-beds.html

Tuesday 24 October 2017

Feeling the Fall – Charlie in the Country

This weekend was quite a fun one. Cooler temps, fresh air, and simply finding room to pause. And if you’re Charlie, it was an exhausting weekend, too — because my precious city pup saw what cows were for the first time, along with experiencing (for the first time) what life might be like if she had a huge, fenced-in property to patrol.

In short: she loved it. And she’s still sleeping it off as I type this.

Charlie is exhausted

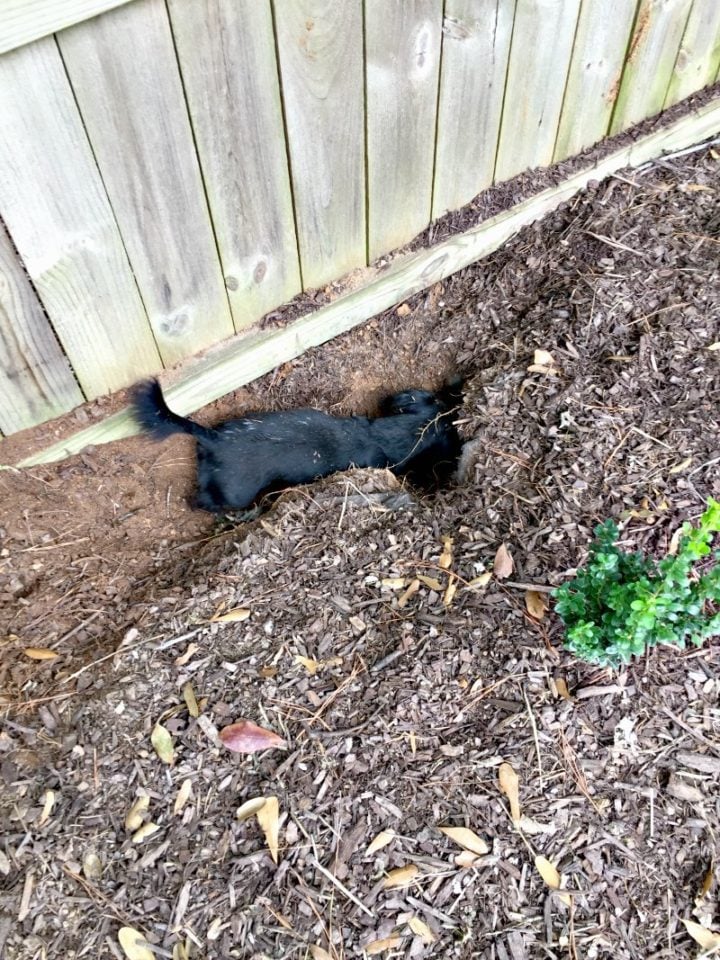
I haven’t shared much about “the bearded guy” on the blog (yet), but I’ve been dating a funny, nerdy, southern-twangy dude almost a year now. For the sake of not having to keep calling him “the bearded guy” as though he’s a stranger, I’ll just call him K. I think my favorite thing is that he pronounces Charlie’s name differently (“CHAH-lee”, no “r”). He’s also the owner of the little munchkin (Stella) you’ve been seeing in my social media feeds and will be a big help with the pub shed project (him, not the dog; she likes to dig holes in my garden beds to go after chipmunks, so she balances out the helpfulness of her owner somewhat).

Stella digging in hedge line

Over the weekend, we traveled to his hometown in Americus, Georgia to visit his parents. As with most trips like this, the intent had a bunch of different reasons, including helping them move some of their furniture (they’re building a house in Tennessee and needed to pack up the U-Haul), rehoming some of his old things (John Deere farm toys?), and spend a little time getting to know people I don’t know all that well yet (spoiler alert: they are incredibly charming). They had also recently chopped down a few trees, and I hoped to take some of it home for a few DIY projects as well as the indoor fireplace and outdoor fire pit (the cedar logs will smell sooooo good).

Americus Georgia Trees

Anyway, Charlie really enjoyed it. K and I have both tried to train her over the last year to walk better on and off a leash (as in, not simply booking it down the road the minute she’s loose), and it really seems to be paying off: my girl happily walked around with us around the entire property, came (mostly) when called, and spent a good part of the evening staring off into the distance at the strange mooing creatures she’d never seen before. She ran and sniffed and enjoyed so much of the property that she was already hinting at wanting to go inside for a nap before dinnertime (our excuse, “she’s an indoor type of dog”).

Charlie staring at cows

I think for Christmas, she’s going to get a dairy cow stuffed animal.

And since it’s almost time for Halloween: wanna see something scary?

scary old camper

This is K’s late grandfather’s old camper. For years, it’s been used as a workshop and for storage and hasn’t moved from this spot (we checked the plate: 1987, aka the year my sister was born). The wheels are flat; it’s rusty and grimy and kind of (okay, a lot) spooky. ðŸ˜±

But, according to him (not that I have a clue yet as I’ve not done any research), it’s from the 40s or 50s and worth something even in this state. So, he wants to restore it — and not, as most of my friends have joked to us so far, burn it.

sneak peek inside old Spartan camper

Well, I suppose I should say restore-ish: he also wants to trick it out with renewable tech and make it smart. Given that I’ve seen a few camper makeovers before (here and here come to mind thus far), I don’t think he’s entirely crazy… but this does also look like a thing where Jason Voorhees and Cousin Eddie might be nightmarish roommates (sooo many jokes, people). So… NOT THAT I’M AGREEING TO TAKE THIS ON YET… if you know of any great Instagram accounts or camper restoration blogs that you love to follow, feel free to send ’em my way to check out. And yes, I may make him wear a bathrobe and a trooper hat for the costume party we go to this weekend just because.

Also, one more update: I’ve caved. I’ve had a DNA test kit that I’ve held onto for a while (it was a gift from my sister a while back), and for the longest time, I haven’t really been all that concerned on what breed Charlie is. She’s a happy, lovable mutt, and since she was a puppy, I’ve always felt it was fun for people to guess rather than spoil their fun… the mystery is enough. But, K brought the kit downstairs the other night and finally convinced me — just for fun — to answer the question once and for all. So, she’s been swabbed and I’m sending off the kit this week. I’ll let you know her results in a few weeks when I get them back.

dna panel dog testing kit

How was your weekend?

P.S. Speaking of Halloween and costumes, I never got to share last year’s DIY costumes in full with ya, so I’m posting about that this week along with a simple and spooky-ish cross stitch pattern that you might enjoy (a bunch of you guys really seemed to like the last one, so I’ll post new plans every now and then when I make them). But fair warning, you’ll need to be an email subscriber for the library I’ll create for all of the downloads when that goes up. DIY build plans will also be in a similar plans library too, so if you’re interested in either one you should go ahead and sign up. Thanks! <3

The post Feeling the Fall – Charlie in the Country appeared first on The Ugly Duckling House.

Website // Subscribe // Advertise // Twitter // Facebook // Google+


from The Ugly Duckling House https://www.uglyducklinghouse.com/feeling-fall-charlie-country/

10 Of The Best Ways To Reuse Wooden Crates Around The Home


Upcycling has long been a popular, yet rustic way of decorating your home both inside and out.
Using wooden crates to create different features in your home is becoming more popular, but many people do not know where to start, or how to use them.

We have selected just ten of the easiest, and best ways to reuse wooden crates to really create statement pieces around your home.

DIY crate coffee table

This requires four medium sized crates, but is again, very easy to do. 
Lay the four crates on their side in a windmill like tile pattern and secure. This creates side storage, as well as a storage area in the middle.
Your unique coffee table can then be finished with paint, with a wood stain, or for a really rustic look, you can leave it unfinished.

Create storage space in your bathroom

This is so easy to do, and looks so effective. If you have access to three or four small crates, you can easily turn these into shelves, perfect for your bathroom.
Paint the crates in the desired colour, and then simply anchor them to the wall so they do not fall over. Simple, but very effective.

Create a unique centre piece

If you have access to smaller, arrow crates, create a really unique centrepiece for your dining table.
Fill mason jars with decorative items and place them in the crate, or use the crate as planter to create a green centre piece. The possibilities are endless, and the best thing about this, is that it is completely free if you just use items you have in your home!


Vintage shelving in your kitchen
You do not need to have the same sized crates for this simple project, just any that will work on the wall of your kitchen.
Unlike the bathroom, you can use these separately and just scatter them both above and below your kitchen cupboards and secure to the wall.
Again, these can be painted, or left plain for a more rustic and vintage feel.

Storage footstall
This is ideal for those who want to create extra storage, whilst keeping it practical. It can work with any sized crate that you like that will fit nicely in your living room.
Paint the crate with whatever colour you want, and set about creating the top. Cut a piece of wood to the same size as the top of the crate, and cover it with foam, before covering it with your choice of fabric. Once this has completely dried, add hinges, so you easily lift the lid up to gain access to the storage space underneath.

Create children’s book storage
This is the perfect project for a child’s bedroom. Cut medium sized crates in half, so they do not stick out too much, paint the desired colour, and then securely attach these to the wall.
Hang them low down, so your child can reach them easily, and use them to store all of their books. They can be made to fit a specific space, and is more unique than a book shelf.

Pallet sofa

This project is not for the feint hearted; however, it can look really great once finished.
You will need several larger crates to act as the seat and the back of the sofa, along with some comfortable cushions.  By attaching these together, you can create a real one of a kind sofa that looks great in conservatories. Cover with large plush cushions for a comfortable finish.


DIY Wine Rack

Stuck for a place to keep your wine bottles? Well fear no longer, as all you need is just one wooden crate. The size in which you choose, is completely dependent on how much wine you have to store, just make sure they are deep enough to fit a wine bottle in.
Fix two pieces of wood in a criss cross position in the pallet, and fix on the wall. Then, get filling!

Built in wall unit

This is an excellent idea if you are looking to create a large amount of extra storage, and have a free wall.
Work to the same rules as the bathroom storage, but just go bigger, creating a unit that covers the entire wall. Ensure that these are fitted securely to both the wall and to each other.
Add staggers and variations to the design, but ultimately ensure all of the weight is evenly balanced.

Create a simple television stand

This design really could not be easier, but creates a handy bit of furniture that looks great. 
You will need four of the same sized crates, that will be large enough to safely house your television.
Turn these on their side, and pair them up before stacking them on top of each other. Simply attach them together, and secure. Use the inside of the crates as storage, and the top to display your television. 

Simple, cheap, and effective. Check out TilesPorcelain for some more amazing guides!

References and Further Reading:
·         Blogof Francesco Mugnai; DIY home ideas: 25 creative ways to recycle wooden crates and pallets
·         TheSpruce; 25 ways to decorate with wooden crates


from Home My Heaven: Home Improvement Blog http://www.homemyheaven.co.uk/2017/10/10-of-best-ways-to-reuse-wooden-crates.html

Why should one choose artificial material over wood to make reception desk?


Earlier people used wood for making different kinds of furniture. The skilled carpenters carved beautiful pieces out of wood. To get the wood, many trees were cut down. As the demand for goof wooden furniture rose, it took a negative toll on the total number of trees. Unrestricted felling of trees has affected the overall environmental balance. 

It is time to stop the cutting of trees. So, another alternative is needed for making furniture. With the advancement of science and technology, we now have access to various artificial materials, which will give the furniture a wood finish look but will not require any chopping of trees.


Using artificial material for furniture making

No one can overlook the classic magnetism of the wooden furniture. But it is not right to endanger the environment to deck your home with these items. But this does not mean that you cannot get the furniture that you desire to have. 

Thankfully, many artificial materials are already invented that can replace the wood. One can opt for the plastic or plywood furniture. Apart from these, the demand of glass and steel is also increasing significantly. 

If you desire to get something unique and rich in appearance, then opting for leather furniture is also ideal possibilities.


Meeting the budget-related constrains

Most people are looking for an alternative to wood as the price of wooden furniture has skyrocketed in the past few decades. It is not that people do not want to keep wooden items; the correct term is that most cannot afford these items. 

Mahogany, cedar, chestnut, and cherry are some of the most popular wood varieties. Due to the scarcity of these trees, the price has gone beyond the reach of ordinary people. In comparison to this, the cost of the synthetic materials falls within the budget of individuals.

Lighter in weight

When considering office furniture, wood is not a good option. The weight of the furniture, made from original timber is more than that of the artificial materials. 

If you need to move the desk from one place to another, lifting a wooden table will be tough. In its place, a table or desk, made of artificial fabric will be easy to lift and move accordingly. Thus, more office owners opt for plywood or plastic products.

Waterproof and scratchproof

Wood is prone to damage by water and can be scratched easily. It pains a lot to see that the wooden desk, which cost you thousands, developed a fungus or scratch. You might be careful about the way you treat the furniture.


You cannot expect the same from your employees. Thus, using plastic or steel reception deskwill help your cause correctly.

Conclusion

The invention of the artificial material has come as a boon for both the people and the environment. With the increased use of these products, the people can get the items of their choice. Furniture made of play is painted in a manner that it looks like wood. The wood finish will cost you extra bucks, but the result will satisfy you. If you do not have the contact details of competent carpenters, then the internet will solve your problem.


from Home My Heaven: Home Improvement Blog http://www.homemyheaven.co.uk/2017/10/choose-artificial-material-reception-desk.html

Thursday 19 October 2017

Top Tips to Looking After Hardwood Flooring

C:\Users\bravr\AppData\Local\Microsoft\Windows\INetCache\Content.Word\ThinkstockPhotos-83115150.jpg
When you first purchase hardwood flooring it adds the look of luxury to your home. There’s no denying that hardwood flooring is beautiful and radiant when it’s first laid down. The problem with this type of floor, however, is it can quickly start to look dull and dingy if it isn’t cared for properly.
In order to keep your hardwood looking the same as it did the day you first purchased it, use these helpful prevention methods:
1. Keep it protected from moisture

Moisture is the number one arch enemy of any hardwood floor and any contact with water needs to be avoided at all costs. If you happen to spill any water on the floor, for example, you’ll want to get it mopped up immediately so that there is no chance of any moisture reaching down to the floor.
You see, your hardwood floor comes with a protective coating but through regular use and sometimes abuse this coating can wear down. If you are rearranging your furniture and end up scratching the floor in the process, the varathane coating will have been compromised. This means that any moisture in the area can seep right down into the hardwood floor and cause water damage.
In order to best protect your hardwood floor, get it recoated every year with either a thin or thick new coating as needed. This way, you’ll know that your floor is being protected from moisture, which is its number one enemy.
Of course, if you do find moisture damage, it may be a case of replacing that section of floor. If you don’t feel confident in doing this, a carpenter will be able to sort it out. Find one in your local area online by searching ‘carpenters London’ for example.
2. Use the right cleaners

Since you have put a lot of money into your new flooring you may be thinking that you’ll have to use very expensive cleaning products in order to keep it maintained. This couldn’t be further from the truth and most of the expensive products on the market are only going to damage your floor rather than help keep it clean.
Use hot water to clean your floors and if they are especially dirty you can add a mild cleaning product to the water if necessary. Use a damp mop, never a wet one, to go over the floors to remove dust and other dirt on it. You don’t need to pay an arm and a leg for cleaning products for your hardwood floor since it is naturally shiny and glossy and only needs a simple cleaning to bring out the sheen once again.
3. Look at the bottom of your furniture

Now is a good time to walk around the room and make sure that all of the furniture bottoms don’t have any sharp edges on them. You may want to invest in some felt padding that can be added to the bottom of the furniture legs for extra protection. You can often find felt padding protectors at a dollar store that could literally save you hundreds of dollars by protecting your new hardwood floor.
The biggest part of maintenance is keeping an eye on your floor and picking up any spills as they occur while repairing any minor damages immediately such as small scratches. With regular preventative maintenance, you can keep your floor looking as good as it did the first day it was installed.


from Home My Heaven: Home Improvement Blog http://www.homemyheaven.co.uk/2017/10/top-tips-hardwood-flooring.html