Monday, 30 April 2018

5 Woodworking Projects for Beginners (Blog Swap with Sawdust 2 Stitches)

Hi friends! Hope your Monday is going well. Today, I’m over at my friend Corey’s blog, Sawdust 2 Stitches, sharing some of my favorite projects. And below, she’s doing the same. Basically, it’s a good ol’ fashioned blog swap! If you’ve never seen this happen before, it’s something bloggers used to do a TON back in blogging’s earlier days when things like Pinterest and Instagram were but a twinkling in the internet’s eye. It sounded like fun to bring this back every now and then (it feels a lot like introducing friends at a party; “friends, meet Corey; Corey meet my awesome friends!”), so I hope you enjoy! She’s got some amazing projects to share. <3


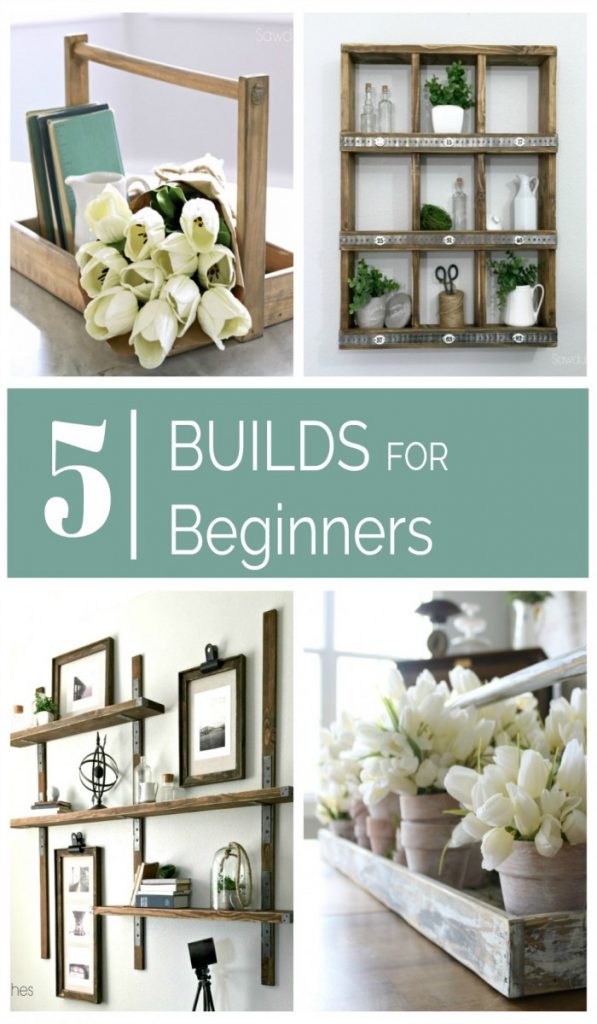
Hey All! This is Corey from Sawdust 2 Stitches, and I am thrilled to be working with our gal Sarah. I have gotten to know Ms. Ugly Duckling in real life, and man is she just as awesome in person as she comes across online! She pretty much does it ALL, and I freaking love that! Me? I tend to stick to what I know, and what I know is building. So today I thought I would share with you 5 small builds that I love. These are easy enough for a beginner builder, but even a seasoned builder will love the look of these little beauties.

1.The Bracket Shelf

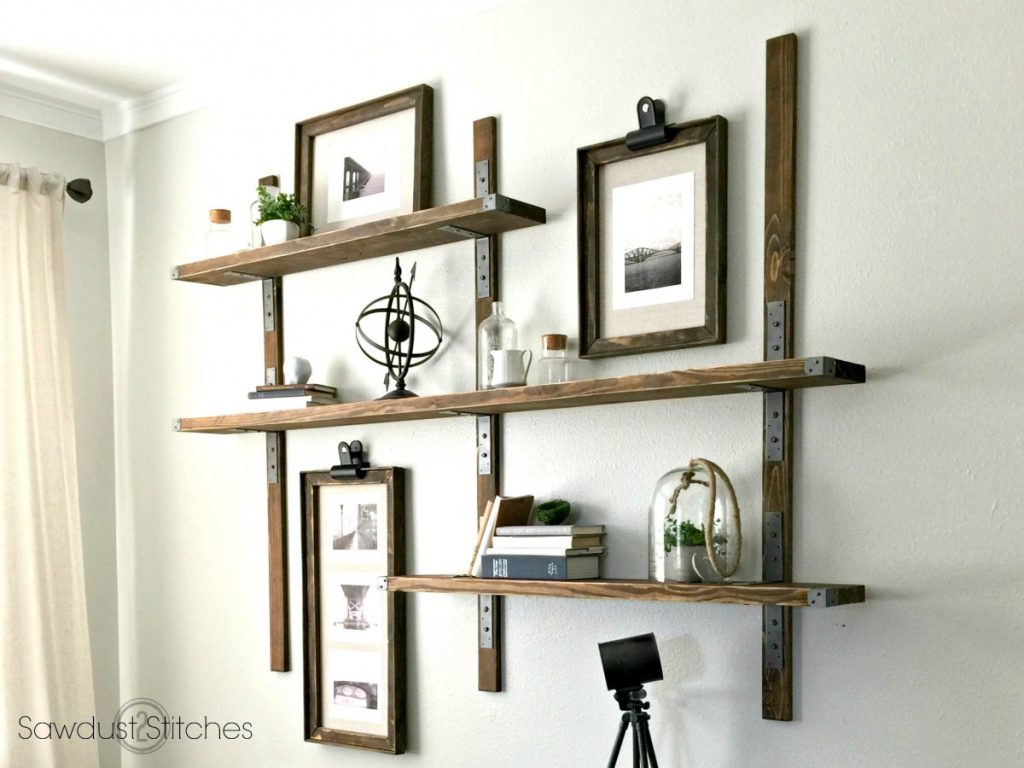
Let’s start with the simplest one I’ve got… this build includes literally 6 cuts ! Don’t own a saw? I bet if you ask someone at your local home improvement store they would be happy to help. (Or begrudgingly. You just never know. But most of the time they are happy to do it. Just be ready to explain what you are making, they always want to know. :) Anyways if you have limited power tools, this Bracket Shelf is the build for you!

2.Target Cubbies

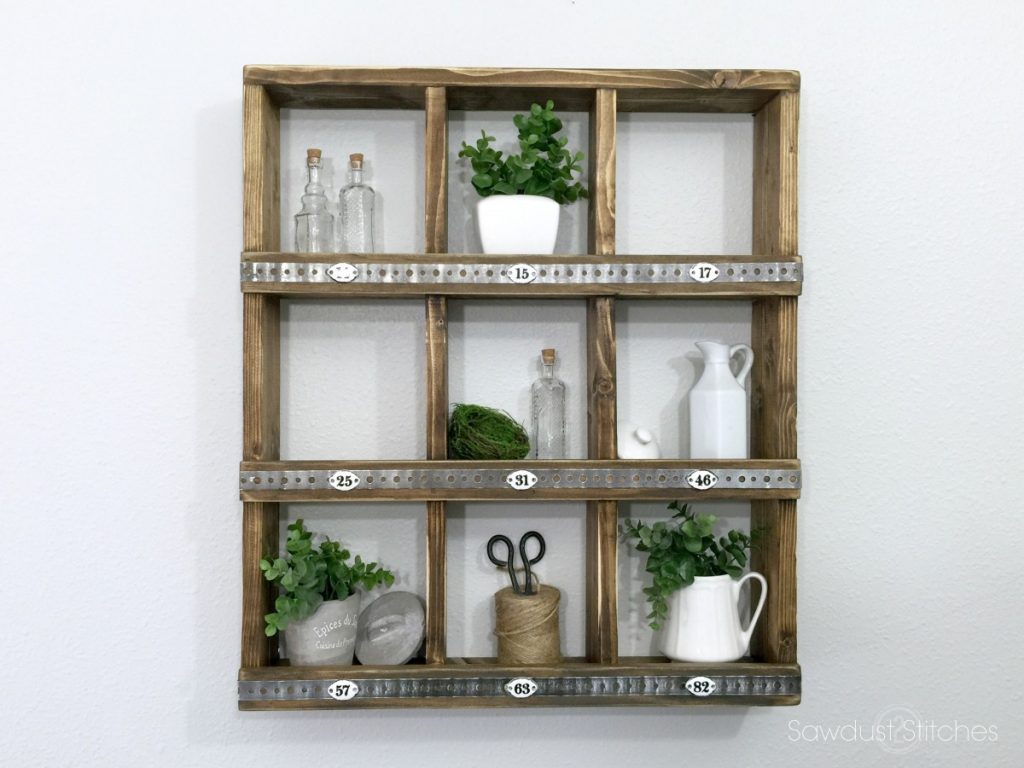
Here who likes Target?! I am assuming you all just mentally raised your hand. If so, this one might seem familiar. A few seasons ago Target had a very similar piece, but it ran a cool $50. Which isn’t awful but when you can make it for a little over $10, it seems like highway robbery. Am I right ? You can whip up this knock off in an afternoon using only saw and some wood glue! ( I used a nail gun, but it’s totally doable with just wood glue if you are the patient type… I am not.) Get the build plans here.

3.Farmhouse Tray

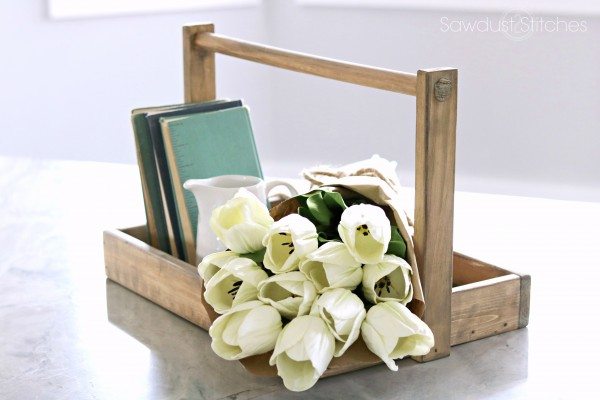
If you feel like you are getting the basics down, try to start including dowel rods, they take a basic build to the next level! I added a dowel rod in lieu of a straight edge board and it makes this a little less DIY and a little more Home Goods! I use this little Farmhouse Tray Caddy for every thing, and it makes a great gift!

4. Long Table Tray

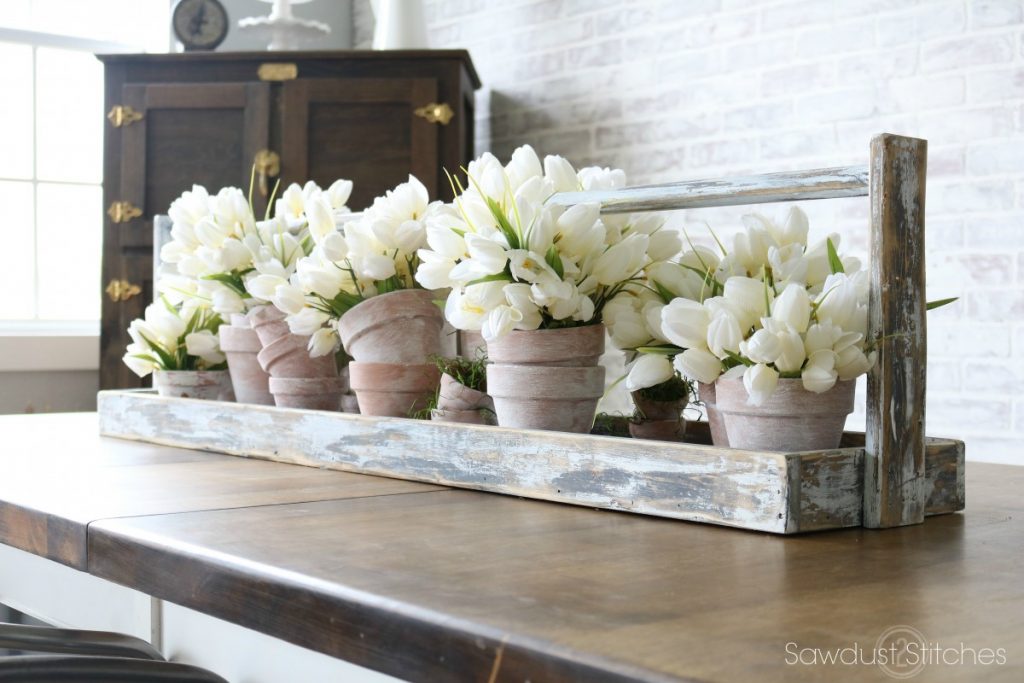
If you liked the last project you are going to love this. It’s the mac daddy, big brother to the farmhouse tray. I whipped this one up to use as a Tray Table Runner for table scapes!

5. Wall Organizer

Alright, I feel that once you have conquered basic straight cuts, the next logical addition to your building knowledge arsenal is angles. This is a functional project that introduces you to angles in small baby steps! But look at that beauty. This thing makes my morning sane. I hang up my kids clothes the night before, toss their socks and shoes in their bins, in the morning they just grab their stuff and go! So, do you want to make your school mornings a little less chaotic?

You can start by clicking here for the build plans.

There you have it folks, a few basic builds that will get you started, or if you already know your way around the shop, these builds are still mighty pretty to look at!

Thanks so much for having me. I loved stopping by and sharing a bit of what I do. If you are looking for more advanced builds, or even full room makeovers I’ve got those too. Feel free to stop by anytime!

Take Luck,
Corey

The post 5 Woodworking Projects for Beginners (Blog Swap with Sawdust 2 Stitches) appeared first on Ugly Duckling House.

You'll Also Love

Introducing: Love Create Celebrate


from Ugly Duckling House https://www.uglyducklinghouse.com/5-woodworking-projects-for-beginners-blog-swap-with-sawdust-2-stitches/

Tuesday, 24 April 2018

DIY Carved Wood Wall Art

I’m in love with my newest piece of wall art, and making it was a lot easier than it looks! Check out this power carved wood wall art and tell me where you think it should go.

Hey, friends!

I’ve got a little bit of picture overload for you today. It’s honestly due to a number of factors:

  • I loved the way my project turned out
  • I loved that I didn’t have to put on makeup to be in these photos because my face is covered up
  • Even though my face is covered up, I look like a badass in these photos
  • This project looks harder to do than it actually is
  • This is part of a blog/YouTube hop called the #WoodArtChallenge

Don’t know about the Wood Art Challenge yet? Well, in a nutshell, around 30+ of us DIYers/makers (bloggers, Youtubers, Instagrammers, etc.) are all teaming up to present you guys with a single hive mind creative challenge: make a piece of wall art that is SQUARE and made out of WOOD.

Thassit. That’s the challenge. And that means with so many ways to interpret that, there are LOTS of DIY ideas in store for you guys today! Just look to the bottom of this post for others who are participating.

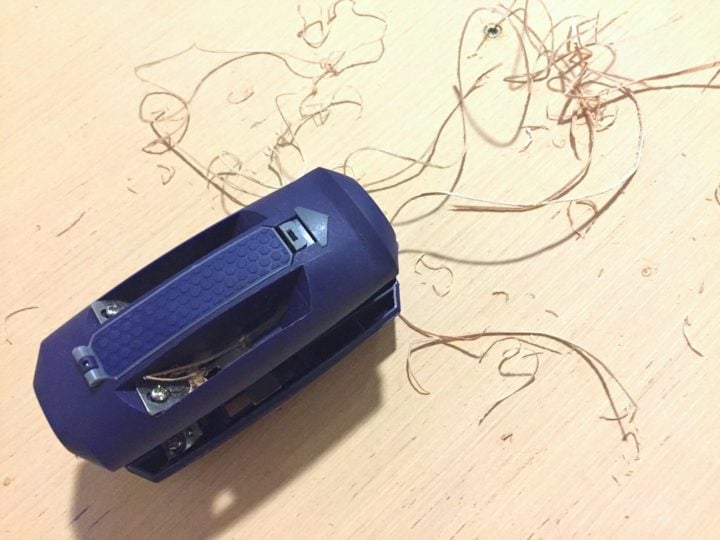
As many of you guys know (unless you’re new here because of the hop thing, in which case hi, stay awhile, we get weird around here… in a good way), I would call myself a woodworking “beginner”. Even though I’ve got plenty of house fixing shenanigans under my belt, there’s a whole other world of power tool fun that I am just now starting to learn more about. And that’s how I found myself using an angle grinder to make a block of wood look like fabric.

power carving wall art - sarah from ugly duckling house

Or twisted metal? Or maybe just crumpled paper? I still can’t put my finger on precisely what I think it resembles most, but it definitely doesn’t look like anything I’ve created out of wood before!

diy carved wood wall art - closeup

It was actually inspired by an artist I follow on Instagram, nugeandwood. My attempt was, of course, pretty small and quick compared to his giant, awe-inducing carved sculpture (which takes anywhere from a few weeks to a couple months to complete). Seriously guys — you’re missing out if you haven’t seen his stuff yet!

Nuge and Wood Inspiration Nuge and Wood Artist

The best part of it is, my DIY version doesn’t use a lot of tools to accomplish; the tools you would need to purchase are well within a normal DIY budget too, so this makes it a great beginner’s woodworking project!

What you’ll need:

  • eye/ear/clothing protection, and a breathing mask (this is a very sawdusty project! safety first!), a hat is good too
  • 1x8x8 poplar board (if you choose another hardwood, keep in mind that hardwood species carve  differently, or so I’ve read)
  • 4 1/2″ angle grinder (I bought mine, but there’s a very good chance a neighbor has one… Harbor Freight has them pretty cheap
  • 4 1/2″ carbide cup wheel from Harbor Freight (only $10, and no, this is not sponsored)
  • 4 1/2″ sanding disc in 40 or 80 grit (I preferred 40)
  • lots of sandpaper: extra coarse (around 40 grit), coarse (60-80 grit), medium (100-150 grit), fine (220 grit), extra fine (400 grit)… a lot of this you’ll probably already have
  • cling wrap
  • bar clamps
  • painter’s tape
  • wood glue
  • wood stain
  • sealer

DIY Power Carved Wall Art

1. Cut pieces to size

Cut down the 1×8 poplar into 6 roughly-equal pieces (it’s ok if it’s slightly off). Line them up the way you would like to establish the block you’ll carve into. Be mindful of the layers below; you’ll carve through parts of the top boards to expose lower layers.

Cover your work surface with cling wrap and tape the ends with painter’s tape (to prevent you from gluing your wood block to your work table).

For my version, I had two scrap pieces that had been Kreg Jig’d together for another project I forgot about ages ago. Since these pieces formed a 90-degree angle, they were perfect for using as temporary clamp pieces in the next step.

2. Glue and clamp the entire block together

I glued 2 stacks of 3 pieces each of the poplar, side by side. This sounds confusing, but it’s not. Just make two equal stacks of your poplar pieces and glue them in order. Be sure to cover the layers in between and the side where the two stacks touch with an ample amount of glue.

If you have or make clamp helpers like I did, put painter’s tape on any sides that will touch the glue… just in case.

With the glue still wet, clamp the ever-loving crap out of the wood block so that it will dry as one solid piece. Be sure to clamp the sides together and the layers (clamp vertically and horizontally).

3. Cut to square and sketch your carving

Since the top and bottom ends of the block aren’t perfectly square, now is the time to cut the excess off so you have a truly square block. Sorry, them’s the rules.

I used the back of my block to sketch out a few lines of where I thought “folds” of my make-believe wood fabric would be, along with giving the carving disc a few test runs to make sure I had a good handle on it.

4. Start carving!

With my carbide blade attached, I went to town on my wood block. Gently, at first, then more aggressive.

carving wood art piece

It made surprisingly quick work of the wood, and I began to learn how to control the curve and carve of the disc to get the shape I wanted.

DIY carved wood wall art

This part was the quickest and most fun! It really only took an hour or two to carve the bulk of what I wanted. When I felt I had a better handle on how to get the shape, I went in again for a second pass to get things smoother.

me - sarah - carving wood for wood art challenge (1)

5. Sand.

Ugh. This part. No fun. But I highly recommend getting a 40-grit sanding disc to attach to the angle grinder as well. This made getting those first big chunks sanded away to a smoother result. I tried again with the 80-grit one, but it left lots of bumps and I regretted it.

(For those who might suggest the Arbortech Turbo Plane to avoid/reduce all the sanding — I do know of the tool. I think it would be awesome to try one and haven’t yet tried it myself. But for a beginner’s project, it doesn’t make sense to recommend a blade that costly. Usually budget is a reason for DIYing and/or part of the roadblock for why someone might not try to DIY, so I’m not going to recommend it here. For professional woodworkers or those who intend on churning out multiple carved pieces, that would be worth giving a try though.)

6. More sanding.

After trying a few other battery- and corded- assisting tools to sand down the remainder, I had to resort to good ol’ fashioned sandpaper for the rest. I hated this part because I was already tired from carving.

7. Stain and seal.

At first, I was really tempted to go with a bold color, like blue or green, since the grain reminded me of a topographical map. I picked out a brown stain instead, because I was worried that the few lines where I used wood glue to connect pieces would not take stain and/or detract from the rest of the piece. I’m sure with more glue-up practice and better clamps, I could see fewer lines from the glue. Either way, I still loved the result!

8. Hang and admire your work. 😉

After way too much dry time (it rained for two days and things just would. not. dry.), I got fed up and finally hung my piece using some of my favorite hangers (they allow the art to sit flush on the wall). I love it!

diy carved wood wall art in the entryway

For now, it’s hanging in the entryway, but I may move it at some point.

diy carved wood wall art - power carving - woodworking how to - wood art challenge

What do you think? What color would you have picked? Would you have put a frame around it? I considered so many possibilities on this one, that the options are still pretty tempting. I’d love to hear your ideas.

P.S. If you’re wondering what those pictures taped to my garage wall are all about, check that out here. K is a real prankster.


Don’t forget, this is a WOOD ART CHALLENGE and a number of other folks are participating, so go check them out!

TONS of unique and creative pieces of wooden wall art!

1) Reality Daydream / 2) 100 Things 2 Do / 3) House Becoming Home / 4) Anika’s DIY Life / 5) My Repurposed Life / 6) 3×3 Custom / 7) One Project Closer / 8) Merrypad / 9) Chatfield Court / 10) Create & Babble / 11) Hazel & Gold / 12) Jen Woodhouse / 13) Sawdust 2 Stitches / 14) Wood Work Life / 15) Remodelaholic / 16)  Evan & Katelyn / 17) Jaime Costigio / 18)  Pneumatic Addict / 19)  Bower Power / 20) Lazy Guy DIY / 21) My Love 2 Create / 22) Addicted 2 DIY / 23) Her ToolBelt / 24) Shades of Blue / 25) Ugly Duckling House / 26) The DIY Village / 27) DIY Huntress / 28) Mr Fix It DIY

The post DIY Carved Wood Wall Art appeared first on Ugly Duckling House.

You'll Also Love

Wood Inlay Ornament with German Glass Glitter


from Ugly Duckling House https://www.uglyducklinghouse.com/carved-wood-wall-art/
Thursday, 5 April 2018

Dueling DIY: Installations and Seeing the Finish Line

My friend Charlotte and I are in a DIY battle to renovate our guest bedrooms. Catch the entire series here.

Hey hey, friends! Sorry about the delay — I know you expected this post yesterday. It’s been one of those “technology sometimes sucks” sorts of weeks, so I’m just going to jump right in and not dwell any further on crappy internet-related problems. It’s time for a Dueling DIY: Guest Room Gauntlet update, and vlog #3!

dueling diy - guest room gauntlet - sarah vs charlotteIf you need a recap, start here and check out the updates here and here. I created the Dueling DIY series because it gives me the motivation I need to stay focused on a house project that I might otherwise shove further down the to-do list (send to project limbo, basically). By challenging another blogger and committing to these bi-weekly updates (along with a vlog recap each month), I get a lot more done. The smack talk is also a lot of fun — especially when I get to make my challenger cry. This time around, I’m challenging Charlotte from At Charlotte’s House, who is also redoing a closet she’s saying is a guest room and pretending her projects are as badass as mine.

cohost charlotte from at charlottes house

Dueling DIY: Guest Room Gauntlet

The biggest news first, shall we?

The Murphy bed

THE MURPHY BED IS INSTALLED!

murphy bed install

Over the last few weeks, I’ve been working almost nightly to get the bed completely built and install all the hardware.

dueling diy guest bedroom murphy bed building process

installing murphy bed pieces

I had to iron on the edge banding and trim it all down so that the unit is ready for paint (delaying all of that painting until more of the built-ins are completed; it’s a lot of painting).

iron on veneer edge banding

edge banding on murphy bed

Sidenote: I had to convince myself to buy this little edge trimmer tool. It was over $10, which just seemed like a needless splurge. But it saved me so much time! I went from “this is a huge waste of money” to “this thing is so handy” in one use. I’ve used edge banding on a few projects before, so I’m certain I’ll use it enough again to make it a worthwhile investment.

cutting down edge banding

Sidenote to the sidenote: I totally loved the sound. Some people hate it like nails on a chalkboard, though. Just a fair warning!

Installation

When I say “installed,” I mean that the mattress is in place and the whole unit is bolted into the wall. The good news: all of the hard parts are DONE! The bad news: the springs are so tight that the whole thing almost squashed me!

The unit is made with a hardware kit, which includes installing a piston lift system to help keep the bed closed and allow the unit to spring back into place when not in use. But that same hardware is meant to be counter-balanced by a heavy mattress on the inside (skip the box spring, FYI). So when you’re installing, trying to keep the thing open is tough, since the unit is designed to be front- and top-heavy and wants to fall over (aka, prime squashing territory). It’s definitely a situation where I needed a helper, so I’m glad I wasn’t cocky enough to install it until K was home from work.

murphy bed pulled open

Together, we got the top header bolted to the studs (VERY important to secure this part, so we went with bolts instead of screws to make it more secure) and there it was: my new Murphy bed, installed!

murphy bed installed

Of course, there’s still more left to do: install some handles (notice how there isn’t a way to open the darn thing?? yeah… gotta fix that) and start building the cabinetry and shelving that will flank the sides of the bed and give the entire wall a clever, built-in look.

murphy bed with center bed unit and built in shelves and cabinets on both sides

Since we went with the biggest news first, all the other little updates seem a little less impressive to me. So I’ll recap them all really quickly:

hanging planters next to window for daylight exposure

In case you missed it, there are new hanging planters along the window. Click here for that tutorial.

how to seal art with epoxy resin

I sealed one of the paintings along the new picture ledges with art resin — such a cool project! You can find that recap and tutorial here.

Speaking of the picture ledges, I built a total of 4 but only wound up using 3. I took the 4th and placed it under the TV for a convenient way to store remotes. Now guests won’t have to wonder where they are.

ledge for remotes under tv

And speaking of the window, I noticed that the conduit I’m using for the curtain rod is just shy of fitting properly into the DIY brackets I made. I want to add some decorative knobs (finials?) to each end, so that means extending the pole just a few inches. I’ll have a tutorial on this soon, but here’s a hint if you’ve ever wondered about gluing metal and wood:

epoxy glue for joining wood and metal

Next plans

Having the Murphy bed mounted to the wall makes it very obvious that there is so much floor space in the room. That means a new focus on trying to optimize this space for all of the other possible uses: a secondary office for K (which means we’re on the hunt for a good dresser to turn into a desk), entertaining space (the speakers have to go somewhere, maybe add seating, etc.). It should make for an exciting next month for this series! I see the finish line in sight.

Vlog #3!

Don’t forget to head over to Charlotte’s blog to check out her progress as well. She says she’s almost finished with her room, but then again, she already said she was going to be finished by this update. So if you leave her a comment, make sure she knows that you know she’s a liar. And again, don’t let her fool you with those pillows and tchotchkes: she’s not done with her bed yet either, and that’s an attempt to hide her secret shame.

P.S. I can’t WAIT to make more progress on this built-in install!

The post Dueling DIY: Installations and Seeing the Finish Line appeared first on Ugly Duckling House.

You'll Also Love

Dueling DIY: Guest Room Gauntlet!
Dueling DIY: First Wall Painted and Murphy Bed Pro...
Dueling DIY: Dark Sage Green, Curtains, and Vlog #...
The Guest Bedroom Picture Ledges are Done!


from Ugly Duckling House https://www.uglyducklinghouse.com/dueling-diy-installations-and-seeing-the-finish-line/