Thursday 30 August 2018

DIY Floating Deck, Part 4: Trimming Deck Boards and Rounding the Edges

I’m building a DIY floating deck in my back yard! Catch the whole thing, start to finish, right here. In this chapter, I’m covering how I trimmed all the deck board ends and rounded off the cut. How to Trim Deck Board Ends Tools and Materials Needed Chalk snap line Circular saw (I now have […]

The post DIY Floating Deck, Part 4: Trimming Deck Boards and Rounding the Edges appeared first on Ugly Duckling House.


from Ugly Duckling House https://www.uglyducklinghouse.com/diy-floating-deck-part-4-trimming-deck-boards-and-rounding-the-edges/

Friday 24 August 2018

5 Modern (and Totally Doable) Woodworking Projects to Tackle This Fall

Happy Friday, friends! As you guys have seen in prior months, I’ve been featuring a few of my favorite bloggers about once a month for a blog swap. It’s something kinda “old school” that bloggers used to do back in the day (pre- Pinterest and Instagram) to help bloggers and readers find each other and get more inspiration. We’re bringing it back with this series in 2018! Today, I’m over on Stacy from Not Just a Housewife’s blog (whom I’m sure some of you know and love already) sharing a few highlights from my DIY past. And that means Stacy is over here today to share some of her favorites. She is AMAZING and sweet and I hope you’ll love these projects of hers! Take it away, Stacy:


5 Modern Woodworking Projects to Consider While the Weather’s Still Warm

Hello UDH readers! I am so thrilled to be visiting today. Sarah is such a kick butt DIYer and I am lucky to have met her several times in real life.

I live in Utah and I share the journey of fixing up our 1938 home. My blog is full of budget friendly DIY projects, decorating ideas, gardening, and family life. Sarah and I both share a love of building things so I thought I would share some of favorite builds with you today.

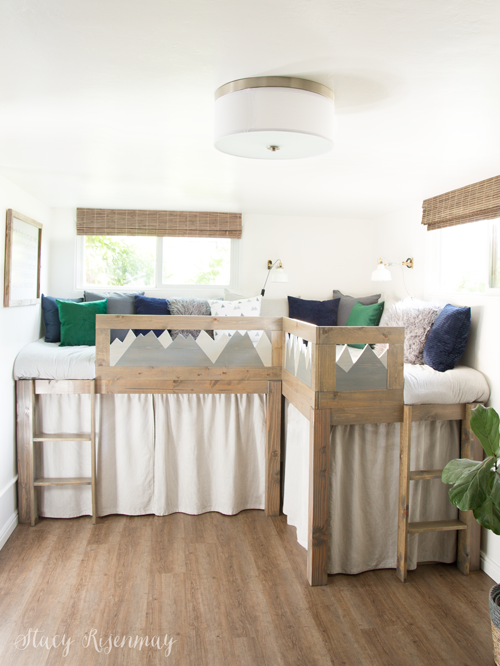
L Shaped Beds

I’m a mom to four boys and I recently gave both boy bedrooms a complete overhaul including building new beds for them all. This mountain themed room is long and narrow so to make the most of this space, I built the beds in an L shape with storage underneath.

Sliding Planter Wall

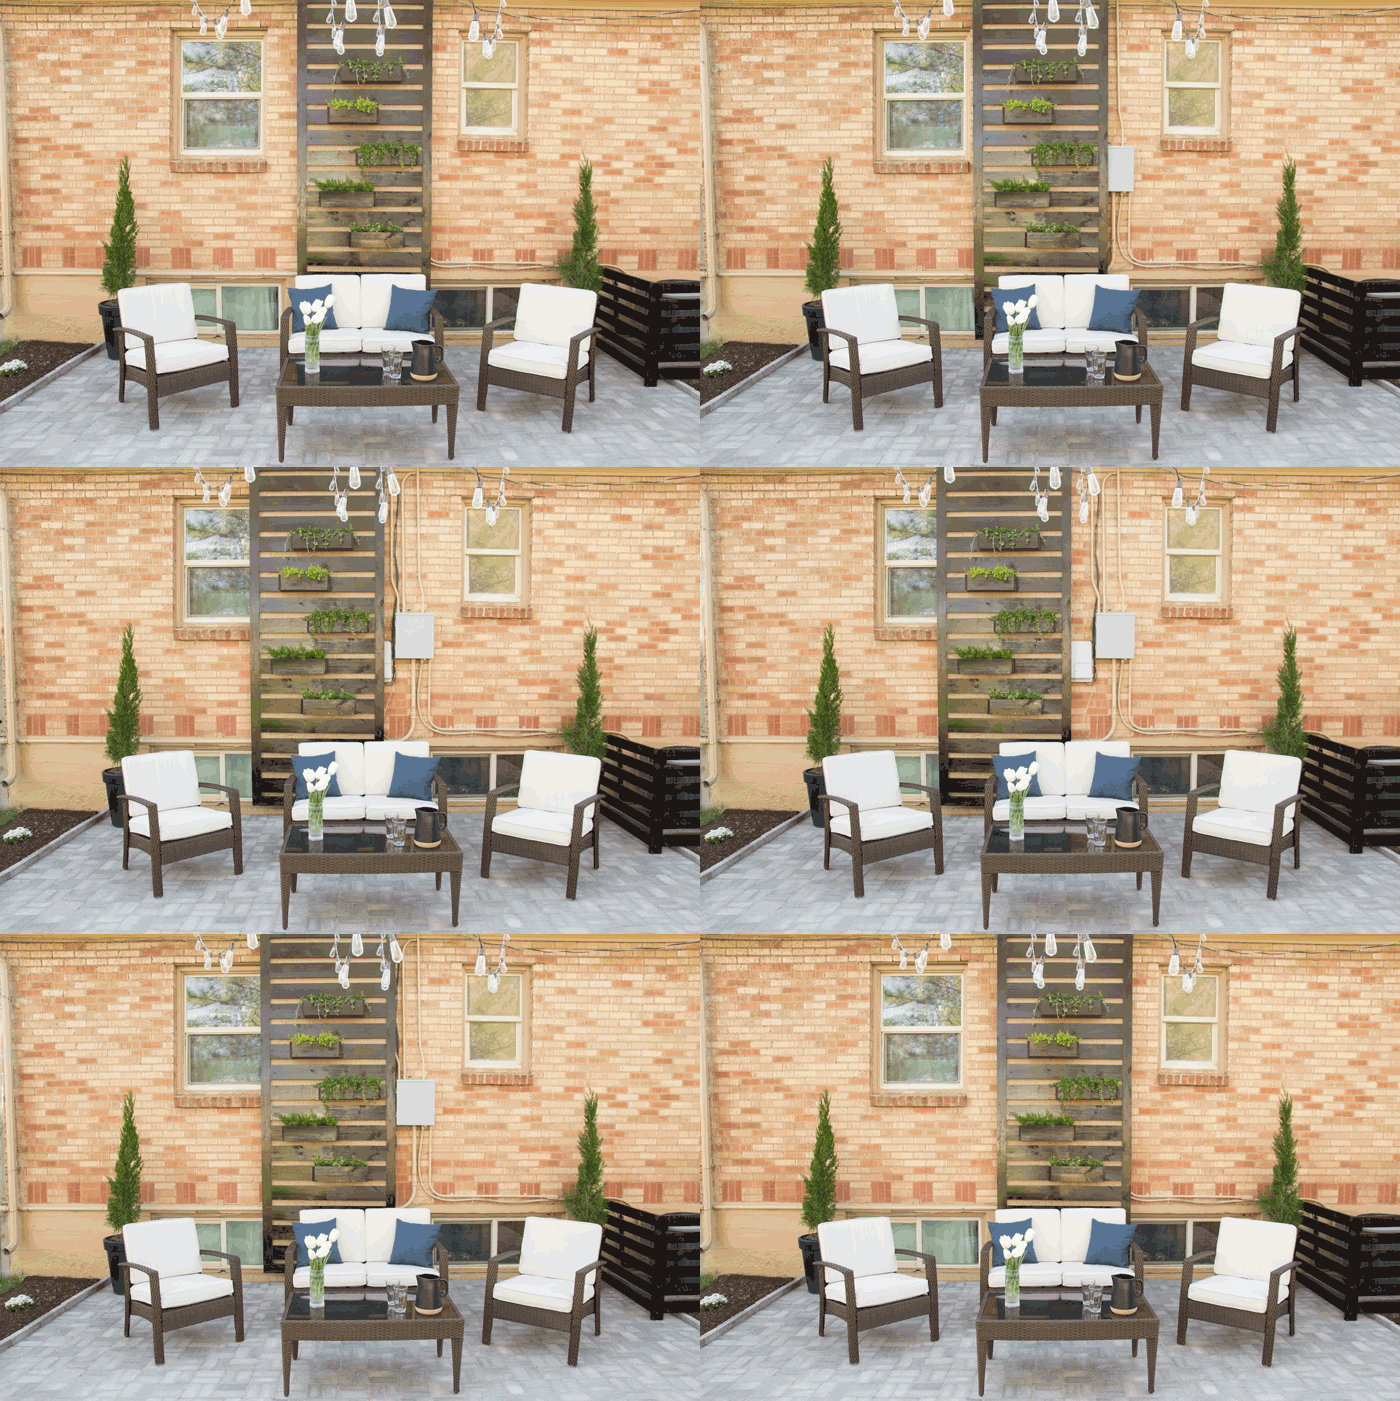
This spring I installed a paver patio. I wanted a way to hide the electrical boxes on the back of our house that would still allow me to access them when needed. I built this sliding wall.

Floating Bathroom Shelves

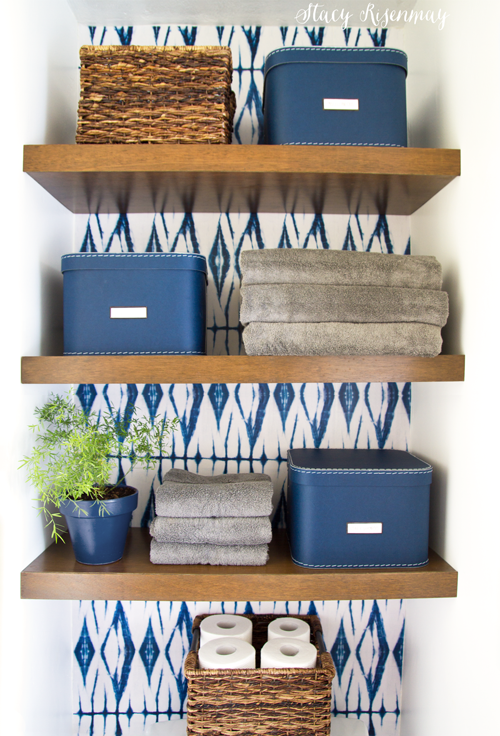
Gutting a bathroom is a dirty job, and while it is fun in its own way, the really fun stuff is in the finishing details. I built floating shelves for above the toilet for added storage. I love how the whole bathroom turned out, especially the sliding mirror!

Outdoor Chairs

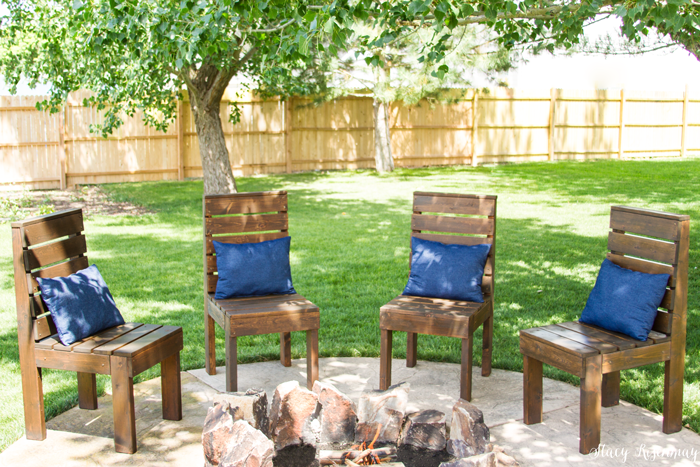
We have lived at this house for 11 years and last year I finally got around to building chairs for the fire pit. Now we don’t have to haul out the dining room chairs every time we want a fire! These are really easy to build too.

Modern Planter

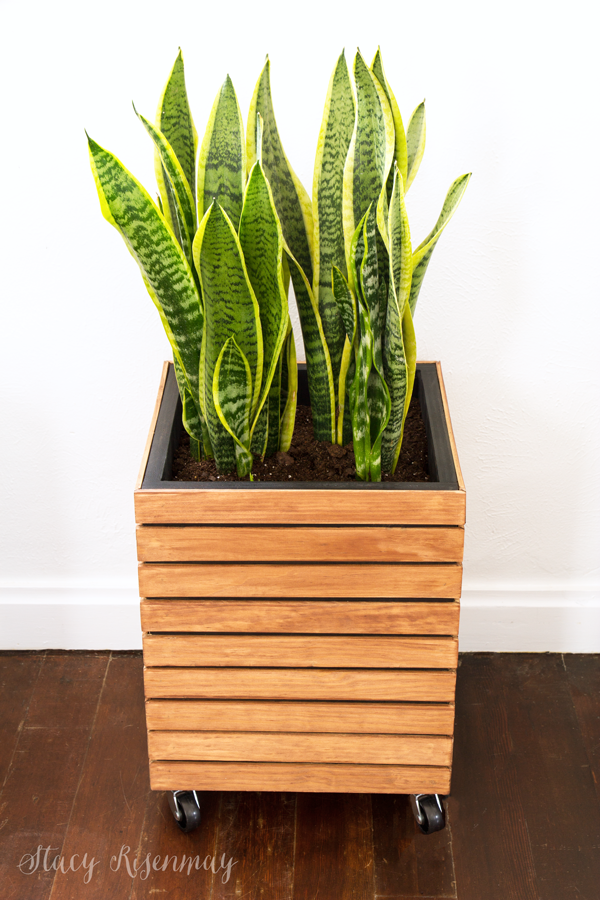
I am a crazy plant lady. I have an obsession with buying plants. With each new plant, the hunt for the perfect planter begins. A lot of the time I end up making the planter because I have a specific look in mind. This slatted planter is super easy to build! I recently did a round up of my favorite 15 DIY planters from my blog.

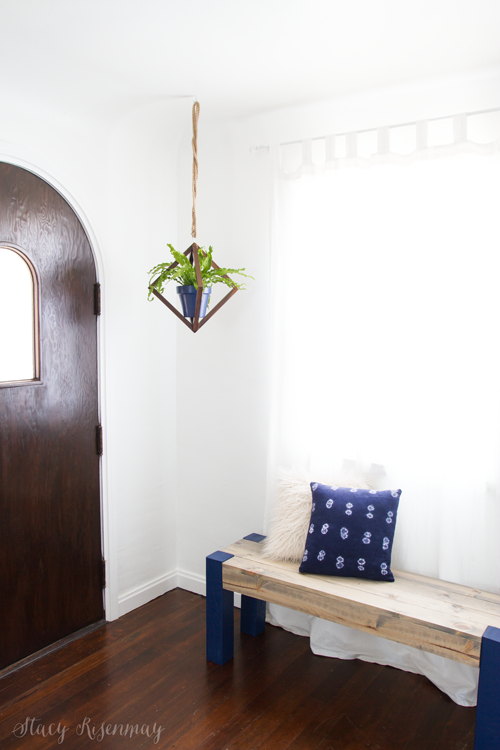
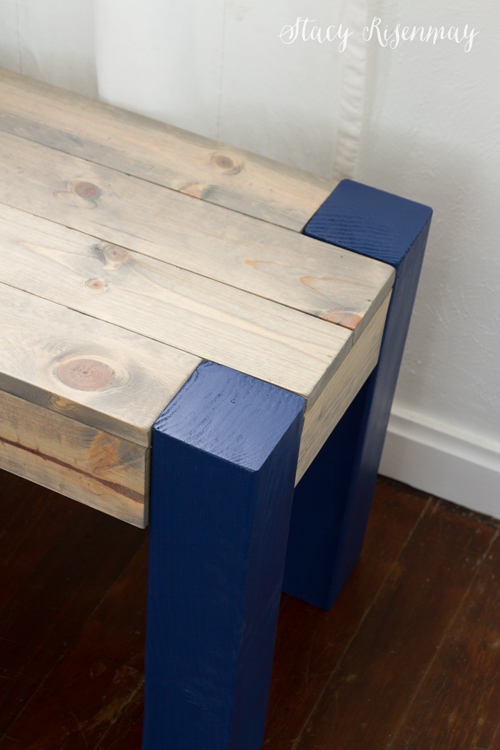
DIY Bench

My front door leads directly into our family room. I needed to create the feel of an entry way in a tiny space. I built this bench and it works perfectly!

Thanks for letting me share today. I would love it if you checked out my site. I have been working all summer on a makeover on the exterior of our house that I will be sharing soon. Our basement is our next big project after that. Lots of fun things will be popping up on the blog and I’d love for you to follow along!

The post 5 Modern (and Totally Doable) Woodworking Projects to Tackle This Fall appeared first on Ugly Duckling House.

More Where That Came From

5 Woodworking Projects for Beginners (Blog Swap wi...
Introducing: Love Create Celebrate
Triangle Tea Light Holders
Scrap Wood Outdoor Bench Seat | DIY garden bench p...


from Ugly Duckling House https://www.uglyducklinghouse.com/5-modern-woodworking-projects/

Friday 17 August 2018

Cleaning House (Please Stand By)

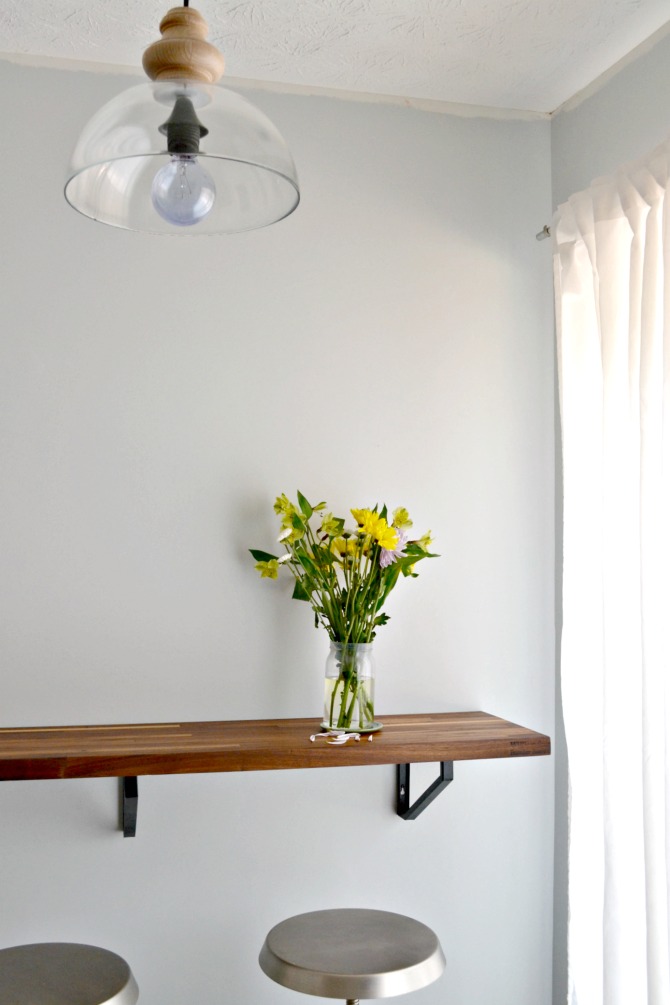
Happy Friday, friends! The kitchen nook area got a nice little update this week with a new set of pans and a wall-mounted pot rack.

kitchen bar area with pot rack

The last time I posted about this area was around this time of year in 2016. It seldom gets any love because it’s the spot right before the sliding glass door (aka, the dumping ground for all of the tools and supplies while I work on the shed and deck outside).

lighting-kitchen-bar-and-stools

It looks even better though when you compare it to how it looked the first year I moved in!

kitchen nook area 2011

Funny how we just need the proper motivation to get organized sometimes, right? For me, the trigger to clean up this area was that white cookware set. I found them at TJMaxx and was immediately drawn to the white enamel and faux-wood handles. K and I discovered the first pair of pans while trying to kill a little time before meeting my parents for dinner one night, and we went on a hunt to Homegoods and another TJMaxx for the rest.

UDH tip: I assume it’s common knowledge, but just in case you didn’t know: if you find something at TJMaxx or Homegoods or Marshalls but it doesn’t have a full set, you can often find matching items at the other nearby stores. You have to take a little bit of a gamble on it, but I was pretty confident we would find more pans (given how many duplicates we found of the pans we bought). And if you’re interested on these kids of shopping tips, I have more here and here.

Anyway, the purchase of the pans made me finally buy the pot racks, and not having any room in my kitchen cabinets for either finally made me go through my pots and pans and get rid of some old ones. After K moved in this year, there’s been a lot of re-organizing to either get rid of duplicates, make room for his collections (he’s got a few, so it’s a challenge!), or just buy new sets of things to better match our combined tastes.

kitchen wall pot rack with-walnut-butcher block countertops

And speaking of reorganizing, the “please stand by” is in regard to me moving servers for this site. That isn’t really going to change how things look, but rather just trying to get a lot of technical stuff dealt with behind-the-scenes so I can then make more improvements. So, if you see something funky over the next couple days/weeks, there’s a good chance I’m already aware of it and trying to fix it, but still feel free to let me know. Whenever migrating, there are things that sometimes disappear (like even this post, so I have held off on my next deck update until I know for SURE I won’t have to do that work twice)!

I hope you guys have a wonderful weekend!

The post Cleaning House (Please Stand By) appeared first on Ugly Duckling House.

More Where That Came From

Rustoleum Painted Countertops and Floors: Months L...
I Painted My Kitchen Countertops
Installing a Butcher Block Countertop: Part 1
Installing a Butcher Block Countertop: Part 2


from Ugly Duckling House https://www.uglyducklinghouse.com/cleaning-house-please-stand-by/

Monday 13 August 2018

Mom’s Quick and Easy Hot Pepper Jelly

Like many first-time gardeners, my humble backyard garden has produced more vegetables than I know what to do with! So, I spent last Saturday morning with Mom and learned to make hot pepper jelly using several pepper varieties from my vegetable garden: bell peppers, banana peppers, and jalapeños.

red pepper jelly in quilted mason jars with tiled background

I’m sure for the sake of accuracy, I should probably call this jam since we blended the pulp of the peppers and seeds to make it, and jelly is typically made with just the juice of something (or so the internet tells me). But jelly is what Mom calls it, so who am I going to believe?

The process of learning to make jellies, jams, and preserves was a new experience for K and I during our visit. Mom walked us through the steps, equipment, sterilization methods, etc. I’m working on a longer post about general rules of thumb for home canning, so be on the lookout for a separate walkthrough to cover those concepts in more detail. This post is meant mainly for the simple, straightforward recipe, but I have some very basic info here, too.

process of home canning in water bath

In order to keep everything as uncontaminated as possible, things moved pretty quickly once it came off of the heat! You’ll need to sterilize your jars before beginning, but Mom keeps them inside the dishwasher (still hot) until they are ready to use, and the lids/bands in a pot of hot water on the stovetop as we prepared the jelly.

Home Canning Supplies

Onto the recipe!

Print

Mom’s Quick and Easy Hot Pepper Jelly

hot pepper jelly with jalapeno and green peppers on marble and copper serving plate with tiled backsplash

If you’re looking for a sweet n’ spicy appetizer with some extra kick, pour a generous helping of Mom’s hot pepper jelly on softened cream cheese, then snarf it down with crackers. It’s great for holidays and parties, too!

  • Author: Sarah Fogle
  • Prep Time: 30
  • Cook Time: 15
  • Total Time: 45 minutes
  • Yield: 4 tall jars
  • Category: Appetizer
  • Method: Water bath

Ingredients

  • 3-4 regular-sized bell peppers (we used a few small ones that would probably have equalled one regular one)
  • 4 jalapeño peppers
  • 1 small habanero pepper
  • 1 box package of powdered pectin
  • 1 cup apple cider vinegar
  • 5 cups sugar

Instructions

  1. Sterilize canning jars, lids, and bands according to manufacturer’s instructions. Fill a large pot with water and heat it up on the stove.
  2. Chop peppers into chunks. For less heat, remove seeds (we removed half of the jalapeño seeds in this batch). Put all chopped pieces in blender and blend until there are no large chunks.
  3. Place pepper blend in a large saucepan over high heat, stirring constantly. Add vinegar and pectin and continue stirring until the mixture is at a full rolling boil.
  4. Add sugar and stir, returning to a full roiling boil for exactly 1 minute.
  5. Remove from heat and skim off any foam with a spoon.
  6. Ladle jelly into jars up to 1/4 inch from the top. Cover with lids and bands; screw on tight.
  7. Place jars into canning pot, either on canning rack (slowly lower it into the pot) or (in Mom’s case) with a dish towel on the bottom of the pot to keep the jars from touching. The water should cover the jars and be hot, but not boiling. Bring water to a boil and let process for 5 minutes.
  8. To prevent the seeds from settling on the bottom, flip the jars over for about five minutes while the jelly begins to cool. Turn them right side up to cool for the rest.
  9. You might hear pops from the lids forming a vacuum as the jelly cools. After 12 – 24 hours of cooling, remove the bands and push your finger down on the lids. If the lid still looks like it has a bump and/or flexes when you push down, the lid is unsealed and needs to be immediately stored in the fridge or reprocessed.

Notes

  • Prepare and sterilize your jars, lids, and bands ahead of time. Here’s a more extensive post on the subject.
  • Never reuse lids.
  • Homemade jelly is meant for small batches; doubling up the recipe can mess with the pectin and cause the jelly not to set properly.
  • If you don’t hear the jelly lid pop, or if you test the lid and it isn’t sealed properly, you can change the lid and reprocess it or immediately put it in the fridge and eat. It will keep for about a week with the lid on in the fridge.
  • Jelly/jam that’s unopened can last for up to two years if it’s given a proper water bath. Once opened, you can store it in the fridge for up to three months (I’ve read six months online as well, but I’m not sure about that).

Keywords: pepper jelly, pepper jam, jelly and cream cheese appetizer, jalapeño jelly

moms hot pepper jelly on marble display plate and sage green tile background


A Note from Me & Mom:

Instagram is fully responsible for this recipe posting so quickly after this weekend. I went over to Mom and Dad’s with the intention of learning how to make Mom’s pepper jelly from my garden and sharing it on the blog for you at some point. But what I didn’t expect was the number of comments on my post about sharing more from “Cathy’s Kitchen.”

We have lots of family recipes like this, and I’m thrilled that so many of you want the stories that go with (like the time Granny knocked her kitchen timer in a big batch of her Sunday sauce, and we didn’t realize where it had gone until she thawed some out later that year — we still laugh about that one! Recipe coming in a future visit to Mom’s). I’m still pretty new to cooking and have zero intentions of making this blog all about recipes, but I’m glad I get to sprinkle in the things I’m learning as we go, much the same way I have with the rest of my home and DIY journey. And even to those of you who weren’t following when she passed, it means a lot to bring some of her favorite activities to the blog (she also taught me cross stitch, which you’ve already seen here too!). ❤


Don’t forget to pin it to save for later!

family recipes - mom's hot pepper jelly

The post Mom’s Quick and Easy Hot Pepper Jelly appeared first on Ugly Duckling House.

More Where That Came From

Herbed Goat Cheese Crostini with Roasted Cherry To...
Chicken Enchilada Dip is Cheesy Goodness
Puff Pastry Pinwheels with Prosciutto, Pesto, and ...


from Ugly Duckling House https://www.uglyducklinghouse.com/homemade-hot-pepper-jelly/

Thursday 9 August 2018

Wood and Metal DIY Industrial Desk

Hey all! It’s Tylynn, dropping in from Bitterroot DIY again. This week I’ve moved up from scrap wood projects to share a little bigger build – a wood and metal industrial desk.

I designed this desk a few months ago for my Father-in-law’s auto shop. Though I know how to weld, I don’t currently have all the necessary tools. So, I sent the plans to one of my FIL’s friends. He welded the frame, sent it back, and I built the wood portion. It was a group effort, and the finished product looks great in the shop!

Wood and Metal DIY Industrial Desk

For the purposes of this tutorial, I have overall dimensions for the frame if you want to weld it yourself. But I’m no expert in that field, so I don’t have details for those steps. If you have questions, I’m happy to try to clarify the design. Shoot me an email or leave a comment over on my page.

Now for the good stuff!

Wood and Metal Industrial Desk

Step 1 – Weld the Metal Frame

Overall dimensions for the frame:

Front

Wood and Metal Industrial Desk

Right

Wood and Metal Industrial Desk

Left

Wood and Metal Industrial Desk

Top

Wood and Metal Industrial Desk

I designed the frame to be constructed with 2″ right angle steel so that it was easy to pop the plywood into place. It’s up to you if you would rather use a different style of steel pipe, but the plywood sits nicely in the right angle.

Step 2 – Cut all the wood parts

You will need two 4 x 8 sheets of 1/2″ plywood for the bottom shelf, sides, and front of the desk. I recommend measuring the frame once it’s finished to account for any variability at the welded joints, but in a perfect world, the following is the list of cuts:

  • 1   |   1/2″ Plywood @ 2′ 5″ x 2′ 11 3/4″ (right side)
  • 1   |   1/2″ Plywood @ 3′ 11″ x 2′ 11 3/4″ (front right)
  • 1   |   1/2″ Plywood @ 2′ 5″ x 2′ 11 3/4″ (front left)
  • 1   |   1/2″ Plywood @ 1′ 11″ x 2′ 11 3/4″ (left side)
  • Cut the bottom shelf to fit as shown in the diagram below:

Wood and Metal Industrial Desk

Cut your pieces and do a dry-fit in the frame.

Place the bottom shelf sections first:

Wood and Metal Industrial Desk

Then, work your way around the side and front shelves:

Wood and Metal Industrial Desk

Make any adjustments necessary.

Once you like how everything looks and fits together, remove the wood from the frame and finish as desired. It’s much easier to finish the wood separate from the metal frame than to try to stain it while in the frame.

I used Minwax Stain in Special Walnut.

After the stain is completely dry, attach the bottom shelf, sides, and front to the welded frame with Liquid Nails.

Wood and Metal Industrial Desk

When it was all said and done, we added a few interior shelves and attached them to the bottom shelf with right angle brackets.

Step 3 – Install the countertop

We used granite for the countertop and attached it with Liquid Nails.

If you want, you could use plywood, wood planks, concrete, etc. for the top … designer’s choice!

Wood and Metal DIY Industrial Desk

I really like the mix of materials on this desk — it adds so much character and is perfect for an auto shop!

Wood and Metal DIY Industrial Desk

Enjoy the free plans, and happy DIY-ing!
For more project ideas like this, I’d love it if you stopped by my blog. You can also find me on Pinterest. And to stay up to date with the latest shenanigans, follow me on Instagram!
Don’t forget to pin it!
wood and metal diy industrial desk - free plans

The post Wood and Metal DIY Industrial Desk appeared first on Ugly Duckling House.

More Where That Came From

Scrap Wood Kitchen Decor – DIY Herb Signs
Scrap Wood Outdoor Bench Seat | DIY garden bench p...
Favorite Projects of 2015: Friends Edition
Easy DIY Craft Desk


from Ugly Duckling House https://www.uglyducklinghouse.com/wood-and-metal-diy-industrial-desk/
Tuesday 7 August 2018

Decorating Ideas for Furnishing the New Deck

Now that the floating deck is done (or nearly done), my thoughts have turned to decor! Check out this inspiration board on what I’m planning to build, buy, and make over to get a relaxing, modern deck.


I suppose it’s only natural that, now that the floating deck build is more done than not-done, my once hurried thoughts on how to create the frame or get the 45 degree angles right has moved on to the exciting decorating part.

In short: I want to park my tired ass on an outdoor sofa soooo bad, you guys.

With a pretty little drink in a glass I just got from Homegoods.

With some kind of spicy new cocktail recipe I created with jalapeños and cucumbers from my own garden.

Under an umbrella that’s tilted juuuuust right to keep out the sun.

So, I drafted up this little design plan!

Relaxed Modern Deck Mood Board


deck mood board - inspiration decor ideas

The deck itself will be getting stained soon, which I’m thinking should be a warm medium brown that goes well with the exterior’s tan and white color scheme. In contrast, I’m really liking the idea of a black, white, and blue color scheme that will add some coolness (plus, we all know that’s my favorite color palette).

Since I already have two Adirondack chairs and a scrap wood bench, I’m in the process of painting those black (just finished today, barring any touch-ups — future post with a few painting tips coming soon). They’ll likely be the interim seating until the big sectional project starts.

DIY Modular Outdoor Sofa

But, since I don’t really want to spend the thousands it would cost to get a decent sectional, I’m going to have to build it. Here’s a little sneak peek at the design plan. I’ll share the woodworking plans once I go through the process and work out the kinks, but right now, just getting to this point is exciting!

diy modular outdoor sofa - future plans sneak peek

The idea for that future project is to build several pieces that all go together to form a sectional when lined up. This way, it allows the most flexibility when friends are over since each chairs can be moved around to form separate seats. It will make the cushions I’ll have to buy a little pricier since I’ll need individual ones for each chair, but I think this will make us happiest long-term.

Is there anything you think I should add? Anyone got some advice on outdoor sound options? I cannot WAIT to get out there and do some relaxing. Fingers crossed we can this fall!

The post Decorating Ideas for Furnishing the New Deck appeared first on Ugly Duckling House.

More Where That Came From

DIY Floating Deck, Part 1: Planning and Layout
DIY Floating Deck, Part 2: Frame & Waterproof...
DIY Floating Deck, Part 3: Diagonal Decking


from Ugly Duckling House https://www.uglyducklinghouse.com/decorating-ideas-for-furnishing-the-new-deck/