This “mini garden deck” made from scrap deck boards has already made a huge difference in keeping my feet dry around the new vegetable garden.
Hey everyone! As you saw from yesterday’s deck update, I’ve been spending a lot of time outside. Between that, the new vegetable garden, and the new shed build, I’ve been in a summer state of mind for quite some time. I’ve also kind of HAD IT with walking on muddy dirt patches (Georgia’s spring rains this year have been nuts!). With summer officially starting today, and with plenty of scrap deck boards around, I decided to hop in with the #scrapwoodchallenge and created my own solution for better garden maintenance. I’m calling it my “mini garden deck”  !
!

My new vegetable garden bed has been a learning process. One part of that has been realizing that this area is going to get a lot of upkeep-related foot traffic.

So, as proud as I am of how well things are going, I have noticed a major drawback: frequent visits have made the inner triangle of the L-shaped garden bed a little dirt-rich and grass-poor. I put down some landscaping fabric intending on eventually covering it with gravel, but then realized how well the leftover deck boards could solve the problem… without an additional materials purchase!

Recommended Tools and Materials
may contain affiliate links
- scrap pressure-treated deck boards
- stair balusters (other strips of scrap wood is fine, I just used what I had available)
- miter saw
- drill
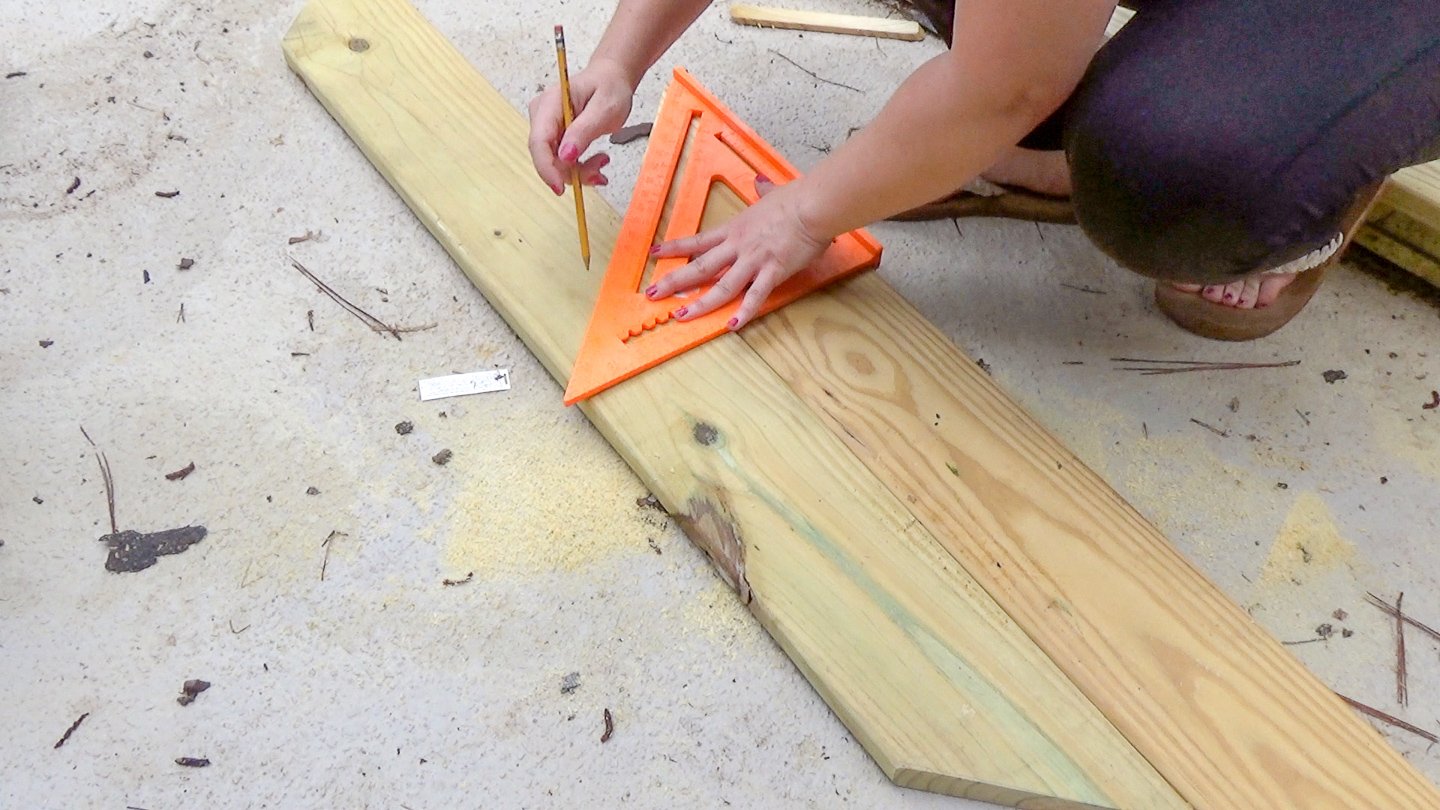
- speed square
- pencil
- exterior screws
- plastic spacers (optional – see below)
- landscaping fabric
The deck boards I used are designated for Ground Contact, which is recommended for wood projects that sit within six inches of the ground. You can find more about that here.
How to make a mini garden deck from scrap wood
Start in the middle
Keeping in mind that this was scrap, I basically took the materials available. I bought stair balusters and wound up not needing them, and I’m kind of terrible about returning leftover materials. I used these as stringers for fastening the deck boards together. Many had been cut already to fit the floating deck (and therefore could not be returned), but some were long enough pieces where they could be reused.

Since I was kind of winging it, I placed the stair balusters on the ground, on top of the landscaping fabric and spread them out, fanning in a sort of triangle shape. These would be what I would screw the deck boards to. If you’ve ever seen a wooden sign and looked on the back, it’s a pretty similar concept (such as here and here).

I began where I thought would be the middle (ish) of the L-shaped area, and cut my deck board at 45-degree angles on both ends.
From this, I cut more pieces to help form a triangle shape until the space was filled. I dry fit each board into place and then began fastening them to the strips underneath.

Spacing
For spacing, I used some old plastic spacers I bought a long time ago for installing the laminate flooring in my house (just held onto them, because I just knew they’d be useful again  ). If you don’t have something like this, insert a few nails between the boards — anything that will serve as a temporary wedge to provide a small gap. You’re mainly looking for spacing to allow the wood to expand and contract with moisture fluctuations.

Screw together and fan out
I screwed in the first board on both ends where it met the stringers from the top down (2 screws on each end of the board, 2 screws down the middle). When the board was attached and spacing set, I moved the spacers to the next gap and fastened the next board. So on, and so on, until the entire triangle was complete.

If you were to look at the back, it would look like a hot mess — the stringers (the stair balusters) that attach to the deck boards are practically random in their placement.

But since you’ll never see them, all that really matters is that they are enough material to hold the entire thing together. Since the ground was soft from the frequent rain, I merely needed to stand on it the new platform to sort squish into the ground and hold in place. The corner was kind of an awkward spot with how narrow it got, so working an extra piece of the baluster (vertically) into the corner was a perfect fit.

And boom: no more muddy feet when maintaining the garden. It actually kind of finishes the area nicely, too.

There’s still a little more work to be done to make the widest end look more finished, but since I still have the shed build left to complete, I’ll wait to use up the remaining full-length deck boards before re-purposing one for the garden bed. This whole area is going to look so great!
I just love scrap wood projects… so feel free to do a little looking around at the links on this list. Jen from House of Wood asked a bunch of us to share some scrap ideas, and there’s LOTS more below!
Check out these other awesome Scrap Wood projects:
- The House of Wood – DIY Bunk Buddy
- 3×3 Custom – Scrap Wood Trivets
- Ugly Duckling House – Mini Garden Deck — that’s HERE! —
- The Created Home – Animal Coin Banks
- Her Toolbelt – 3D Pixel Art
- The Kim Six Fix – Outdoor Drink Stakes
- DIY Huntress – Scrap Wood Coasters
- Mr. Build It & Mrs. Style It – Bent Plywood Headphone Stand
- At Charlotte’s House – Buffalo Check Tray
- Sawdust 2 Stitches – Scrap Wood Wall Decor
- Bower Power – Pallet Baseball Hat Rack
- Pneumatic Addict – Table with Epoxy Resin
- Anika’s DIY Life – DIY Spice Rack
- 100 Things 2 Do – DIY Can Crusher
- Hazel + Gold Designs – Patio Table Drink Holder
- Reality Daydream – Scrap Wood Shoe Cabinet
- House Becoming Home – Modern DIY Clock
- Chatfield Court – Wooden Garden Obelisk
The post Mini Garden Deck | Scrap Deck Boards Made Useful appeared first on Ugly Duckling House.
from Ugly Duckling House https://www.uglyducklinghouse.com/diy-mini-garden-deck/
No comments:
Post a Comment