Saturday, 19 May 2018

Simple DIY Tricks for Covered Porch Plants

I’ve learned the hard way what not to do when it comes to container gardening. Today, I’m sharing a few simple tips on picking the right shade-loving plants for thriving covered porch planters.

Happy Saturday! While I’m praying that the weather cooperates so I can get more done on the shed this weekend, I thought I’d give you a fun little update for what’s going on with the front porch.

A few weeks ago, I shared with you that, although I’ve done a lot of repair and basic updating to the front porch area, I haven’t really taken things to the next level in terms of style. Don’t get me wrong; it’s a far cry from where things began:

humble beginnings - front porch circa 2012

But with more of the house in later renovation stages and my increasing desire to entertain after years of repair, it’s time to really put some oomph into the entry! Most recently, I began this process with two new planters and some seasonal color. As I finished up, it occurred to me that I should pass on a few of these tips to you guys!

1. Know thyself… and thy porch

It’s taken me years to get the hang of gardening in and around the house. In that time, I’ve learned the kind of light/water/general care the area is going to get. As it turns out, finding answers to those questions are pretty important for making sure plants stay healthy:

  • what kind of sunlight does the area get naturally?
  • will the spot be exposed directly to the weather or require more deliberate upkeep?
  • will it need to be moved around regularly?

southern living plant collection mountain snow pieris - great for shade containers

Considering that a covered porch is shaded most of the day, any light it gets is generally indirect. As far as watering, the rain won’t reach this area, so I would have to do most of the watering myself (which also means a plant would need to be tolerant of my limited upkeep).

I’ve found that as well-intentioned as I might be, it’s best to ignore my impulse to buy a plant just because it’s beautiful. No amount of beauty in a plant has ever caused me to put in more effort in the garden, so I’ve learned to seek out plants that suit my needs and my house’s most natural conditions rather than tell myself that I’ll change my ways. Phrases like “shade” and “drought/heat tolerant” are factors for success. Don’t buy the plant that needs watering every day if you barely have time to shower. Resist the urge to buy a plant and get overly ambitious with your normal habits for care; it’s a recipe for a brown, dead plant!

2. Height, texture, color.

There is another rule like this you may have heard: thriller, filler, spiller. Basically, you want to pick plants that have some variety for visual interest. And a good rule of thumb is to pick a grouping with three separate purposes: height, filling the container, and spilling over the lip of the container. I decided not to go with a “spiller” for this season, but I still kept the variety a priority. One larger shrub toward the back of the container is used to add height (and will grow taller over time). Another was added for texture (the hosta), and a third was chosen for bright color. The colorful impatiens will eventually need to be replaced (they’re annuals), and at that point I might replace them with a more cascading plant.

new planters on front porch

3. How to use less soil and lighten up potted plants

You may have noticed the empty plastic water bottles in the above photo; that’s actually the planter’s little secret! A few years ago, I discovered this trick for using less soil per planter. It also keeps the potted plant lighter, so I can move them around when the situation calls for it. Just throw several empty bottles into the bottom of the container, and cover the top area with newspaper. Then, plant as usual.

layer in newspaper and soil

fill container with plastic bottles, newspaper layer, then soil

4. Tilt plants toward the lip to look fuller

When I first began planting containers, I thought everything had to be planted straight up and down. It wasn’t until I spoke with a gardener a few years ago that I realized that you can manipulate it a little. Tilt the plant slightly when planting so that they root at an angle, toward the edge of the planter. This is especially effective with “spiller” type plants that fall over and down the container, but I did it here with the impatiens to make the color pop a little more and make the planter look fuller.

rule of 3 for fillign in container

5. Water regularly until established

Moving day is pretty much stressful for all living creatures, it seems; keep in mind that new plants tend to need more water upkeep until they have been around for a little while.

new porch planters

6. Easy does it

I’ve found that if I can keep my impatience in check, the better it is for my gardens. Adding slowly and thoughtfully, rather than planting too ambitiously too fast, leads to a garden style I’m much happier with.

I always get so impatient during the first year with new plants, thinking that I went too small or that I need to add more. Instead, a simple care plan for this first year is better than adding too much; it risks killing everything from having too much upkeep. The main shrub in each of these containers will grow between 3-4 feet, so while the plants needed a little something extra this year, they probably won’t need to be filled in much in the future.
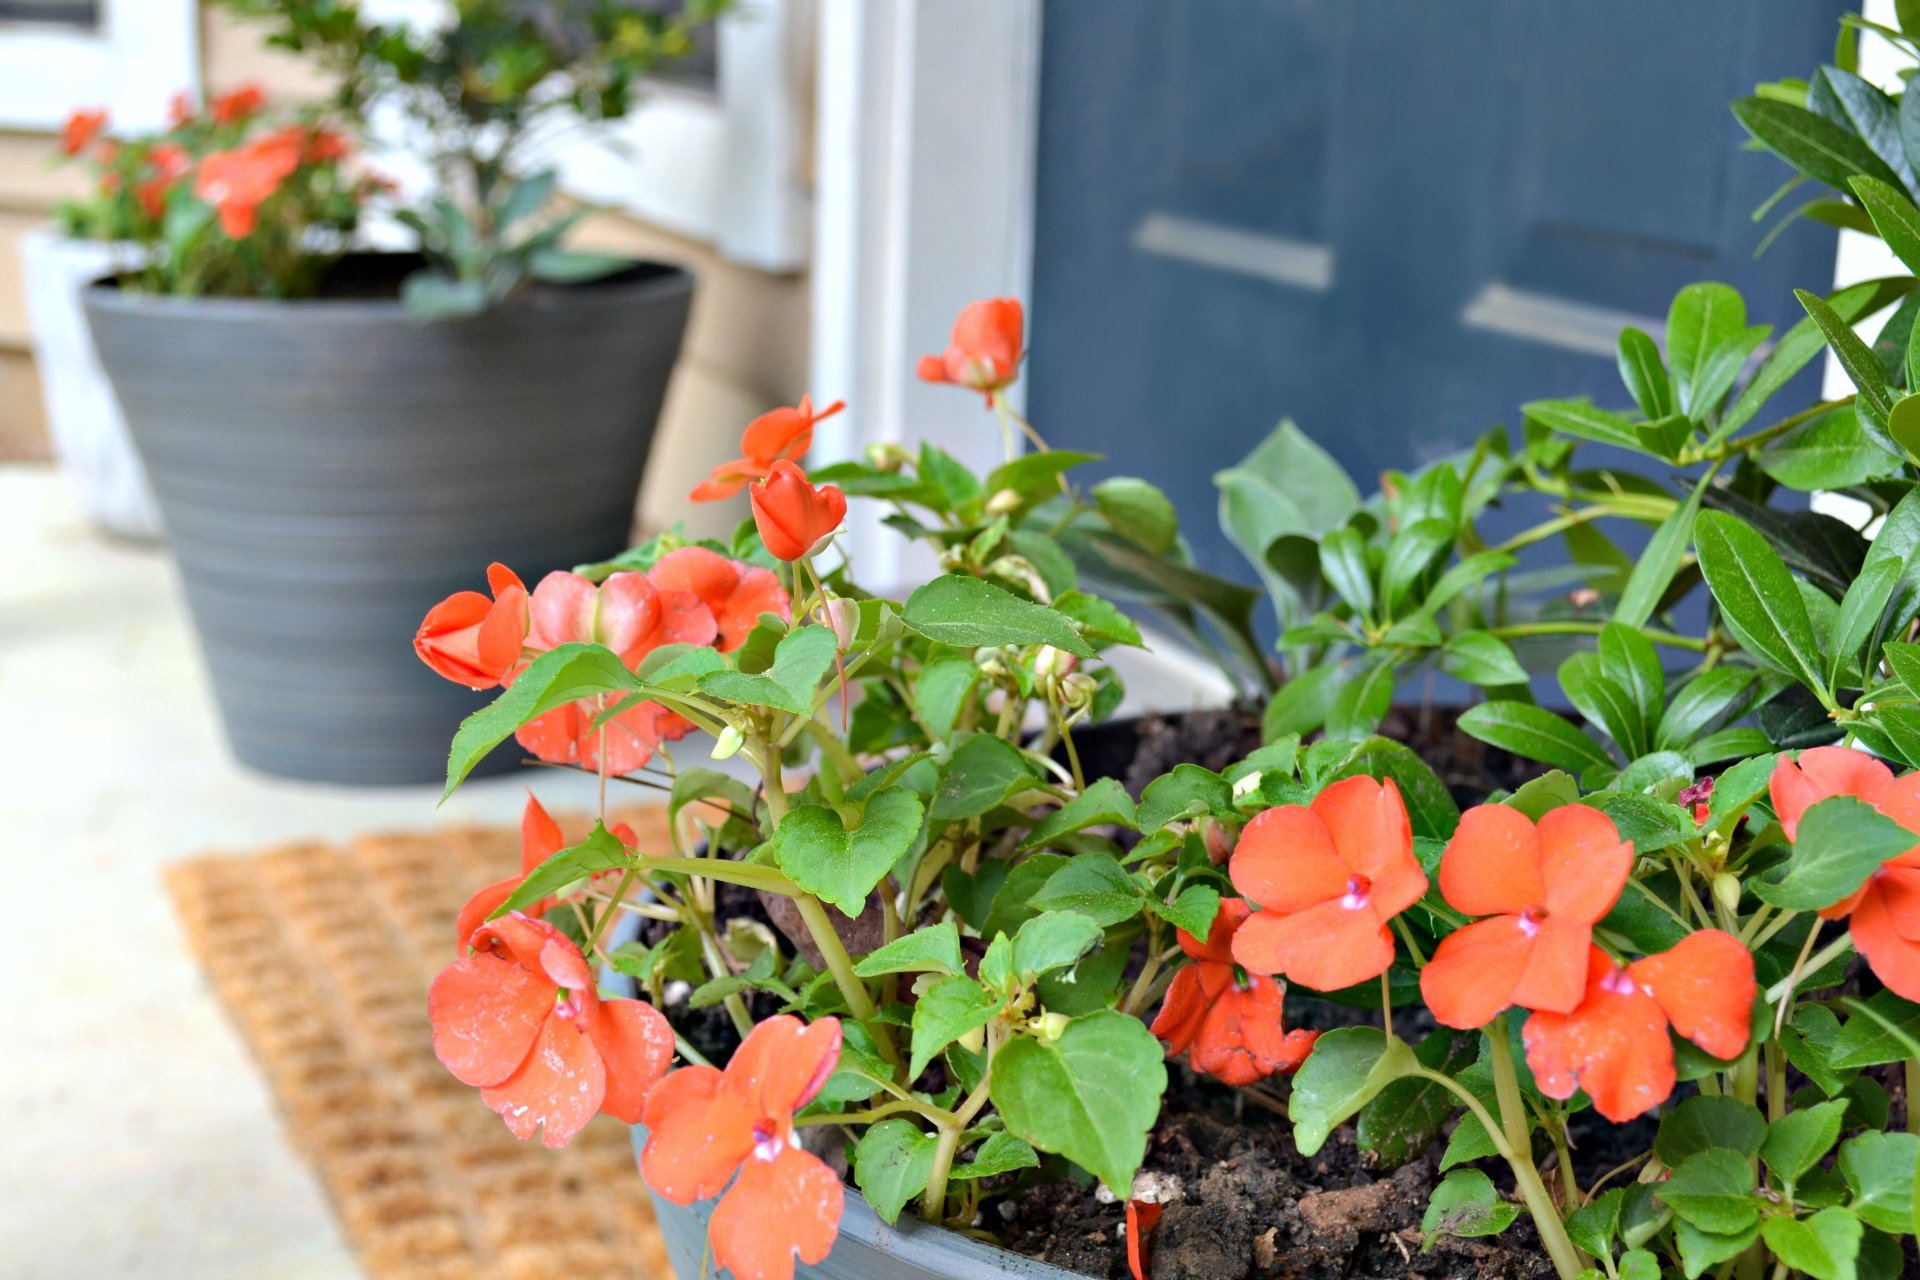
containers for front porch

closeup of impatiens and front porch planters

Regardless, it’s nice to come home to some bright new color!
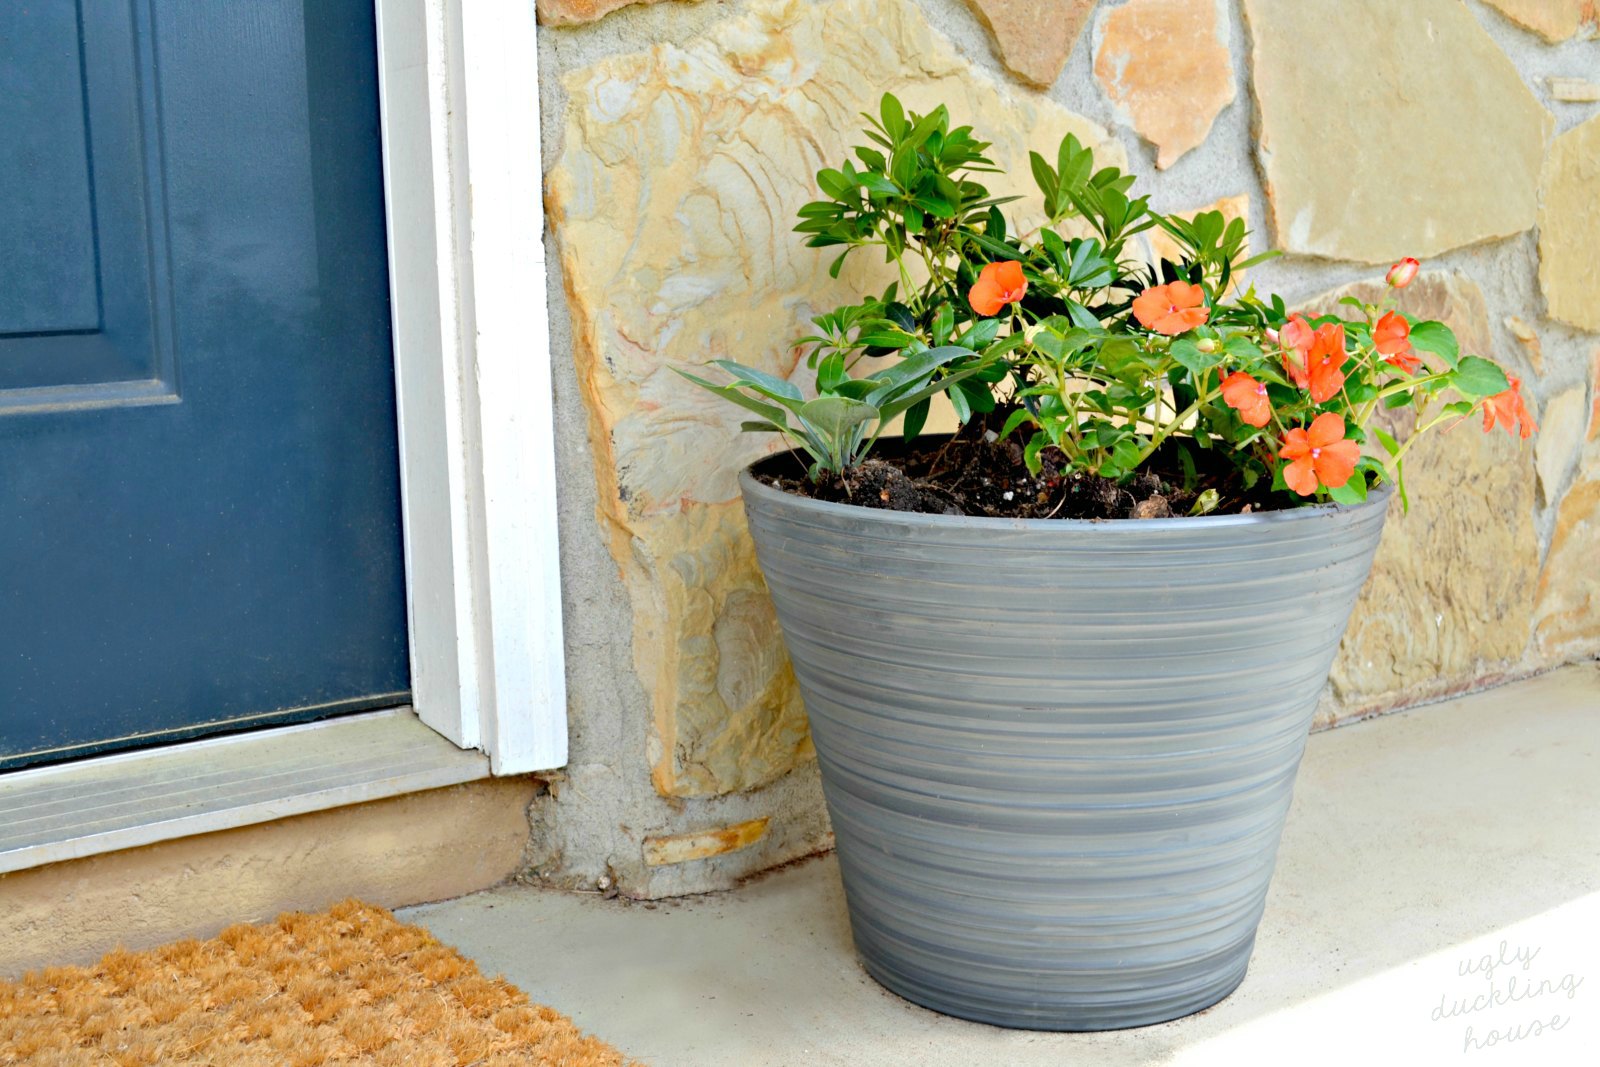
diy tricks for covered porch planters - ugly duckling house

shaded container garden on covered porch - ugly duckling house

covered porch container garden - shade loving plants and easy care tips - how to and video tutorial

Want more outdoor DIY ideas? You’re in luck! My pal Cassity from Remodelaholic is hosting an Outdoor DIY Challenge today, and there are 12 more projects to check out!

outdoor DIY challenge button #remodelaholic

Get Out! Outdoor DIY Projects

Covered Patio Outdoor Dining Area | Remodelaholic
DIY Outdoor Bench | Hertoolbelt
How to Build a Gazebo (from a Kit) | The Palette Muse
Sunroom Makeover | Lantern Lane Designs
DIY Solar Walkway Lights | Toolbox Divas
Wooden Welcome Sign Wreath | Lemon Thistle
DIY Washer Toss Game | Everyday Party Magazine
Backyard Hammock Area | North Country Nest
Easy Cinder Block Garden Planters | Our Crafty Mom
Funny DIY No Soliciting Sign | Leap of Faith Crafting
Simple DIY Tricks for a Covered Porch | Ugly Duckling House (you’re HERE!)
Bistro Set Makeover | Practical & Pretty
Tiered Vertical Planter Garden | Creative Ramblings
02 outdoor DIY challenge new tutorials projects #remodelaholic
There’s also a video playlist you can catch right here too! Have a great weekend, friends!

The post Simple DIY Tricks for Covered Porch Plants appeared first on Ugly Duckling House.

More Where That Came From

Quick Patio Patch
Going for Gold
4 Easy Tips for Growing Hydrangeas
How to Make Your Patio Look New Again for Less Tha...


from Ugly Duckling House https://www.uglyducklinghouse.com/simple-diy-tricks-for-covered-porch-planters/

Monday, 30 April 2018

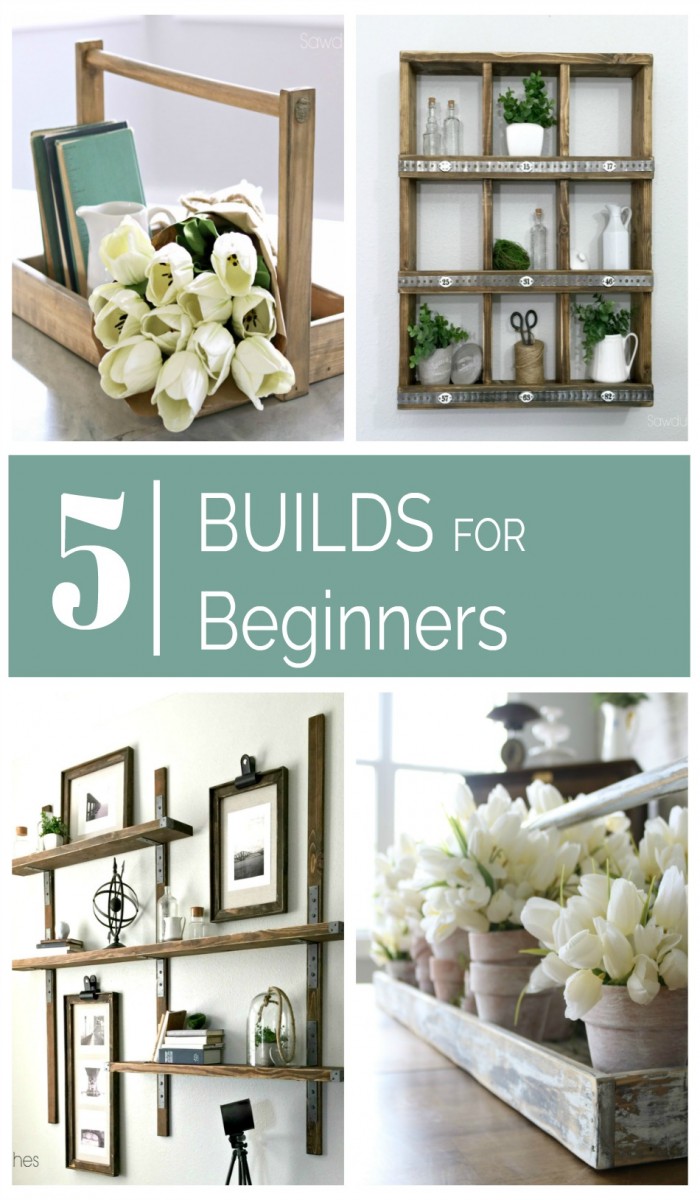
5 Woodworking Projects for Beginners (Blog Swap with Sawdust 2 Stitches)

Hi friends! Hope your Monday is going well. Today, I’m over at my friend Corey’s blog, Sawdust 2 Stitches, sharing some of my favorite projects. And below, she’s doing the same. Basically, it’s a good ol’ fashioned blog swap! If you’ve never seen this happen before, it’s something bloggers used to do a TON back in blogging’s earlier days when things like Pinterest and Instagram were but a twinkling in the internet’s eye. It sounded like fun to bring this back every now and then (it feels a lot like introducing friends at a party; “friends, meet Corey; Corey meet my awesome friends!”), so I hope you enjoy! She’s got some amazing projects to share. <3


Hey All! This is Corey from Sawdust 2 Stitches, and I am thrilled to be working with our gal Sarah. I have gotten to know Ms. Ugly Duckling in real life, and man is she just as awesome in person as she comes across online! She pretty much does it ALL, and I freaking love that! Me? I tend to stick to what I know, and what I know is building. So today I thought I would share with you 5 small builds that I love. These are easy enough for a beginner builder, but even a seasoned builder will love the look of these little beauties.

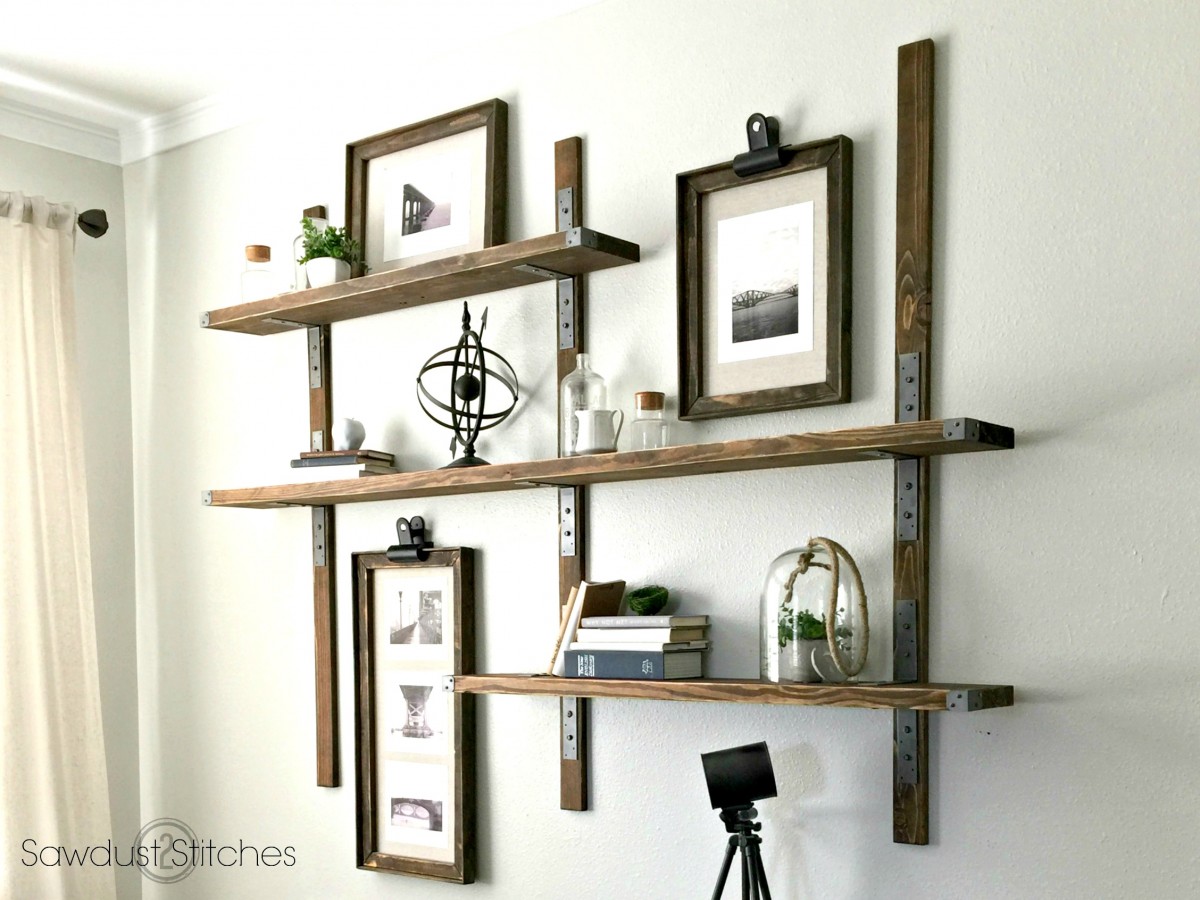
1.The Bracket Shelf

Let’s start with the simplest one I’ve got… this build includes literally 6 cuts ! Don’t own a saw? I bet if you ask someone at your local home improvement store they would be happy to help. (Or begrudgingly. You just never know. But most of the time they are happy to do it. Just be ready to explain what you are making, they always want to know. :) Anyways if you have limited power tools, this Bracket Shelf is the build for you!

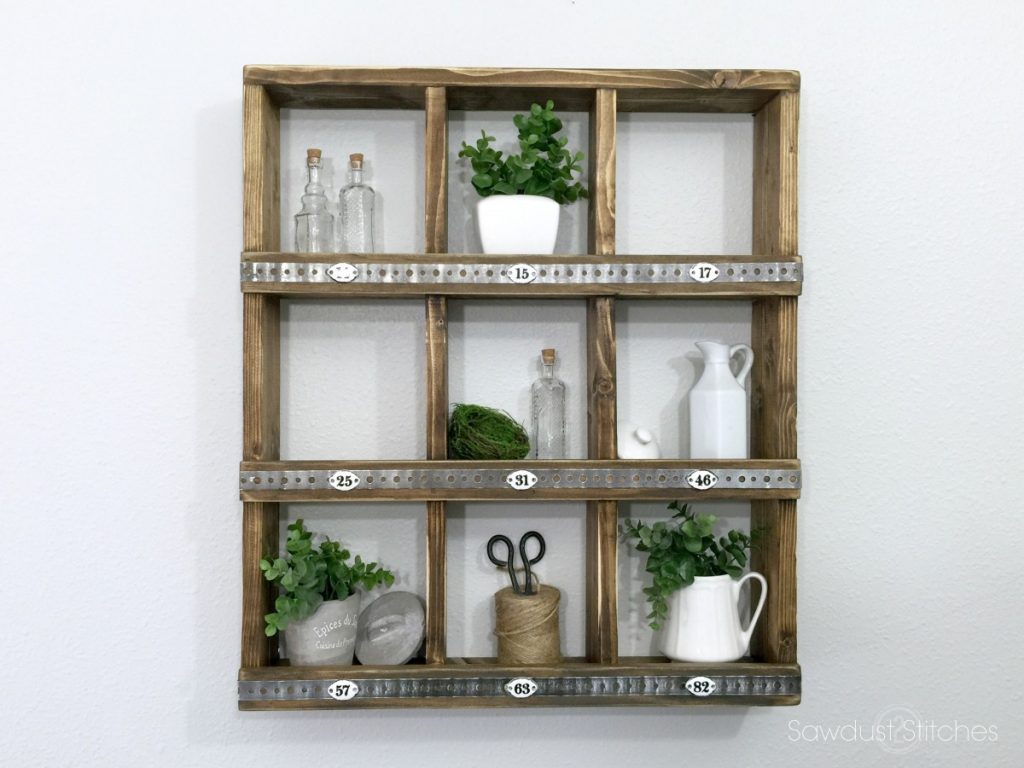
2.Target Cubbies

Here who likes Target?! I am assuming you all just mentally raised your hand. If so, this one might seem familiar. A few seasons ago Target had a very similar piece, but it ran a cool $50. Which isn’t awful but when you can make it for a little over $10, it seems like highway robbery. Am I right ? You can whip up this knock off in an afternoon using only saw and some wood glue! ( I used a nail gun, but it’s totally doable with just wood glue if you are the patient type… I am not.) Get the build plans here.

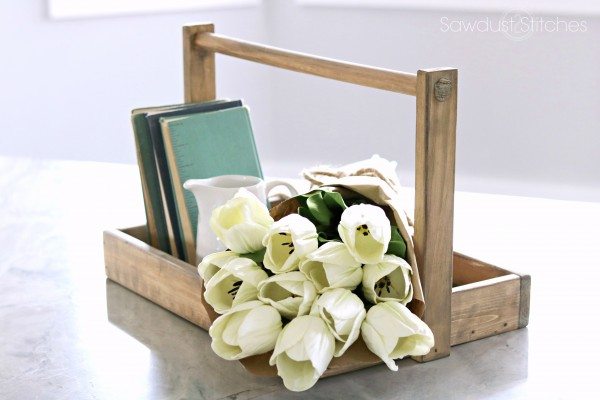
3.Farmhouse Tray

If you feel like you are getting the basics down, try to start including dowel rods, they take a basic build to the next level! I added a dowel rod in lieu of a straight edge board and it makes this a little less DIY and a little more Home Goods! I use this little Farmhouse Tray Caddy for every thing, and it makes a great gift!

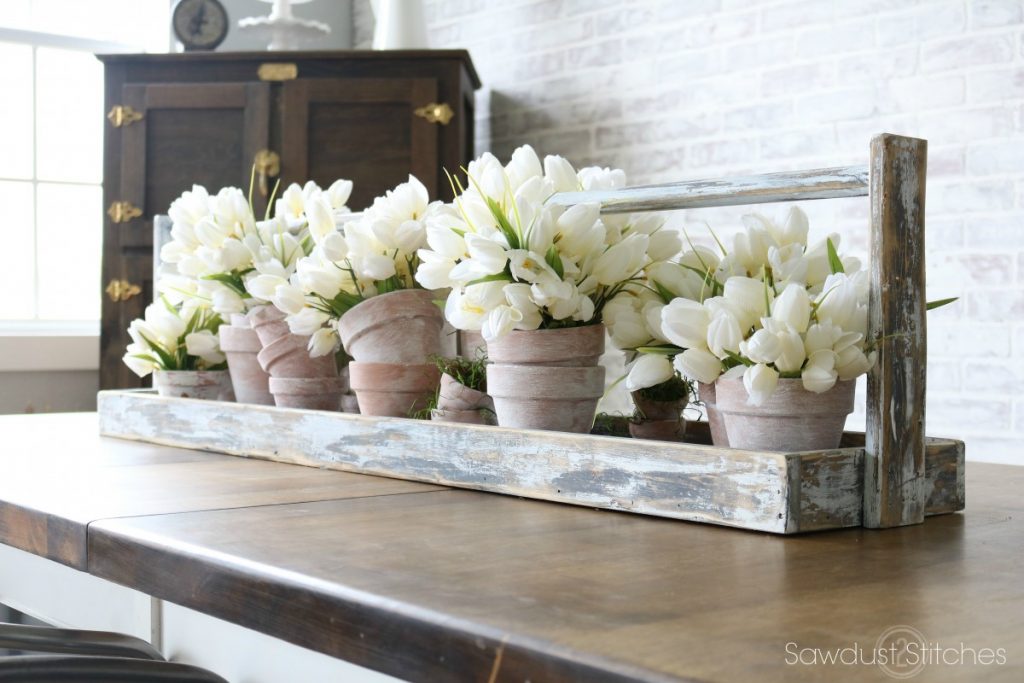
4. Long Table Tray

If you liked the last project you are going to love this. It’s the mac daddy, big brother to the farmhouse tray. I whipped this one up to use as a Tray Table Runner for table scapes!

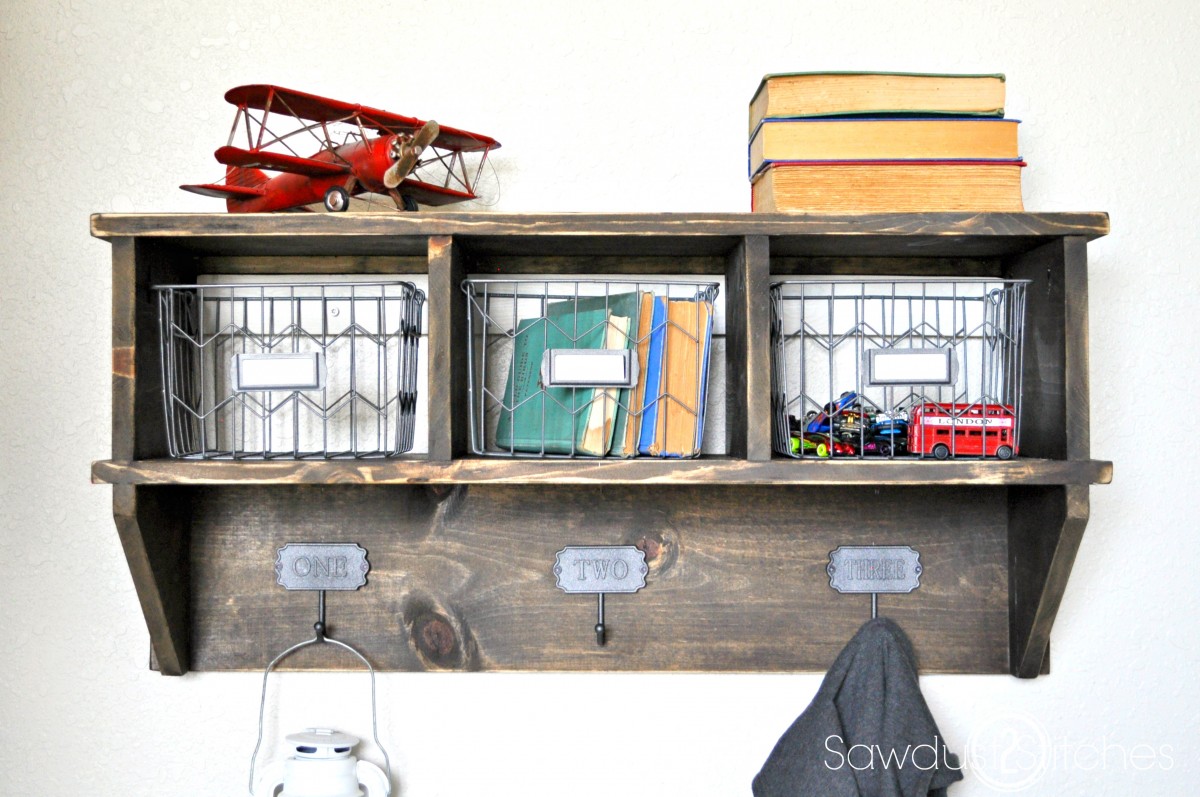
5. Wall Organizer

Alright, I feel that once you have conquered basic straight cuts, the next logical addition to your building knowledge arsenal is angles. This is a functional project that introduces you to angles in small baby steps! But look at that beauty. This thing makes my morning sane. I hang up my kids clothes the night before, toss their socks and shoes in their bins, in the morning they just grab their stuff and go! So, do you want to make your school mornings a little less chaotic?

You can start by clicking here for the build plans.

There you have it folks, a few basic builds that will get you started, or if you already know your way around the shop, these builds are still mighty pretty to look at!

Thanks so much for having me. I loved stopping by and sharing a bit of what I do. If you are looking for more advanced builds, or even full room makeovers I’ve got those too. Feel free to stop by anytime!

Take Luck,
Corey

The post 5 Woodworking Projects for Beginners (Blog Swap with Sawdust 2 Stitches) appeared first on Ugly Duckling House.

You'll Also Love

Introducing: Love Create Celebrate


from Ugly Duckling House https://www.uglyducklinghouse.com/5-woodworking-projects-for-beginners-blog-swap-with-sawdust-2-stitches/

Tuesday, 24 April 2018

DIY Carved Wood Wall Art

I’m in love with my newest piece of wall art, and making it was a lot easier than it looks! Check out this power carved wood wall art and tell me where you think it should go.

Hey, friends!

I’ve got a little bit of picture overload for you today. It’s honestly due to a number of factors:

  • I loved the way my project turned out
  • I loved that I didn’t have to put on makeup to be in these photos because my face is covered up
  • Even though my face is covered up, I look like a badass in these photos
  • This project looks harder to do than it actually is
  • This is part of a blog/YouTube hop called the #WoodArtChallenge

Don’t know about the Wood Art Challenge yet? Well, in a nutshell, around 30+ of us DIYers/makers (bloggers, Youtubers, Instagrammers, etc.) are all teaming up to present you guys with a single hive mind creative challenge: make a piece of wall art that is SQUARE and made out of WOOD.

Thassit. That’s the challenge. And that means with so many ways to interpret that, there are LOTS of DIY ideas in store for you guys today! Just look to the bottom of this post for others who are participating.

As many of you guys know (unless you’re new here because of the hop thing, in which case hi, stay awhile, we get weird around here… in a good way), I would call myself a woodworking “beginner”. Even though I’ve got plenty of house fixing shenanigans under my belt, there’s a whole other world of power tool fun that I am just now starting to learn more about. And that’s how I found myself using an angle grinder to make a block of wood look like fabric.

power carving wall art - sarah from ugly duckling house

Or twisted metal? Or maybe just crumpled paper? I still can’t put my finger on precisely what I think it resembles most, but it definitely doesn’t look like anything I’ve created out of wood before!

diy carved wood wall art - closeup

It was actually inspired by an artist I follow on Instagram, nugeandwood. My attempt was, of course, pretty small and quick compared to his giant, awe-inducing carved sculpture (which takes anywhere from a few weeks to a couple months to complete). Seriously guys — you’re missing out if you haven’t seen his stuff yet!

Nuge and Wood Inspiration Nuge and Wood Artist

The best part of it is, my DIY version doesn’t use a lot of tools to accomplish; the tools you would need to purchase are well within a normal DIY budget too, so this makes it a great beginner’s woodworking project!

What you’ll need:

  • eye/ear/clothing protection, and a breathing mask (this is a very sawdusty project! safety first!), a hat is good too
  • 1x8x8 poplar board (if you choose another hardwood, keep in mind that hardwood species carve  differently, or so I’ve read)
  • 4 1/2″ angle grinder (I bought mine, but there’s a very good chance a neighbor has one… Harbor Freight has them pretty cheap
  • 4 1/2″ carbide cup wheel from Harbor Freight (only $10, and no, this is not sponsored)
  • 4 1/2″ sanding disc in 40 or 80 grit (I preferred 40)
  • lots of sandpaper: extra coarse (around 40 grit), coarse (60-80 grit), medium (100-150 grit), fine (220 grit), extra fine (400 grit)… a lot of this you’ll probably already have
  • cling wrap
  • bar clamps
  • painter’s tape
  • wood glue
  • wood stain
  • sealer

DIY Power Carved Wall Art

1. Cut pieces to size

Cut down the 1×8 poplar into 6 roughly-equal pieces (it’s ok if it’s slightly off). Line them up the way you would like to establish the block you’ll carve into. Be mindful of the layers below; you’ll carve through parts of the top boards to expose lower layers.

Cover your work surface with cling wrap and tape the ends with painter’s tape (to prevent you from gluing your wood block to your work table).

For my version, I had two scrap pieces that had been Kreg Jig’d together for another project I forgot about ages ago. Since these pieces formed a 90-degree angle, they were perfect for using as temporary clamp pieces in the next step.

2. Glue and clamp the entire block together

I glued 2 stacks of 3 pieces each of the poplar, side by side. This sounds confusing, but it’s not. Just make two equal stacks of your poplar pieces and glue them in order. Be sure to cover the layers in between and the side where the two stacks touch with an ample amount of glue.

If you have or make clamp helpers like I did, put painter’s tape on any sides that will touch the glue… just in case.

With the glue still wet, clamp the ever-loving crap out of the wood block so that it will dry as one solid piece. Be sure to clamp the sides together and the layers (clamp vertically and horizontally).

3. Cut to square and sketch your carving

Since the top and bottom ends of the block aren’t perfectly square, now is the time to cut the excess off so you have a truly square block. Sorry, them’s the rules.

I used the back of my block to sketch out a few lines of where I thought “folds” of my make-believe wood fabric would be, along with giving the carving disc a few test runs to make sure I had a good handle on it.

4. Start carving!

With my carbide blade attached, I went to town on my wood block. Gently, at first, then more aggressive.

carving wood art piece

It made surprisingly quick work of the wood, and I began to learn how to control the curve and carve of the disc to get the shape I wanted.

DIY carved wood wall art

This part was the quickest and most fun! It really only took an hour or two to carve the bulk of what I wanted. When I felt I had a better handle on how to get the shape, I went in again for a second pass to get things smoother.

me - sarah - carving wood for wood art challenge (1)

5. Sand.

Ugh. This part. No fun. But I highly recommend getting a 40-grit sanding disc to attach to the angle grinder as well. This made getting those first big chunks sanded away to a smoother result. I tried again with the 80-grit one, but it left lots of bumps and I regretted it.

(For those who might suggest the Arbortech Turbo Plane to avoid/reduce all the sanding — I do know of the tool. I think it would be awesome to try one and haven’t yet tried it myself. But for a beginner’s project, it doesn’t make sense to recommend a blade that costly. Usually budget is a reason for DIYing and/or part of the roadblock for why someone might not try to DIY, so I’m not going to recommend it here. For professional woodworkers or those who intend on churning out multiple carved pieces, that would be worth giving a try though.)

6. More sanding.

After trying a few other battery- and corded- assisting tools to sand down the remainder, I had to resort to good ol’ fashioned sandpaper for the rest. I hated this part because I was already tired from carving.

7. Stain and seal.

At first, I was really tempted to go with a bold color, like blue or green, since the grain reminded me of a topographical map. I picked out a brown stain instead, because I was worried that the few lines where I used wood glue to connect pieces would not take stain and/or detract from the rest of the piece. I’m sure with more glue-up practice and better clamps, I could see fewer lines from the glue. Either way, I still loved the result!

8. Hang and admire your work. 😉

After way too much dry time (it rained for two days and things just would. not. dry.), I got fed up and finally hung my piece using some of my favorite hangers (they allow the art to sit flush on the wall). I love it!

diy carved wood wall art in the entryway

For now, it’s hanging in the entryway, but I may move it at some point.

diy carved wood wall art - power carving - woodworking how to - wood art challenge

What do you think? What color would you have picked? Would you have put a frame around it? I considered so many possibilities on this one, that the options are still pretty tempting. I’d love to hear your ideas.

P.S. If you’re wondering what those pictures taped to my garage wall are all about, check that out here. K is a real prankster.


Don’t forget, this is a WOOD ART CHALLENGE and a number of other folks are participating, so go check them out!

TONS of unique and creative pieces of wooden wall art!

1) Reality Daydream / 2) 100 Things 2 Do / 3) House Becoming Home / 4) Anika’s DIY Life / 5) My Repurposed Life / 6) 3×3 Custom / 7) One Project Closer / 8) Merrypad / 9) Chatfield Court / 10) Create & Babble / 11) Hazel & Gold / 12) Jen Woodhouse / 13) Sawdust 2 Stitches / 14) Wood Work Life / 15) Remodelaholic / 16)  Evan & Katelyn / 17) Jaime Costigio / 18)  Pneumatic Addict / 19)  Bower Power / 20) Lazy Guy DIY / 21) My Love 2 Create / 22) Addicted 2 DIY / 23) Her ToolBelt / 24) Shades of Blue / 25) Ugly Duckling House / 26) The DIY Village / 27) DIY Huntress / 28) Mr Fix It DIY

The post DIY Carved Wood Wall Art appeared first on Ugly Duckling House.

You'll Also Love

Wood Inlay Ornament with German Glass Glitter


from Ugly Duckling House https://www.uglyducklinghouse.com/carved-wood-wall-art/