Wednesday 30 May 2018

DIY Wood Burned Roasting Sticks

These personalized wood-burned roasting sticks are great around the fire pit for toasting marshmallows.

As you guys saw in my last post, I’ve been coming up with a small series of projects on behalf of Bernzomatic, which has been ridiculously fun. Mainly because I get to burn things, and I’m not quite sure I’ve ever really gotten that out of my system since my first introduction with campfires in Girl Scouts (remember those little tin foil ovens and stuff???).

bernzomatic st500

At any rate, they sent me a little soldering iron, and I didn’t really have anything around inspiring me to use it until I realized that the opportunity was sitting directly in front of me as I made the charred wood s’mores tray; it’s also great for little wood burned designs! Today, I’m going to show you how I used this tool to personalize my store-bought roasting sticks.

diy wood burned roasting sticks = soldering iron tutorial

Here’s How to Make Them:

Tools:

Materials:

Begin with roasting sticks of your choosing; I ordered mine online, and they came with colorful caps. I like the idea of color, but these looked a little impersonal for my taste.

begin with roasting sticks

With a pair of cutting pliers, remove the colored plastic..

clip off colored plastic

removed plastic caps

In a well-ventilated area, allow the soldering iron to get nice and hot on its max setting. I used a small paver stone to rest my soldering iron on when heating up and cooling down.

rest on brick to cool

When ready to burn, hold the soldering iron so that your hands are free from getting too close to the heat, and begin the first burn design. I highly recommend starting with dots; they are easiest to learn from, so you can be more consistent with lines and shapes.

begin marking first burn

Next, get out your favorite colors of craft paint. In the time it takes to mix custom colors, the roasting sticks will likely be cool enough to paint.

mix custom colors for craft paint

I was happy with an organic look for this one, so I free-handed some stripes and wrap-around patterns.

paint with craft paint

For straight lines, I prefer painter’s tape.

straight line with painters tape

You can do the wood burn first and then the paint, or vice versa. With more complex designs, I found it much easier to do a light version first and then go over it with a deeper burn.

create light image to trace

Once the burn is cooled and the paint is dry, cover with a wood-safe finish (the handles shouldn’t really come in contact much with food, so this is just an overabundance of caution).

closeup finished handle - wood burnt roasting sticks

For just a few minutes of my time, it was well worth it to have a customized little set for entertaining! Before…

before - colorful but uninteresting and a little juvenile

And after!

after - more personalized roasting sticks for marshmallows and smores

They go great with my charred wood s’mores tray (another Bernzomatic project), don’t you think?

ready for marshmallows

This project can easily be enjoyed by the whole family. Older kids can design their own patterns, and you can let younger children paint after you burn the design for them. I picked my favorite, and even marked the end with a little heart.

colorful wood burned roasting sticks

Enjoy!

The post DIY Wood Burned Roasting Sticks appeared first on Ugly Duckling House.


from Ugly Duckling House https://www.uglyducklinghouse.com/diy-wood-burned-roasting-sticks/

Saturday 26 May 2018

Scrap Wood Kitchen Decor – DIY Herb Signs

Hi guys! While I’m busy outside this weekend working on the new deck, I want to introduce you to my newest contributor! If you aren’t yet familiar with these types of projects, then basically, I decided about a year ago to bring on a few new bloggers just starting out. These are just my way to “pay it forward” and give talented new bloggers a warm welcome as they begin their own blogging journeys. Each contributor will contribute once a month, and may switch out from time to time. They’re people I’ve found via social media and personally enjoy following, and I think you’ll enjoy them too! This time, I want you to meet a gal who is as obsessed with scrap wood as I am: Tylynn of Bitterroot DIY.

tylynn-bitterroot-diy


Hey all, I’m Tylynn from Bitterroot DIY and I’m happy to introduce myself today as a new contributor to  Ugly Duckling House! The Ugly Duckling House was one of the first blogs I followed before starting my own blog. The projects are great, the tutorials are easy to understand, and I always love connecting with other people who aren’t afraid to get their hands dirty and pick up a power tool! I “met” Sarah on Instagram and was seriously so surprised when she asked me to contribute. I’m excited to connect with her readers and hope you enjoy my posts!

To start things off, I’d like to share a scrap wood project from my Bitterroot Scrap Series!

The what series?

Let me explain:

My husband and I recently moved and didn’t want to haul all my scrap wood along. I figured that was as good an opportunity as ever to use up as much as possible! So last month I completed 15 small scrap wood projects and am sharing a new one every-other-day of May over at Bitterroot DIY.

And today, I’m here with some DIY Kitchen Herb signs!

They’re simple.

They’re quick.

They’re adorable.

All the best qualities.

Kitchen Herb Signs

Tools & Supplies:

  • 2 x 4 |   2’ (if you want to make all six signs, otherwise just whatever you have lying around)
  • Wax Paper
  • Inkjet Printer
  • Krylon Acrylic Spray
  • Rust Oleum Semi-Gloss White Paint
  • Minwax Classic Gray

Step 1

Cut six 2 x 4s @ 3.5”. You should end up with six squares (or however many you’d like to make).

Step 2

Sand and finish. I started with a coat of Minwax Classic Gray stain on each block, let it dry, and then followed up with a coat of Rust Oleum Semi-Gloss White. I thinned the white paint with a little water to tone it down. I found that it worked really to dip my brush in the paint and then swirl it with some water on a plate – that way I didn’t have to commit to mixing a specific ratio. I just played it by ear … as every good DIY goes ;)

Let the blocks dry.

Step 3

The Wax Paper Transfer.

Print your mirrored images onto the shiny side of a sheet of wax paper. I simply taped a piece of wax paper to a normal piece of paper so that it would run through the printer nicely.

Make sure all the edges are secure before printing. I mirrored the PDFs for these herbs already, but if you make any new ones, make sure to mirror them so they transfer correctly.

Take care when dealing with the printed wax paper. The ink sits on top of the wax and is easily smeared, as you can see in the photo.

Kitchen Herb Signs

Cut each image out carefully.

Place the image face down on the block, hold securely in place to avoid any smears, and rub the back with a spoon. Apply a fair amount of pressure in order to transfer the ink.

Kitchen Herb Signs

Kitchen Herb Signs

Step 4.

Spray each block with Krylon Acrylic Spray to set the ink.

Kitchen Herb Signs

There you have it – simple, quick, adorable.

Head on over to Bitterroot DIY to snag the free prints and enjoy your new kitchen décor!

scrap wood diy herb signs

The post Scrap Wood Kitchen Decor – DIY Herb Signs appeared first on Ugly Duckling House.

More Where That Came From

Wood Inlay Ornament with German Glass Glitter
Easy White Washed Ornaments
Triangle Tea Light Holders


from Ugly Duckling House https://www.uglyducklinghouse.com/scrap-wood-kitchen-decor-diy-herb-signs/

Friday 25 May 2018

6 Must-See Gardening Ideas to Transform Your Outdoor Space

Remember last month, when my friend Corey shared some of her projects and we did a blog swap? This month, I’m continuing that monthly feature (aiming for the last Friday each month), and happy to be swapping with my pal Beth! If you want to check out the post I wrote for her blog, head over to her site, Unskinny Boppy to see some of my favorite gardening ideas.


Hey guys! I am SO excited to be a guest on Sarah’s blog today.

First off, let me give you a little background on me — I’m Beth from Birmingham, Alabama. I’ve been sharing my home, garden and DIY projects for over a decade at my blog, Unskinny Boppy. When one of our mutual friends (holla at Stacy!) suggested we kick it old-school style and join together for a blog swap, I was all in.

Sarah and I decided since summer is upon us here in the South, we would share our best gardening ideas for our blog swap today. Here are a few of my best garden projects to give you ideas for your yard this summer.

6 must-see gardening ideas to improve your yard this summer

One of the most popular garden projects we added to our backyard was this raised garden bed to hide the underside of our back deck. The beds are constructed with a lumber frame and cedar plank siding. It totally transformed my backyard and provides us with tons of fresh veggies and fruit all summer. Right now I’m growing tomatoes, cucumber, blueberries, blackberries, squash, zucchini and a few sunflowers for fun! I also love not having to bend over to tend to my garden.

Click here to read about my raised garden beds.

Raised Garden Beds to Underpin the Porch

Another popular outdoor tutorial is an oldie but a goodie. In 2011 I hung a vintage ladder over my back patio table with a Moravian star and mason jars to provide candlelight for ambiance. I loved this simple garden project so much. It added a ton of character to our back patio beside the swimming pool.

Click here to read about the Hanging Ladder Mason Jar Chandelier.

hanging ladder with mason jars and moravian star

Freshening up porches for summertime entertaining is never a fun job, but it’s always worth it in the end. Here are some of my best tips for decorating a narrow front porch for welcoming guests in the spring and summer.

Click here for Decorating Ideas for a Narrow Front Porch.

If you have a shady yard like me, it can be tough to find pretty plants that will grow in the shade. I started embracing the shade and realized there’s plenty of pretty plants that will grow in the darker areas of my yard.
Click here to read my list of Top Five Shade Loving Plants for a Summer Garden.

Top Five Shade Loving Plants

Speaking of shade, I just recently finished a screened-in back porch makeover so we can have a shady (and mosquito-free) spot to sit this summer. Between the bed swing and the Adirondack chairs, we have been chilling like villains out here all month. It’s the perfect spot to enjoy the great outdoors without dealing with the rain or bugs.

Click here to read all about the back porch makeover.

back porch makeover - Unskinny Boppy

My most recent garden tutorial is this watering can that is “pouring” fairy lights into the fern below. This was a super simple and fun project to add some whimsy to any outdoor space. If you need a quick gift idea for a gardener in your life, this one will be a huge hit!

Click here to read the Fairy Lights in a Watering Can tutorial.

fairy light watering can - Beth Unskinny Boppy

I hope these posts that I’ve shared will give you guys a taste of my gardening style. If you like what you see, I’d be honored if you would stop by my blog and look through my archives to see if there are any other ideas you would like to pin. I’d also be super stoked if you wanted to be my friend on social media or join my e-mail list.

Here are some links to do that:

Click any of these links to join me on social media:
Pinterest | Instagram | Facebook

Or click here to join my email list.

Thanks for joining me today! Happy decorating and DIYing, y’all!

~Beth

5 must see gardening ideas to transform your outdoor space

The post 6 Must-See Gardening Ideas to Transform Your Outdoor Space appeared first on Ugly Duckling House.

More Where That Came From

Quick Patio Patch
4 Easy Tips for Growing Hydrangeas
How to Make Your Patio Look New Again for Less Tha...
Game of Stones


from Ugly Duckling House https://www.uglyducklinghouse.com/6-must-see-gardening-ideas/

Wednesday 23 May 2018

DIY Floating Deck, Part 1: Planning and Layout

I’m building a floating deck in my back yard! This is the very first post of this series, but you will be able to catch the whole thing, start to finish, right here.

Hey there! This post (or post series, rather) has been a long time coming. It’s a little tricky to do a large project like this and then share it on the blog, mainly because the project itself can be quite tiring, and breaking it into beneficial chunks takes a little time to do it right. It’s almost like building it all a second time, except fewer last-minute changes and less muscle soreness.

balance beam on floating deck

All that just to say, bear with me as we go through these posts. My main goal is to help clear the fog on the where/what/why, and a lot of these decisions are specific to dealing with unique challenges of my yard (sloping, building over/around a concrete patio, etc.). But if you wind up having questions as I go, I’ll try address them in future posts!


Legal disclaimer stuff: this is a personal recap, and the evolution of what I learn as I work on projects in my home. In hindsight, I often think of how I could have done something better. By no means is it a comprehensive guide for every scenario. No two houses are alike, and building codes/permitting rules vary. You will still need to research and make the best possible decision for your own home. I’m not a licensed professional. Reading and using any and all information is at your own risk. Power tools are dangerous and can kill you. Use protective safety gear, always. Don’t feed your dog chocolate, don’t stick keys in the electrical socket, and so on.


Backyard upgrades (to get to this point)

If you’ve been following along for a while, then you already know a lot of this. But for those that don’t, for the longest time with this house, I’ve been focusing a lot on the interior. I supposed that’s a pretty normal habit. We are more likely to first change the things we interact with everyday, like the kitchen, before we start fixing the part that can be more easily ignored, like the overgrown bushes in the back yard.

kitchen vs outside

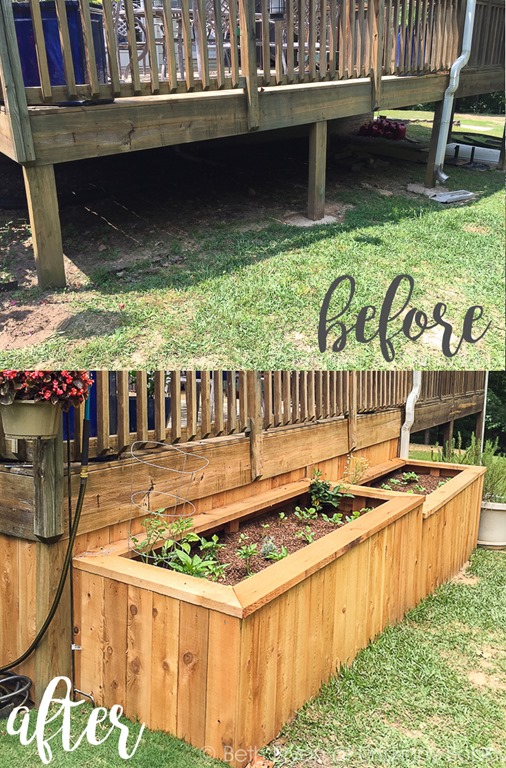
Each year, I dedicated a little time toward making progress, but it was hard to see (pun-intended) the forest for the trees. I killed off ivy, removed a bunch of pine trees, filled in a sinkhole, and started making cosmetic improvements (a back hedge, fire pit, corner garden, etc.). All of a sudden, late last year, things really started to click; it was time to begin the two big projects I’ve always wanted to do. As with any project, it was a matter of money, time, labor, and research. It can all seem pretty overwhelming until you get started, and I am VERY good at procrastinating when I have a lot of logical reasons to postpone at my disposal!

Timing and budgeting: a juggling act

I knew I wanted to build a shed for extra storage toward the back of my lot and began planning for that last summer (which is also underway, but that build has its own separate series). I also wanted to eventually build a floating deck off of the existing concrete slab next to the house.

back of house

Originally, I thought these projects would happen in completely different timelines. But as I was planning, I managed to bring a sponsor onboard for the shed. It’s not always easy to have the right fit come along when you are trying to plan seasonally/budget/etc., so a huge thank-you to Wood Its Real for that help! I realized that, since I had been saving up the funds already, I could basically maximize the benefits of the budget if I did both projects in one short, blazing summer of building. A lot of materials crossed over between the builds, so I reasoned that purchasing bulk amounts would be cheaper and I could save on the cost of rentals, if any. Plus, working with the same materials, I would be able to cross over the skills from one build to the next. I sketched up a quick version of how I thought everything would be done.

quick sketch of entire yard

This seemed like a great option if I could also somehow convince K to help me design and plan it. It would be well worth the effort, I reasoned, provided that we didn’t manage to kill each other with all the sharp power tools at our disposal (thankfully, he’s a design engineer professionally and likes power tools as much as I do, so it was an easy sell). But to do any of it, we needed an actual, proper plan.

Design

I wanted the new build to create a natural flow from the patio door to the deck, from the deck to the fire pit, and so on. This would maximize the yard for an open, entertaining feel, while still giving everything separate zones.

  • Patio = grill spot
  • New deck = seating area
  • Fire pit = fire pit shenanigans

It’s kind of  a lot to fit into a single space and around the only remaining tree in the yard. Even though I removed most of the trees, I kept the central one because it makes for a natural anchor for all the new lighting that will tie everything together (patio lights make everything better!). The sketch I created seemed to make sense of everything, including the new shed, room for a vegetable garden, and so on. But as I started marking things out in the yard, I realized that extending the patio as large as I sketched out would be WAY too big.

trying to visualize the new deck

With K’s help, we came up with an even better plan:

deck - full lumber version

Although this deck design doesn’t run the full length of the existing patio, I like that it sits perfectly between the patio and fire pit. The right corner of the new deck plan is at an angle, which allows for the mower to fit in between (really. important. thing. for K; I won’t fight it, since I win by not having to mow). It keeps the shed/garden zone a little more separate from the patio and deck, but still cohesive. The step up from the existing patio and step down from the deck to the fire pit will be parallel.

Slope challenges

As of 2016, my yard is filled in, but there is still a slope toward the back. I planned it this way for good reason: water runoff. The neighbor to my left is higher in elevation than all the others, so rainwater flows in a single direction in and out of my yard. If I had graded it any differently, I would risk disrupting that water flow, even jeopardizing the fill dirt by seeing it erode right back out of my yard. I planted a hedge line in the lower area as well to anticipate stemming future erosion problems, too.

back yard with green grass

Patios and just about anything in the yard have a slight slope for the same reason. I confirmed this with a level on my own patio, and the right corner is the lowest spot. The plan has been to continue that same slope on the new deck. So, it won’t be perfectly level, but it also won’t be noticeable.

Foundation

To help build the foundation but account for leveling, sloping, etc., I did some research and found that the best (and most readily-available) fit seems to be precast pier blocks (aka deck blocks or Handi-blocks).

I also briefly considered TuffBlock (same concept, but more lightweight material). They seem much lighter and might avoid more digging, but I couldn’t find many examples of it in use on uneven ground and the supply would have been special order. Since the concrete version is in stock at Home Depot and Lowe’s, I did most of my research on these before choosing them. I think I’ll give them a try if I ever do this project again (with a new house or working on a friend’s, etc.).

In either case, these have a notch on top that fits a 2x- or 4×4 post. Since the floating deck will sit on or partially hover over the ground, I am putting them in for extra support. Where they are too high to sit on the ground, I’m digging them down partially into the dirt. On the farthest corner (closest to the fire pit), it’s actually not tall enough even when sitting on the ground, so one 4×4 post is needed there. On top of these, there will be a framework of 2×6 lumber and then the deck boards. And me, awkwardly doing bad yoga (completing steps on building a deck puts me in a goofy mood).

bad deck yoga

Ground contact lumber

One important piece of info: since most of the new deck is touching the ground, the entire support structure (everything but the deck boards) will be made from “ground contact” lumber. In my research for these projects, I discovered that there are new standards as of 2016 for treated lumber and outdoor projects. You may already know of “pre-treated/PT” lumber, which is lumber that has been chemically treated to withstand outdoor conditions better than bare wood (recommended for just about any project exposed to the elements). But now, there is a new standard, and stores are starting to carry more and more “gound contact” or “GC” pre-treated lumber.

pretreated lumber vs ground contact lumber

The main difference is where you plan to use it. Here is a graphic that breaks it down depending on use (along with more details), but here’s an easy rule: if it’s anything touching the ground or within 6 inches of the ground, it should be made with ground contact lumber.

If it’s exposed to more moisture, use ground contact. If it’s something that will be difficult to reach or repair: ground contact. If it’s smarter than the average bear… ground contact.

I’ll cover a few more facts about GC lumber and even PT lumber in general as this series goes on, but there are so many details to cover! This is important enough to cover in more depth, but I don’t want to throw too many details into this initial post until I can show more of the build as examples.

Partially covering the patio

As you can see from that digital rendering above, part of the new deck will cover a small corner of the existing patio. I found this tutorial from Family Handyman, and I plan to use some of the same ideas. Basically, I’ll be attaching some 2×4 supports to the patio (using ground contact lumber once again), and the deck will go over the whole thing.

floating deck frame

Water buildup between the concrete pad and the wood will rot wood faster, even if it’s treated. So, extra efforts will be made to raise the framework in that spot with plastic shims.

Water is the enemy

Let’s see here: ground contact lumber, slope, plastic/flashing, drainage… basically every part of this plan has fighting water in common! So far, I’ve learned that water is my biggest concern. I may actually overdo it with all of the ways I’m planning to handle it, but I hope through this process that my deck lasts a good long while.

Permits

I know this question will probably pop up a few times. I didn’t get a building permit for the deck and didn’t appear to need one (after researching it for a confusingly long time). Even though there are standards (IRC and others) that are adopted by many states, the whole thing is rather complex and took time to figure out the who/what/where/when (yes, that all matters):

  • What the codes are (there are multiple standards/guidelines that might be used to determine what is adopted)
  • Where they apply (city code, county code, etc.)
  • When they were adopted by your local ordinance
  • Who enforces it (there is often some discretion for the code enforcement officer regarding violations)

I checked with my local guidelines prior to starting (if you don’t find one for your city, start researching the county, and so on). By comparison to what I’ve found, my county seems to be on the less restrictive side. For example, one of my friends just informed me that he needed a permit in his city just to have a new range installed in his kitchen! So, this is definitely a situation where the best answer of whether or not a permit will be needed is, “it depends.” Regardless, I’m doing my best to build things smart and structurally sound, permit or no (the shed as well).

Next

So, that was a really long intro, and we haven’t even started building yet! But in the next post of the series, I’ll show you how I went from the initial design:

initial layout for floating deck

To an actual framework:

floating deck at night

Keep ya posted!

The post DIY Floating Deck, Part 1: Planning and Layout appeared first on Ugly Duckling House.

More Where That Came From

How to Identify Poison Ivy, Prevent Exposure, ...


from Ugly Duckling House https://www.uglyducklinghouse.com/diy-floating-deck-part-1-planning-and-layout/

Saturday 19 May 2018

Simple DIY Tricks for Covered Porch Plants

I’ve learned the hard way what not to do when it comes to container gardening. Today, I’m sharing a few simple tips on picking the right shade-loving plants for thriving covered porch planters.

Happy Saturday! While I’m praying that the weather cooperates so I can get more done on the shed this weekend, I thought I’d give you a fun little update for what’s going on with the front porch.

A few weeks ago, I shared with you that, although I’ve done a lot of repair and basic updating to the front porch area, I haven’t really taken things to the next level in terms of style. Don’t get me wrong; it’s a far cry from where things began:

humble beginnings - front porch circa 2012

But with more of the house in later renovation stages and my increasing desire to entertain after years of repair, it’s time to really put some oomph into the entry! Most recently, I began this process with two new planters and some seasonal color. As I finished up, it occurred to me that I should pass on a few of these tips to you guys!

1. Know thyself… and thy porch

It’s taken me years to get the hang of gardening in and around the house. In that time, I’ve learned the kind of light/water/general care the area is going to get. As it turns out, finding answers to those questions are pretty important for making sure plants stay healthy:

  • what kind of sunlight does the area get naturally?
  • will the spot be exposed directly to the weather or require more deliberate upkeep?
  • will it need to be moved around regularly?

southern living plant collection mountain snow pieris - great for shade containers

Considering that a covered porch is shaded most of the day, any light it gets is generally indirect. As far as watering, the rain won’t reach this area, so I would have to do most of the watering myself (which also means a plant would need to be tolerant of my limited upkeep).

I’ve found that as well-intentioned as I might be, it’s best to ignore my impulse to buy a plant just because it’s beautiful. No amount of beauty in a plant has ever caused me to put in more effort in the garden, so I’ve learned to seek out plants that suit my needs and my house’s most natural conditions rather than tell myself that I’ll change my ways. Phrases like “shade” and “drought/heat tolerant” are factors for success. Don’t buy the plant that needs watering every day if you barely have time to shower. Resist the urge to buy a plant and get overly ambitious with your normal habits for care; it’s a recipe for a brown, dead plant!

2. Height, texture, color.

There is another rule like this you may have heard: thriller, filler, spiller. Basically, you want to pick plants that have some variety for visual interest. And a good rule of thumb is to pick a grouping with three separate purposes: height, filling the container, and spilling over the lip of the container. I decided not to go with a “spiller” for this season, but I still kept the variety a priority. One larger shrub toward the back of the container is used to add height (and will grow taller over time). Another was added for texture (the hosta), and a third was chosen for bright color. The colorful impatiens will eventually need to be replaced (they’re annuals), and at that point I might replace them with a more cascading plant.

new planters on front porch

3. How to use less soil and lighten up potted plants

You may have noticed the empty plastic water bottles in the above photo; that’s actually the planter’s little secret! A few years ago, I discovered this trick for using less soil per planter. It also keeps the potted plant lighter, so I can move them around when the situation calls for it. Just throw several empty bottles into the bottom of the container, and cover the top area with newspaper. Then, plant as usual.

layer in newspaper and soil

fill container with plastic bottles, newspaper layer, then soil

4. Tilt plants toward the lip to look fuller

When I first began planting containers, I thought everything had to be planted straight up and down. It wasn’t until I spoke with a gardener a few years ago that I realized that you can manipulate it a little. Tilt the plant slightly when planting so that they root at an angle, toward the edge of the planter. This is especially effective with “spiller” type plants that fall over and down the container, but I did it here with the impatiens to make the color pop a little more and make the planter look fuller.

rule of 3 for fillign in container

5. Water regularly until established

Moving day is pretty much stressful for all living creatures, it seems; keep in mind that new plants tend to need more water upkeep until they have been around for a little while.

new porch planters

6. Easy does it

I’ve found that if I can keep my impatience in check, the better it is for my gardens. Adding slowly and thoughtfully, rather than planting too ambitiously too fast, leads to a garden style I’m much happier with.

I always get so impatient during the first year with new plants, thinking that I went too small or that I need to add more. Instead, a simple care plan for this first year is better than adding too much; it risks killing everything from having too much upkeep. The main shrub in each of these containers will grow between 3-4 feet, so while the plants needed a little something extra this year, they probably won’t need to be filled in much in the future.

containers for front porch

closeup of impatiens and front porch planters

Regardless, it’s nice to come home to some bright new color!

diy tricks for covered porch planters - ugly duckling house

shaded container garden on covered porch - ugly duckling house

covered porch container garden - shade loving plants and easy care tips - how to and video tutorial

Want more outdoor DIY ideas? You’re in luck! My pal Cassity from Remodelaholic is hosting an Outdoor DIY Challenge today, and there are 12 more projects to check out!

outdoor DIY challenge button #remodelaholic

Get Out! Outdoor DIY Projects

Covered Patio Outdoor Dining Area | Remodelaholic
DIY Outdoor Bench | Hertoolbelt
How to Build a Gazebo (from a Kit) | The Palette Muse
Sunroom Makeover | Lantern Lane Designs
DIY Solar Walkway Lights | Toolbox Divas
Wooden Welcome Sign Wreath | Lemon Thistle
DIY Washer Toss Game | Everyday Party Magazine
Backyard Hammock Area | North Country Nest
Easy Cinder Block Garden Planters | Our Crafty Mom
Funny DIY No Soliciting Sign | Leap of Faith Crafting
Simple DIY Tricks for a Covered Porch | Ugly Duckling House (you’re HERE!)
Bistro Set Makeover | Practical & Pretty
Tiered Vertical Planter Garden | Creative Ramblings
02 outdoor DIY challenge new tutorials projects #remodelaholic
There’s also a video playlist you can catch right here too! Have a great weekend, friends!

The post Simple DIY Tricks for Covered Porch Plants appeared first on Ugly Duckling House.

More Where That Came From

Quick Patio Patch
Going for Gold
4 Easy Tips for Growing Hydrangeas
How to Make Your Patio Look New Again for Less Tha...


from Ugly Duckling House https://www.uglyducklinghouse.com/simple-diy-tricks-for-covered-porch-planters/