Hi guys! While I’m busy outside this weekend working on the new deck, I want to introduce you to my newest contributor! If you aren’t yet familiar with these types of projects, then basically, I decided about a year ago to bring on a few new bloggers just starting out. These are just my way to “pay it forward” and give talented new bloggers a warm welcome as they begin their own blogging journeys. Each contributor will contribute once a month, and may switch out from time to time. They’re people I’ve found via social media and personally enjoy following, and I think you’ll enjoy them too! This time, I want you to meet a gal who is as obsessed with scrap wood as I am: Tylynn of Bitterroot DIY.

Hey all, I’m Tylynn from Bitterroot DIY and I’m happy to introduce myself today as a new contributor to Ugly Duckling House! The Ugly Duckling House was one of the first blogs I followed before starting my own blog. The projects are great, the tutorials are easy to understand, and I always love connecting with other people who aren’t afraid to get their hands dirty and pick up a power tool! I “met” Sarah on Instagram and was seriously so surprised when she asked me to contribute. I’m excited to connect with her readers and hope you enjoy my posts!
To start things off, I’d like to share a scrap wood project from my Bitterroot Scrap Series!
The what series?
Let me explain:
My husband and I recently moved and didn’t want to haul all my scrap wood along. I figured that was as good an opportunity as ever to use up as much as possible! So last month I completed 15 small scrap wood projects and am sharing a new one every-other-day of May over at Bitterroot DIY.
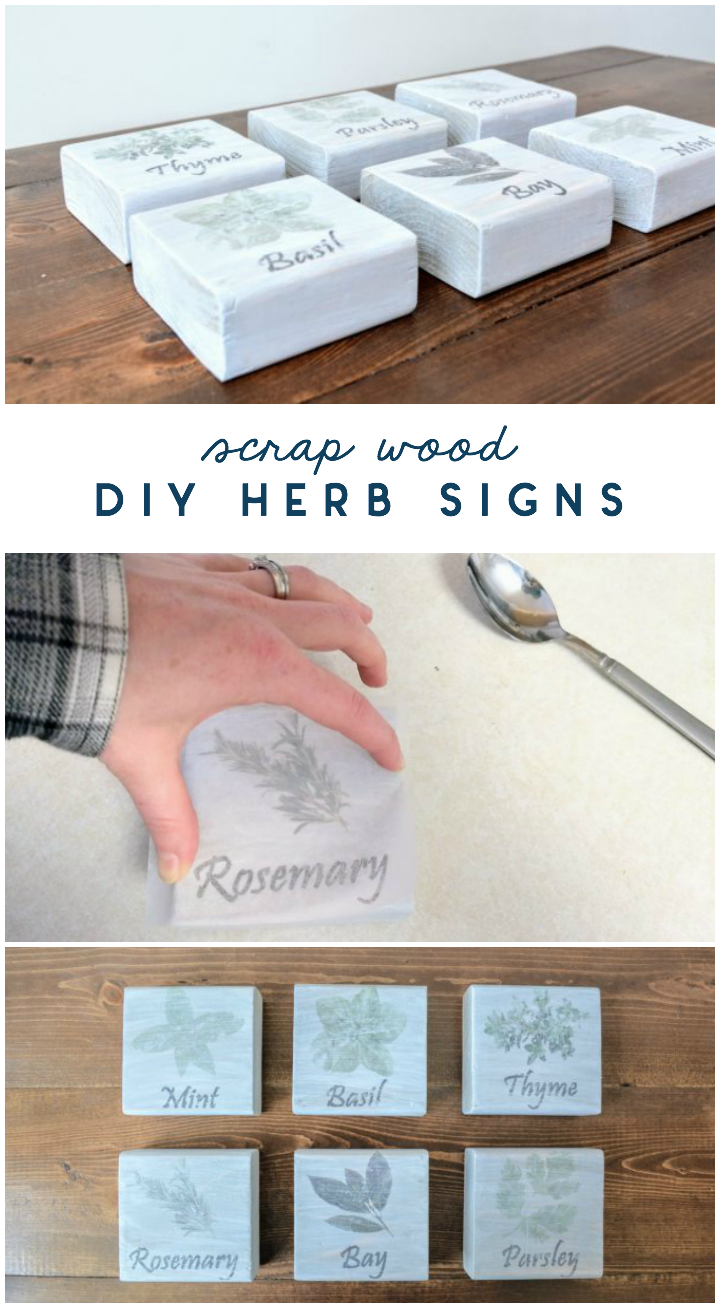
And today, I’m here with some DIY Kitchen Herb signs!

They’re simple.
They’re quick.
They’re adorable.
All the best qualities.

Tools & Supplies:
- 2 x 4 | 2’ (if you want to make all six signs, otherwise just whatever you have lying around)
- Wax Paper
- Inkjet Printer
- Krylon Acrylic Spray
- Rust Oleum Semi-Gloss White Paint
- Minwax Classic Gray
Step 1
Cut six 2 x 4s @ 3.5”. You should end up with six squares (or however many you’d like to make).
Step 2
Sand and finish. I started with a coat of Minwax Classic Gray stain on each block, let it dry, and then followed up with a coat of Rust Oleum Semi-Gloss White. I thinned the white paint with a little water to tone it down. I found that it worked really to dip my brush in the paint and then swirl it with some water on a plate – that way I didn’t have to commit to mixing a specific ratio. I just played it by ear … as every good DIY goes ;)
Let the blocks dry.
Step 3
The Wax Paper Transfer.
Print your mirrored images onto the shiny side of a sheet of wax paper. I simply taped a piece of wax paper to a normal piece of paper so that it would run through the printer nicely.
Make sure all the edges are secure before printing. I mirrored the PDFs for these herbs already, but if you make any new ones, make sure to mirror them so they transfer correctly.
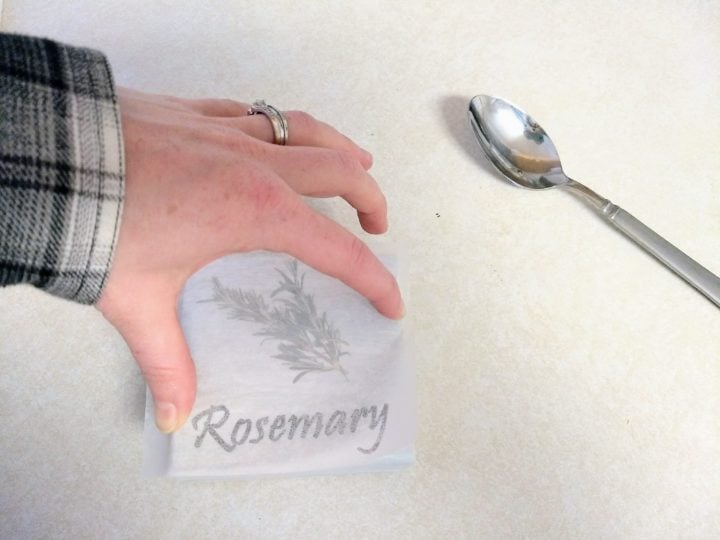
Take care when dealing with the printed wax paper. The ink sits on top of the wax and is easily smeared, as you can see in the photo.

Cut each image out carefully.
Place the image face down on the block, hold securely in place to avoid any smears, and rub the back with a spoon. Apply a fair amount of pressure in order to transfer the ink.

Step 4.
Spray each block with Krylon Acrylic Spray to set the ink.

There you have it – simple, quick, adorable.
Head on over to Bitterroot DIY to snag the free prints and enjoy your new kitchen décor!
The post Scrap Wood Kitchen Decor – DIY Herb Signs appeared first on Ugly Duckling House.
from Ugly Duckling House https://www.uglyducklinghouse.com/scrap-wood-kitchen-decor-diy-herb-signs/
No comments:
Post a Comment